

Developing the website
Contents
You can contribute to the PostHog documentation, handbook, and blog in two ways:
Create a pull request in GitHub for any page that has an Edit this page link on it. In this situation you must edit the page using the GitHub web editor interface. This method is suitable for text-only edits and basic file manipulation, such as renaming.
Run the posthog.com website in development and make changes there by creating a branch of the master codebase, committing changes to that branch and raising a pull request to merge those changes. This is the recommended method as it allows you to quickly preview your changes, as well as perform more complex changes easily.
Below, we'll explain the two options for option two.
Option 1: Running with Codespaces
Creating/running the Codespace
Open the posthog.com repository in GitHub.
Click the Code button, then the Codespaces tab, then under the
...menu, choose New with options...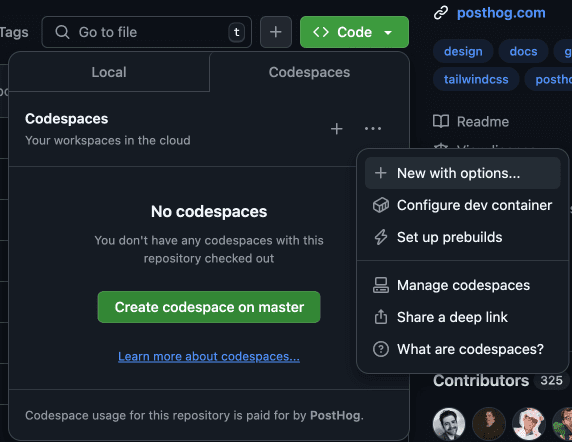
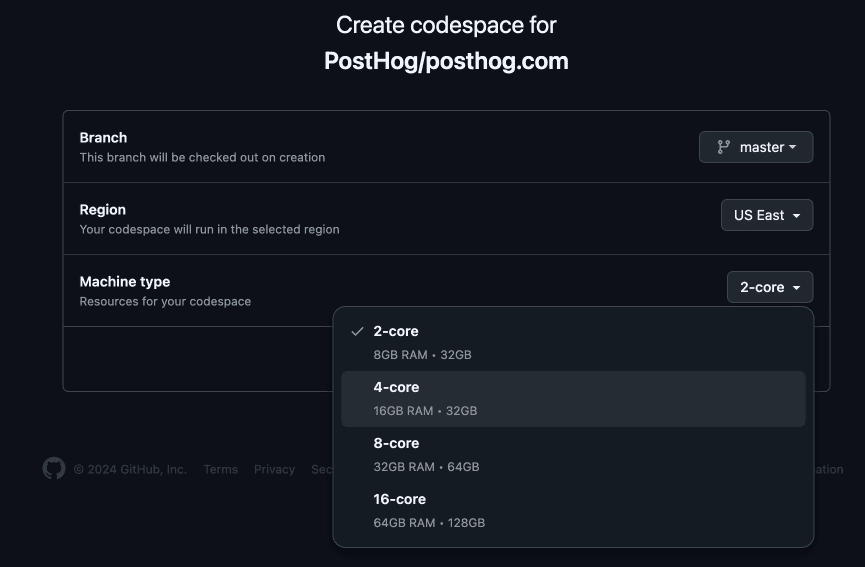
Under Machine type, choose 4-core.
When the repo opens in Codespaces, it will install some things automatically.

When completed, press any key.
In terminal, type
pnpm install && pnpm startand hit [Enter].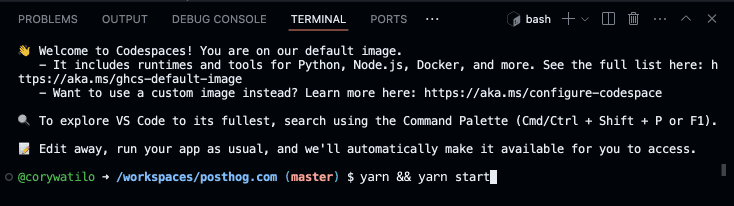
- This will take a while. The last step of the process is "Building development bundle" which will take a few minutes on its own.
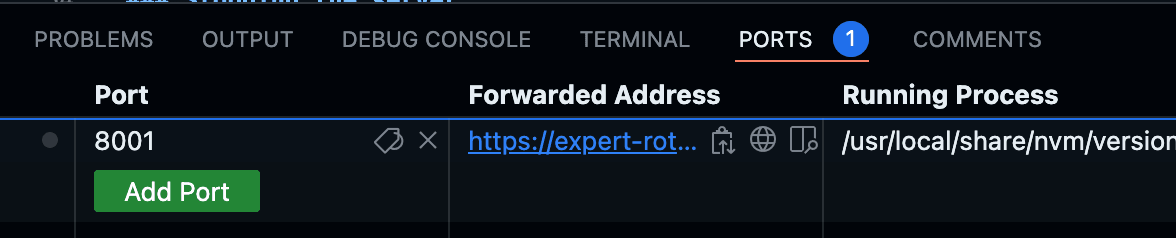
- You may see a dialog that says, "Your application running on port 8001 is available." Don't be enticed by the big green button quite yet.
Once you see
success Writing page-data.json files..., you can click the green Open in browser button which will open the site at http://localhost:8001.You can also click the Ports tab to access the URL where you can preview the site. Cmd + click the URL seen here.
Committing and pushing changes
Use the built-in Git tab in VS Code to commit and push your changes.
From the Git source control
...menu, choose Checkout to... to create a new branch.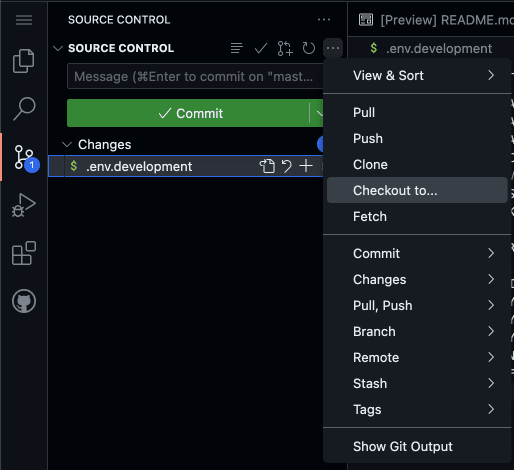
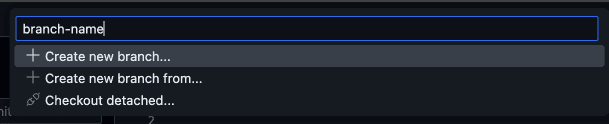
Type a new branch name and press enter.
Now you can commit changes to your new branch. Type a commit message and use
Cmd+Enter(or push the big green button).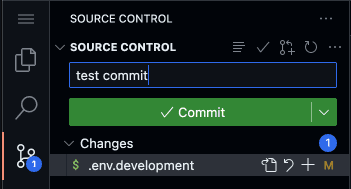
If you see the dialog below, choose Always to always stage all files you've changed. (Otherwise, you'll need to hit the
+button next to each file you want to commit.)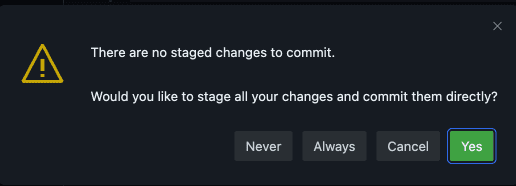
Now that your changes are committed, it's time to publish them to GitHub.

Note: After finishing changes on your branch, be sure to switch back to
masterso you don't inadvertently make future changes to your current branch.
>

Stopping the server
- Place your cursor into Terminal and type
Cmd+Cto stop the server. - In the bottom left corner of the window, click Codespaces: [your codespace name], then Stop current codespace.
Notes
If you plan on using this codespace frequently, disable Auto-delete codespace in the ... menu under the Code > Codespaces dropdown in the repo.
Option 2: Editing posthog.com locally
Before you begin
In order to run the PostHog website locally, you need the following installed:
- Git – version control system
- Node.js (version 22.x) – server runtime
- pnpm (version 10.x) – package manager for Node.js
- Apple Rosetta (version 2) – dynamic binary translator for Apple silicon
If you are unfamiliar with using Git from the command line (or just prefer graphical interfaces), use the GitHub Desktop app.
You may also want to familiarize yourself with these resources:
Cloning the posthog.com repository
The posthog.com codebase is on GitHub at https://github.com/PostHog/posthog.com. To work on it locally, first you need to clone it to your disk:
via the command line
You can clone the codebase from the command line using the following command:
Terminalvia GitHub Desktop
You can also clone the repository with GitHub Desktop installed, from the posthog.com repository page, click the Code button and select Open with GitHub Desktop from the dropdown that appears.
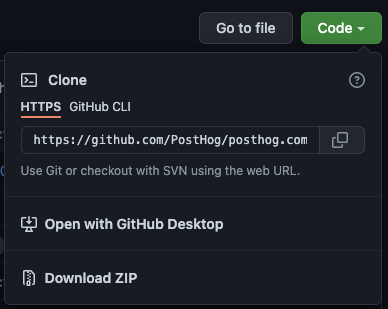
You will then be prompted by the browser to confirm if you want to open the GitHub Desktop application. Select the affirmative action that has text such as Open GitHub Desktop.
Once GitHub Desktop has opened you will be prompted to confirm the repository that is being cloned and the location on disk where you wish the code to be stored.

Click Clone to clone the posthog.com repository to your local disk.

Once the clone has completed the GitHub Desktop interface will change to the following:
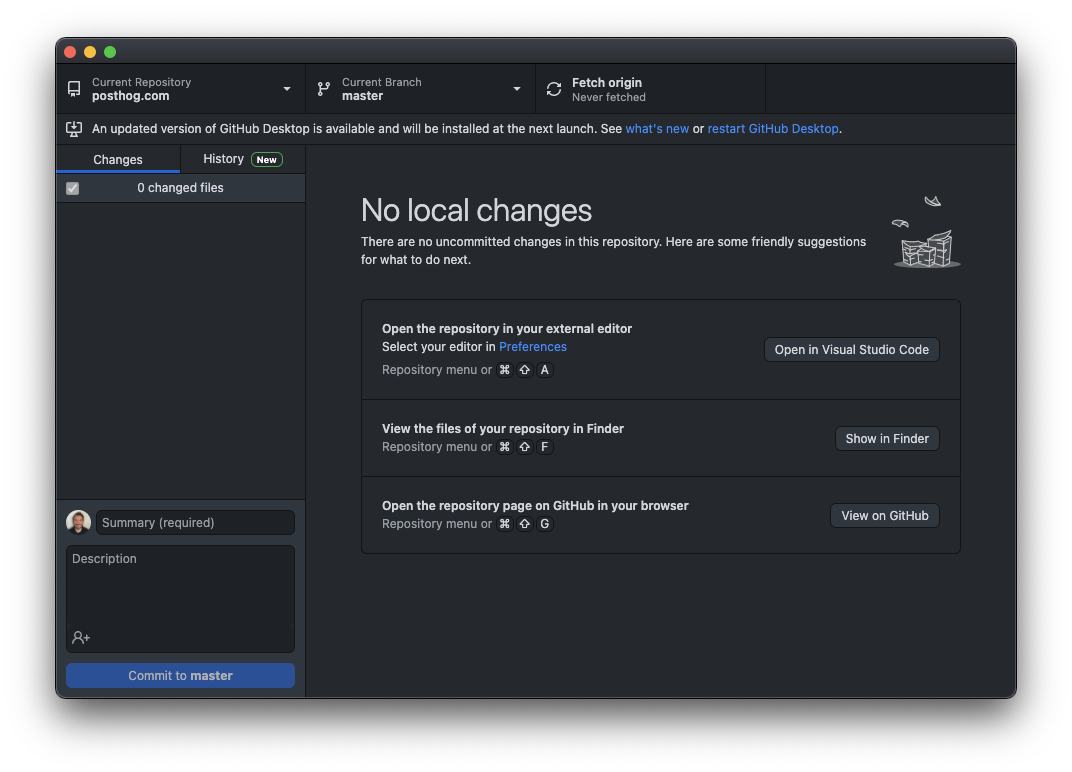
To view the code for the website click Open in Visual Studio Code. Dialogs may appear around permissions and trust as you open Visual Studio Code.
Once you have Visual Studio Code open, select the Terminal menu option. Within the dropdown select New Terminal. This will open a new terminal window within Visual Studio Code:
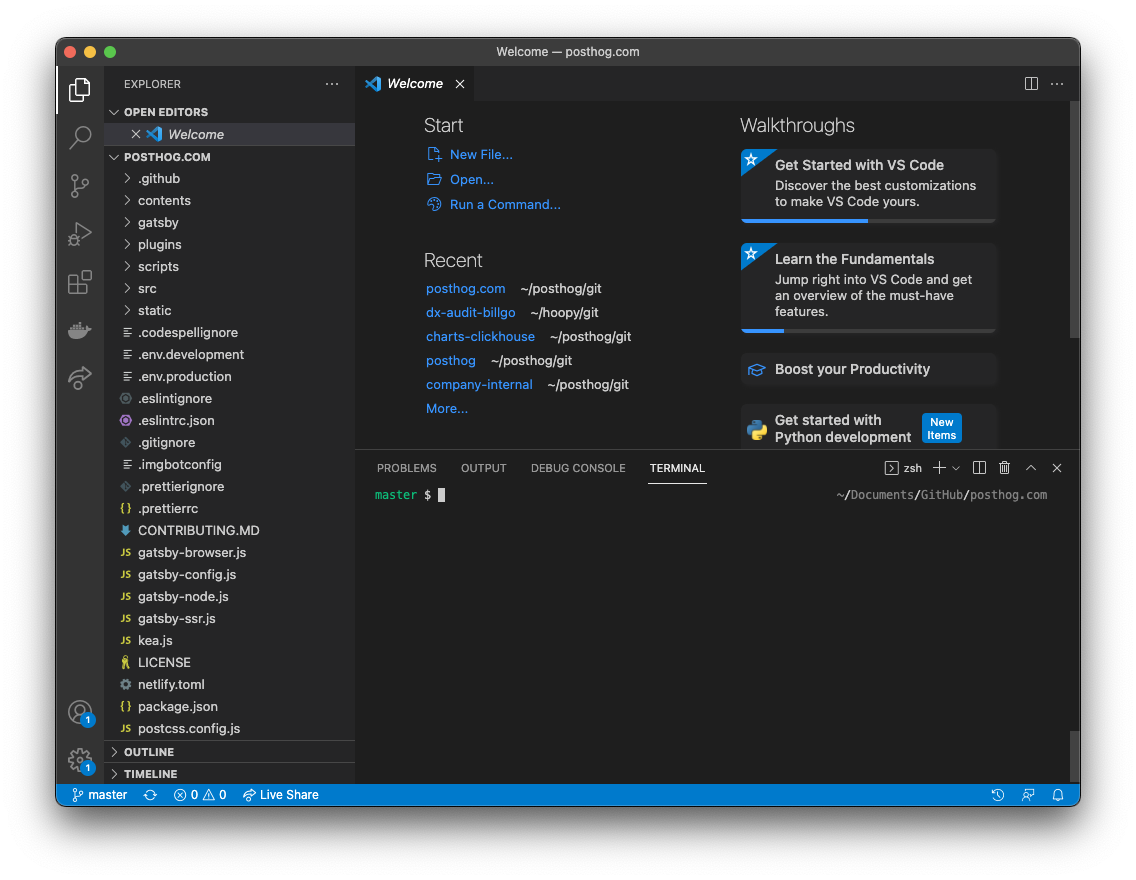
Don't worry! We only need to run a few commands in the command line.
Running posthog.com locally
If you're using an Apple Silicon Mac (M1+) then you'll need to run the following commands before using pnpm:
Type the following into the command line and press return:
This installs the dependency packages used by posthog.com. This may take a few minutes.
After initial setup, use the following command to start the development server:
This runs the local clone of the website, which you can use to preview changes you make before pushing them live. It takes a bit of time for some file processing and compilation to take place, but once it's completed you can access the locally running version of posthog.com via by visiting http://localhost:8001 in your web browser.
Any time you want to preview changes you are making to the local version of the website, all you have to do is run the pnpm start again, wait for the command to finish running and then open http://localhost:8001 in your web browser.
Troubleshooting
If the server fails to start, the first troubleshooting step is to clear cache. You can do this (and start the server again) by running:
Minimal mode
For faster builds, you can run in minimal mode:
Minimal mode only builds:
- Docs pages (
/docs/*) - Handbook pages (
/handbook/*) - Blog/content posts (
/blog/*,/tutorials/*,/library/*,/founders/*,/product-engineers/*,/newsletter/*,/spotlight/*,/customers/*) - All pages in
src/pages/(product pages, pricing, etc.)
Everything else (apps, CDP, templates, jobs, API docs, SDK references, pagination/category/tag pages) won't exist - they'll 404. Next/previous navigation links and GitHub data for roadmaps/jobs will also be absent. Sourcemap generation is disabled.
PR preview deployments (Cloudflare Pages)
Pull request previews on Cloudflare Pages use the same minimal build as above: the workflow sets GATSBY_MINIMAL=true (see .github/workflows/deploy-preview.yml). That keeps preview builds fast.
Building without cache: If a preview build is broken due to a stale Gatsby cache, add the no-cache label to the PR. This skips cache restore and runs a clean build from scratch. Remove the label when you're done to go back to cached builds.
Implications for content authors:
- Post category indexes are not built — Routes like
/tutorials,/blog, and/postsare not generated in previews. Opening them can fail or show a broken page (for example a blank or error screen in the site shell). This is expected. - Individual posts and docs still build — Preview the change by opening the direct URL to the MDX page (e.g.
/tutorials/your-post-slug,/blog/your-post-slug). - Search and listing data — Post listings and site search rely on full production builds and indexing (e.g. Algolia). Content from a branch typically will not appear in search on the preview until it is merged to
masterand the production site is built.
Environment variables
Our website uses various APIs to pull in data from sites like GitHub (for contributors) and Ashby (our applicant tracking system). Without setting these environment variables, you may see various errors when building the site. Most of these errors are dismissible, and you can continue to edit the website.
If you need a specific environment development, ask in #posthogdotcom.
Finding the content to edit
Once you have cloned the repo, the contents/ directory contains a few key areas:
docs/= all of the documentation for PostHog's platformhandbook/= the PostHog company handbookblog/= our blog posts
Inside each of these are a series of markdown files for you to edit.
Posts and blog filtering
There are two ways to filter posts by tag:
Query param — Add a
post_tagsquery param to the URL, e.g.,/posts?post_tags=Comparisons. This works on the main posts listing and allows saving/sharing filtered URLs.Static tag pages — For SEO purposes, we generate static pages at
/{category}/{tag}, e.g.,/blog/session-replay. These are generated at build time ingatsby/createPages.ts.
Hidden from index
Some categories and tags are intentionally hidden from the main posts index view. They still appear when you filter directly to that category or tag.
Categories hidden from index: customers, spotlight, changelog, comparisons, notes, repost
Tags hidden from index: Comparisons
Posts can also set hideFromIndex: true in their frontmatter to be excluded.
These exclusions are defined in src/components/Edition/Posts.tsx and src/templates/BlogPost.tsx.
Making edits
Creating a new Git branch
When editing locally, changes should be made on a new Git branch. Branches should be given an "at a glance" informative name. For example, posthog-website-contribution.
via the command line You can create a new Git branch from the command line by running:
TerminalFor example:
Terminalvia GitHub Desktop
You can also create a new branch in GitHub Desktop by selecting the dropdown next to the Current Branch name and clicking New Branch.
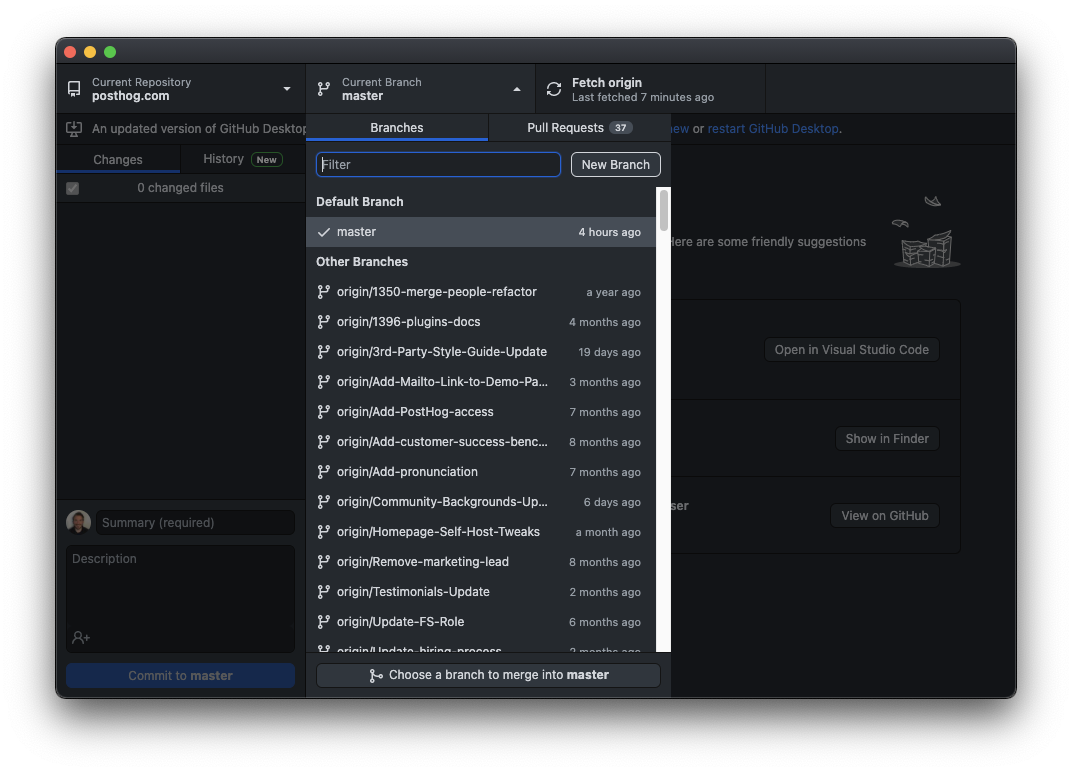
Then, in the dialog that follows, entering the new branch name.

Once you have a new branch, you can make changes.
Markdown details
Frontmatter
Most PostHog pages utilize frontmatter as a way of providing additional data to the page. Available frontmatter varies based on the template the page uses. Templates are determined based on the folder the file resides in:
Blog
Markdown files located in `/contents/blog``
date: the date the blog was postedtitle: the title that appears at the top of the blog post and on the blog listing pagerootPage: necessary for listing all blog posts on /blog. should always be set to/blogauthor: the author(s) of the post. correlates to your handle located in /src/data/authors.jsonfeaturedVideo: the iframe src of the video that appears at the top of the post. replaces the featured image on post pages.featuredImage: the Cloudinary URL of the image that appears at the top of the post and on the blog listing pagefeaturedImageType:standard|full- determines the width of the featured image on the blog postcategory: the broader category the post belongs to. one of the following:BlogCEO diariesEngineeringGeneralInside PostHogPostHog newsProductProduct growthStartupsUsing PostHog
tags: the more specific tag(s) the post belongs to. an array containing any number of the following:AIAI ObservabilityAlertsBlogCEO diariesClickHouseComparisonsCultureCustomer AnalyticsDataData warehouseDuckDBEndpointsEngineeringError trackingExperimentsExplainersFeature flagsGeneralGrowthGrowth engineeringGuidesHardwareHiringInfrastructureInside PostHogInside PosthogLLMLaunch weekLifecycle messagingLogsMarketingOffsitesOpen sourceOpsPeoplePostHog newsPrivacyProductProduct analyticsProduct engineersProduct metricsProduct updatesRelease notesResearchSession replayStartupsSupportTracingWorkflowsY CombinatorYouTubeai-observabilitydata pipelinesdata warehouse
seo: object containing SEO metadata:metaTitle: StringmetaDescription: String
Tutorials
Markdown files located in /contents/tutorials
date: the date the tutorial was postedtitle: the title that appears at the top of the tutorial and on the tutorial listing pageauthor: the author(s) of the tutorial. Correlates to your handle located in /src/data/authors.jsonfeaturedTutorial: determines if tutorial should be featured on the homepagefeaturedVideo: the iframe src of the video that appears at the top of the tutorialfeaturedImage: the Cloudinary URL of the image that appears at the top of the tutorial and on the tutorial listing pagetags: the tag(s) the tutorial belongs to. an array containing any number of the following:A/B testingAIAI ObservabilityAutomationDeskHogMCPTutorialsWorkflowsactionsappscdpcohortsconfigurationdashboardsdata managementdata warehouseerror trackingeventsexperimentationexperimentsfeature flagsfiltersfunnelsgroup analyticsheatmapsinsightslifecyclepersonsproduct analyticsproduct osproduct-osretentionsession replaysession replayssessionssettingssite-appssqlstickinesssubscriptionssurveystoolbartrendsuser pathsweb analyticszapier
seo: object containing SEO metadata:metaTitle: StringmetaDescription: String
Docs & Handbook
Markdown files located in /contents/docs and /contents/handbook
title: the title that appears at the top of the handbook / doc pageseo: object containing SEO metadata:metaTitle: StringmetaDescription: String
Comparison pages
Create a table on a "PostHog vs..." page with the following components. (You can see examples of how this is used in this pull request.)
Import the components at the top of the post content (after frontmatter):
Create a table like:
In ComparisonRow:
- Values for
column1andcolumn2can be:{true}|{false}|"Text string" featureis required butdescriptioncan be omitted (only if not using that column for the entire table)
Customers
Markdown files located in /contents/customers
title: the title of the case studycustomer: the name of the customerlogo: the customer logofeaturedImage: the Cloudinary URL of the image that appears in the card on the customers listing pageindustries: a list of industries that apply to the companyusers: a list of user types that use the company's producttoolsUsed: a list of highlighted PostHog tools used by the companyseo: object containing SEO metadata:metaTitle: StringmetaDescription: String
Plain
If the file doesn't reside in one of the above folders, it uses the plain template.
title: the title that appears at the top of the pageshowTitle:false- if omitted, the title will appear at the top of the pagewidth:sm|md|lg|full- determines the width of the pagenoindex:true|false- determines whether to index the page or notseo: object containing SEO metadata:metaTitle: StringmetaDescription: String
You can often refer to the source of existing pages for more examples, but if in doubt, you can always ask for help.
Adding rich media
Add images or videos to your post by uploading them to Cloudinary and including the URL in your Markdown file. Be sure to follow our best practices when adding media.
Links to/from the navigation
If you've created a new markdown file (for use in docs or handbook), you should link to it from the sidebar where appropriate.
The sidebar is generated from src/navs/index.js.
Redirects
Redirects are managed in vercel.json which is located in the root folder.
To declare a new redirect, open vercel.json and add an entry to the redirects list:
The default HTTP status code is 308 (permanent), but if the redirect should be temporary (307), it can be updated like this:
Committing changes
It's best to create commits that are focused on one specific area. For example, create one commit for textual changes and another for functional ones. Another example is creating a commit for changes to a section of the handbook and a different commit for updates to the documentation. This helps the pull request review process and also means specific commits can be cherry picked.
via the command line
First, stage your changes:
TerminalFor example:
TerminalOnce all the files that have been changed are staged, you can perform the commit:
TerminalFor example:
Terminalvia GitHub Desktop
Files that have been changed can be viewed within GitHub Desktop along with a diff of the specific change.
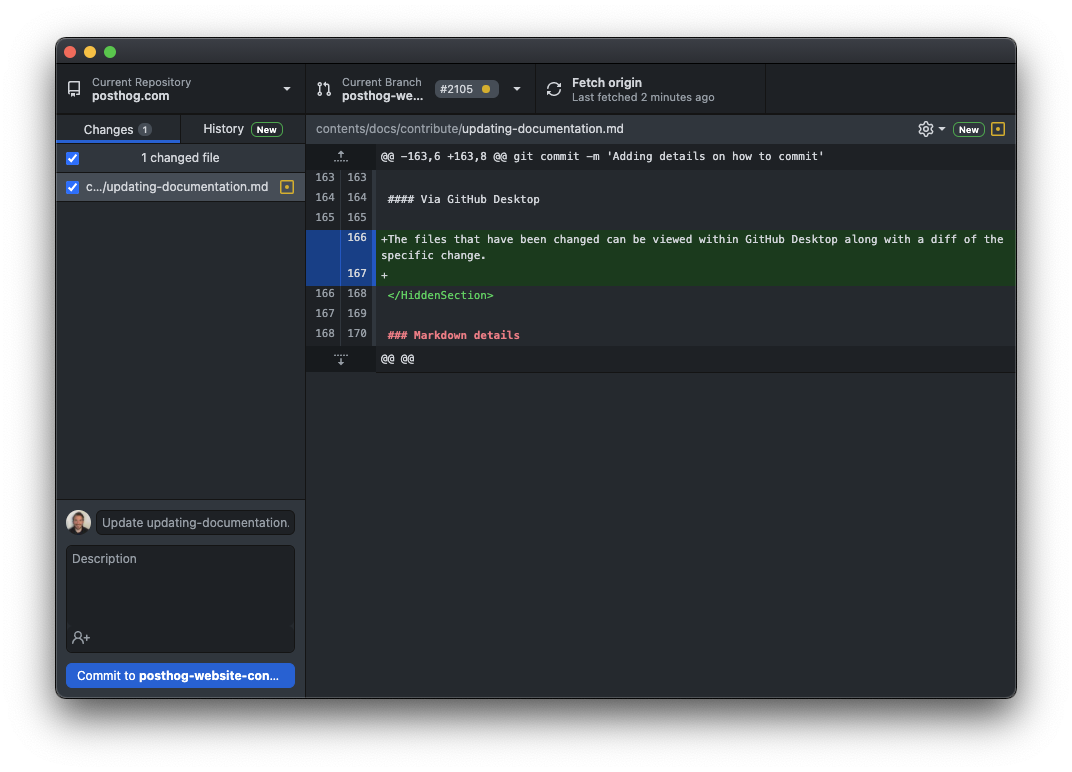
Select the files that you want to be part of the commit by ensuring the checkbox to the left of the file is checked within GitHub Desktop. Then, write a short descriptive commit message and click the Commit to... button.
Push changes to GitHub
In order to request that the changes you have made are merged into the main website branch you must first push them to GitHub.
via the command line
TerminalFor example:
TerminalWhen this is done, the command line will show output similar to the following:
TerminalThis output tells you that you can create a pull request by visiting a link. In the case above, the link is
https://github.com/PostHog/posthog.com/pull/new/posthog-website-contribution. Follow the link to complete your pull request.via GitHub Desktop
Once you have committed the changes you want to push to GitHub, click the Push origin button.

Create a pull request
Create a pull request to request that your changes be merged into the main branch of the repository.
via the command line
Navigate to the link shown when you push your branch to GitHub. For example,
https://github.com/PostHog/posthog.com/pull/new/posthog-website-contributionshown below:Terminalvia GitHub Desktop
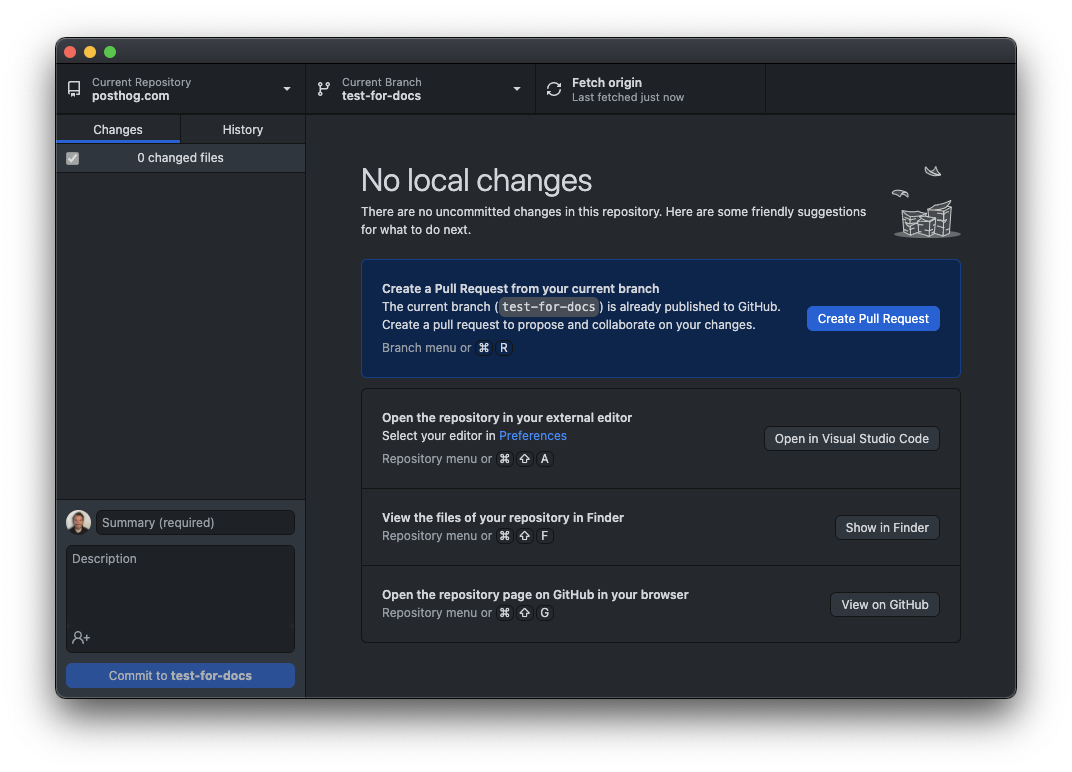
With the branch published, click the Create pull request button.
This will open up a page on github.com in your default web browser.
If you are pushing to an existing branch, navigate to the posthog.com repo and switch to the new branch using the dropdown:

Then, open the Contribute dropdown and click the Open pull request button.
Make the pull request title a descriptive name and complete the detail requested in the body.
If you know who you would like to review the pull request, select them in the Reviewers dropdown.
Preview branch
After a series of checks are run (to ensure nothing in your pull request breaks the website), Vercel will generate a preview link available in the Vercel bot comment. This includes all of your changes, so you can preview before your pull request is merged.
An initial build can take up to 50 minutes to run. After the initial build, subsequent builds should complete in under ~15 minutes. We're limited to two concurrent builds, so if there's a backlog, this process can take longer.
Because Vercel charges per seat, we don't automatically invite all team members to our Vercel account. If your build fails, you can run pnpm build locally to see what's erroring out. If nothing is erroring locally, it's likely the build timed out in Vercel. The Website & Docs team monitors for failed builds, so they'll re-run it for you. If the build is urgent, give a shout in #team-website-and-docs and someone with Vercel access can trigger a rebuild for you.

Note: Checks are run automatically for PostHog org members and previous contributors. First time contributors will require authorization for checks to be run by a PostHog org member.
Deployment
To get changes into production, the website deploys automatically from master. The build takes up to an hour, but can be delayed if other preview builds are in the queue.
Product interest tracking for onboarding
We track which products users have shown interest in by visiting product landing pages or docs. This data is stored using PostHog's cookie_persisted_properties feature, making it available across all posthog.com subdomains (including app.posthog.com) for onboarding personalization.
How it works
When a user visits a product-specific page (like /product-analytics or /docs/session-replay), we record that product's slug using posthog.register() with the property prod_interest. This property is configured in cookie_persisted_properties in gatsby/onPreBoostrap.ts, which means it gets stored in a cross-subdomain cookie automatically.
To read the interests, we use posthog.get_property('prod_interest') which returns an array of product slugs like ["product-analytics", "session-replay"].
We always store the most recent interests last in the array.
Code structure
The tracking is implemented in:
src/lib/productInterest.ts- Core utilities usingposthog.get_property()andposthog.register()src/hooks/useProductInterest.ts- React hooks for trackingsrc/components/Products/Slides/SlidesTemplate.tsx- Integration for product landing pagessrc/templates/Handbook.tsx- Integration for docs pages
Reading interests on app.posthog.com
Since this uses PostHog's built-in cookie persistence, you can read the interests on any subdomain where PostHog is initialized:
Expanding usage
Everything is usually automatically handled because our website is well-structured but if you want to start tracking interest for new products you'll need to add a new entry to PRODUCT_SLUGS in src/lib/productInterest.ts