


Next steps
Contents
1. Migrate historical data from another tool
Are you migrating from another tool like PostHog?
- Congratulations on a great descision. Go you.
- Head to our docs on historial migrations.
2. Add PostHog to your website
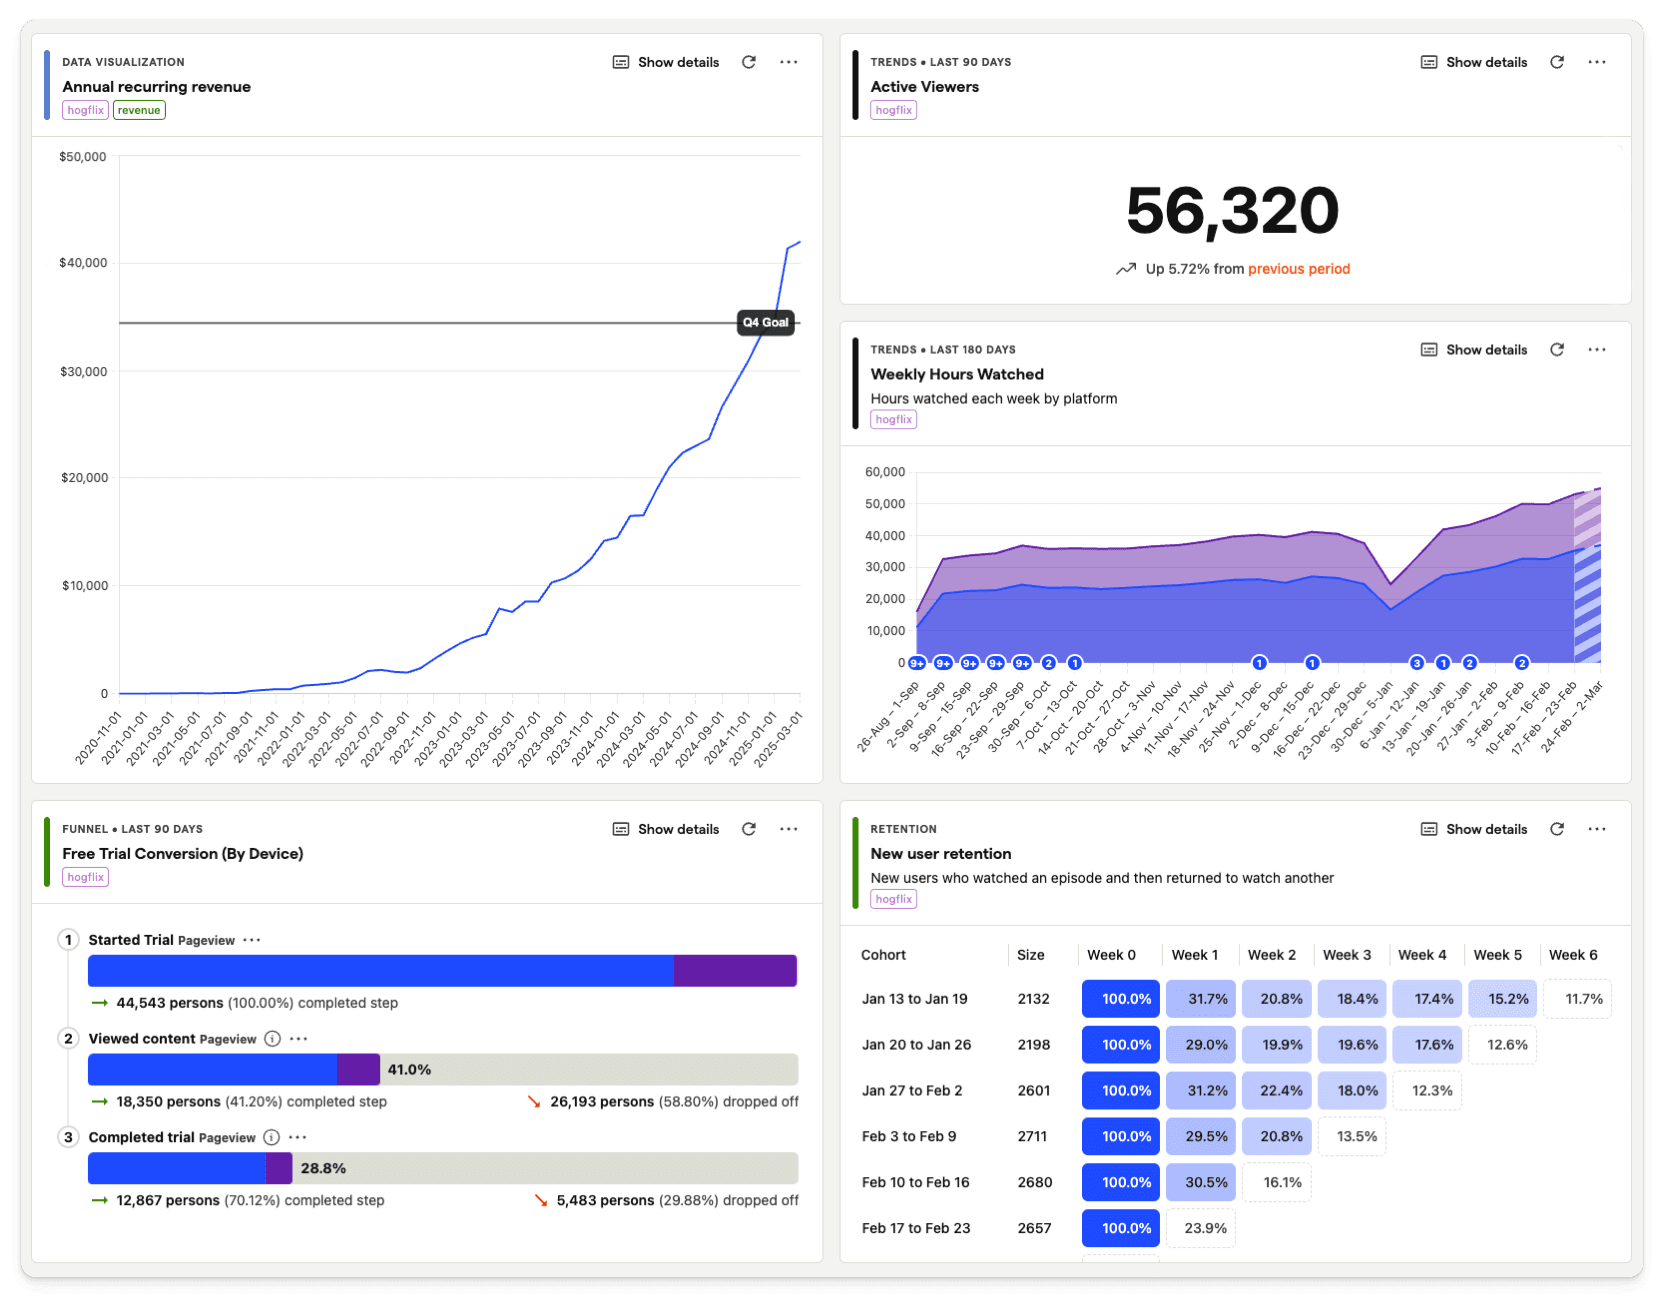
Installing PostHog on both your app and website enables you track the entire funnel of a user through acquisition, activation, retention, and revenue.
It's cheap, too. You can send us anonymous events from your website, which are up to 4x cheaper than the identified events used for product analytics.
You can then use our web analytics dashboard to track your top pages, how people find your website, and your web vitals.
Read our web analytics vs product analytics explainer for more.
3. Watch your first session replay
Watching people using your product is magic.
Once you've enabled session replay in your project, head to the what to watch tab in session replay to watch how users navigate specific parts of your app.
Warning: watching replays is addictive, but incredibly useful.
4. Import revenue and customer data into our data warehouse
When you choose PostHog, you also get a built-in data warehouse.
You can use it to link your most valuable data from sources like your CRM, payment processor, or database, combine it with the event data already in PostHog, and query across all of it.
We currently offer fully-managed import integrations for the likes of Stripe, Hubspot, and Salesforce.
We also support important data from most popular data warehouses and databases, such as Postgres, BigQuery, and Amazon S3.
See the full list of PostHog data sources for more.
5. Start sending PostHog data to other tools
As data arrives in PostHog, you can export it immediately to other tools using realtime destinations.
You can use this for things like:
- Conversion tracking
- Monitoring key events with your chat platform
- Enriching customer data in your CRM
- Triggering automations
We have dozens of pre-configured destinations, including Slack, Discord, Hubspot, Intercom, and a webhook destination for sending events to any HTTP endpoint.
Head to the data pipelines docs for more on how you can use PostHog as your customer data platform.
You can also configure batch exports to a data warehouse.
6. Learn how to win with PostHog
PostHog exists to help you build more successful products and we provide a lot of tools to get the job done.
If you have no idea where to start, we recommend reading our guide to Winning with PostHog. It will guide you through:
- Creating a tracking plan by defining your North Star metric.
- How to track and measure activation – aka one of the most important metrics ever.
- How to think about and track retention of users and customers.
- Capturing revenue in PostHog, so you can monitor the health of your whole business.
7. Start testing in production
At PostHog, we test in production. This doesn't mean we:
- Commit to
mainevery time we make a change. - Randomly click around once the code releases to make sure it works.
- Ship code into production without testing it.
It means we use feature flags to ship changes safely to small internal groups at first, then to select groups of beta testers, and so on.
Feature flags + testing in production = shipping features your uses love faster.
Read more about:
- Installing feature flags and creating your first flag
- How we test in production at PostHog using feature flags
- Best practices for using feature flags in your product
- VS Code extension — manage flags, see analytics, and clean up stale flags without leaving your editor
8. Try PostHog AI
PostHog AI is an AI-powered product analyst that lives in your browser. It can answer product usage questions, build filters and queries, and teach you everything you need to know about PostHog.
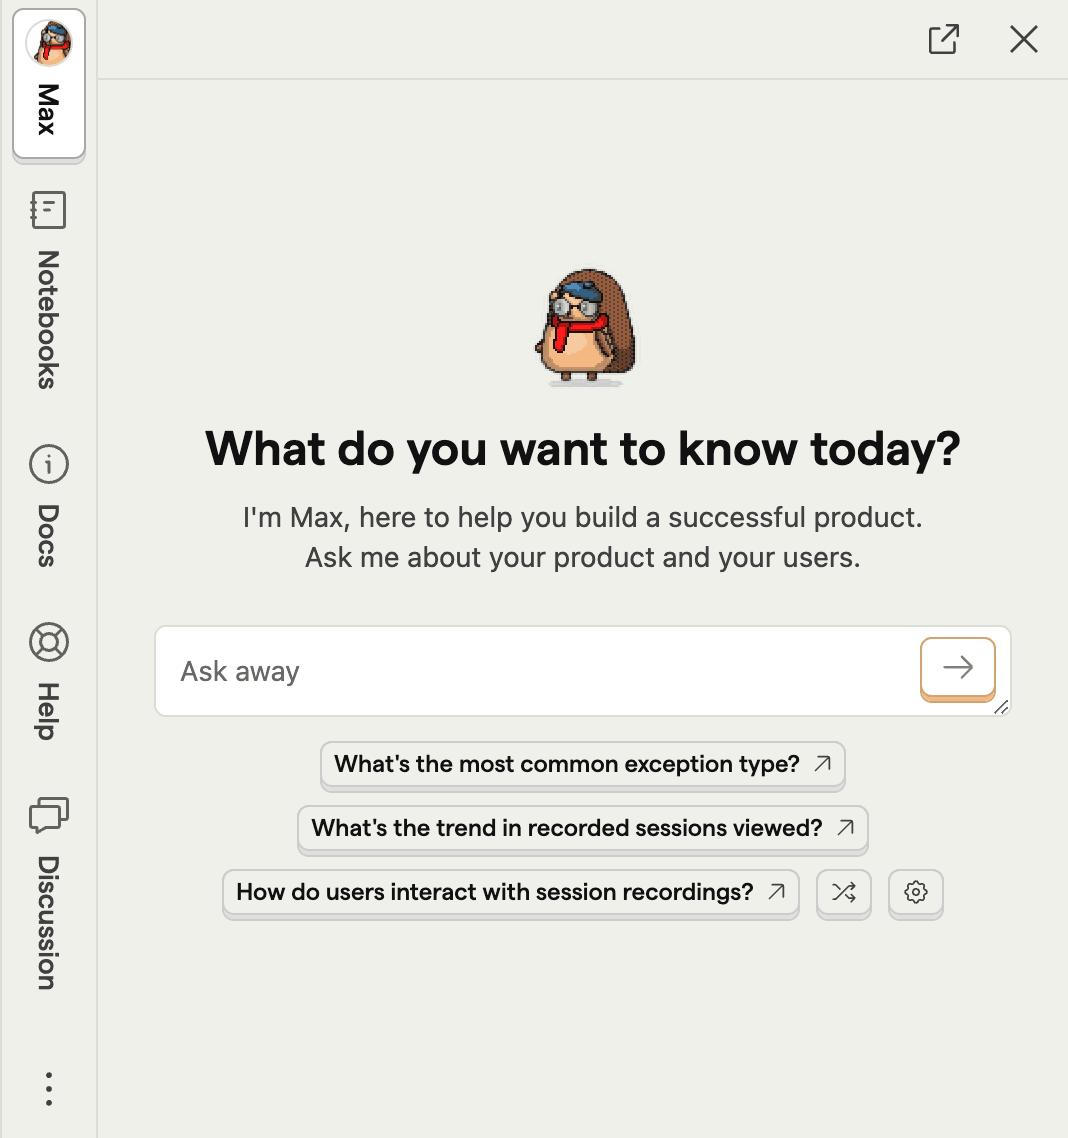
You can ask PostHog AI things like:
- "What's my churn rate?"
- "What's our most popular feature?"
- "Why are people dropping off before conversion?"
Or tell PostHog AI to:
To chat with PostHog AI, opt into the beta in the feature previews menu.