


How to set up WordPress analytics with PostHog
Contents
Getting traffic, usage, and user behavior data about your WordPress site is simple with PostHog. Once you have that data, you can discover insights and build dashboards with our suite of dev tools.
How to add PostHog to your WordPress site
The best way to add PostHog to your WordPress site depends on what version of WordPress you are using.
All of them require you to signup for PostHog, get your snippet with your project token and instance address from your project settings, and add the PostHog snippet to your site.
Option 1: Use a plugin
The first option is to use a plugin. These enable you to easily add custom code to your site's header which we can use to add the PostHog snippet.
For WordPress.com users, this is also the only option. This is because you don't have access to the header.php or functions.php files. Using plugins does require their Business or Commerce plans. We also recommend this option for WooCommerce sites.
Two plugin options include:
WordPress.com recommends using the free Insert Headers and Footers plugin.
If you are already using Google Tag Manager on your WordPress site with a plugin like Site Kit, you can add the PostHog snippet as a tag instead. See our Google Tag Manager docs for more information.
The workflow for these is the same:
- Install the plugin.
- Add the PostHog snippet to the header via the plugin.
- Activate the plugin.
Option 2: Edit your theme's functions file
Theme functions enable you to add functionality to your WordPress site. This makes them a great way to add PostHog.
To set one up for PostHog, first, find your theme's functions.php file. This can be found either in app/public/wp-content/themes/<your-theme> folder or in your WordPress admin under Tools -> Theme Filter Editor.
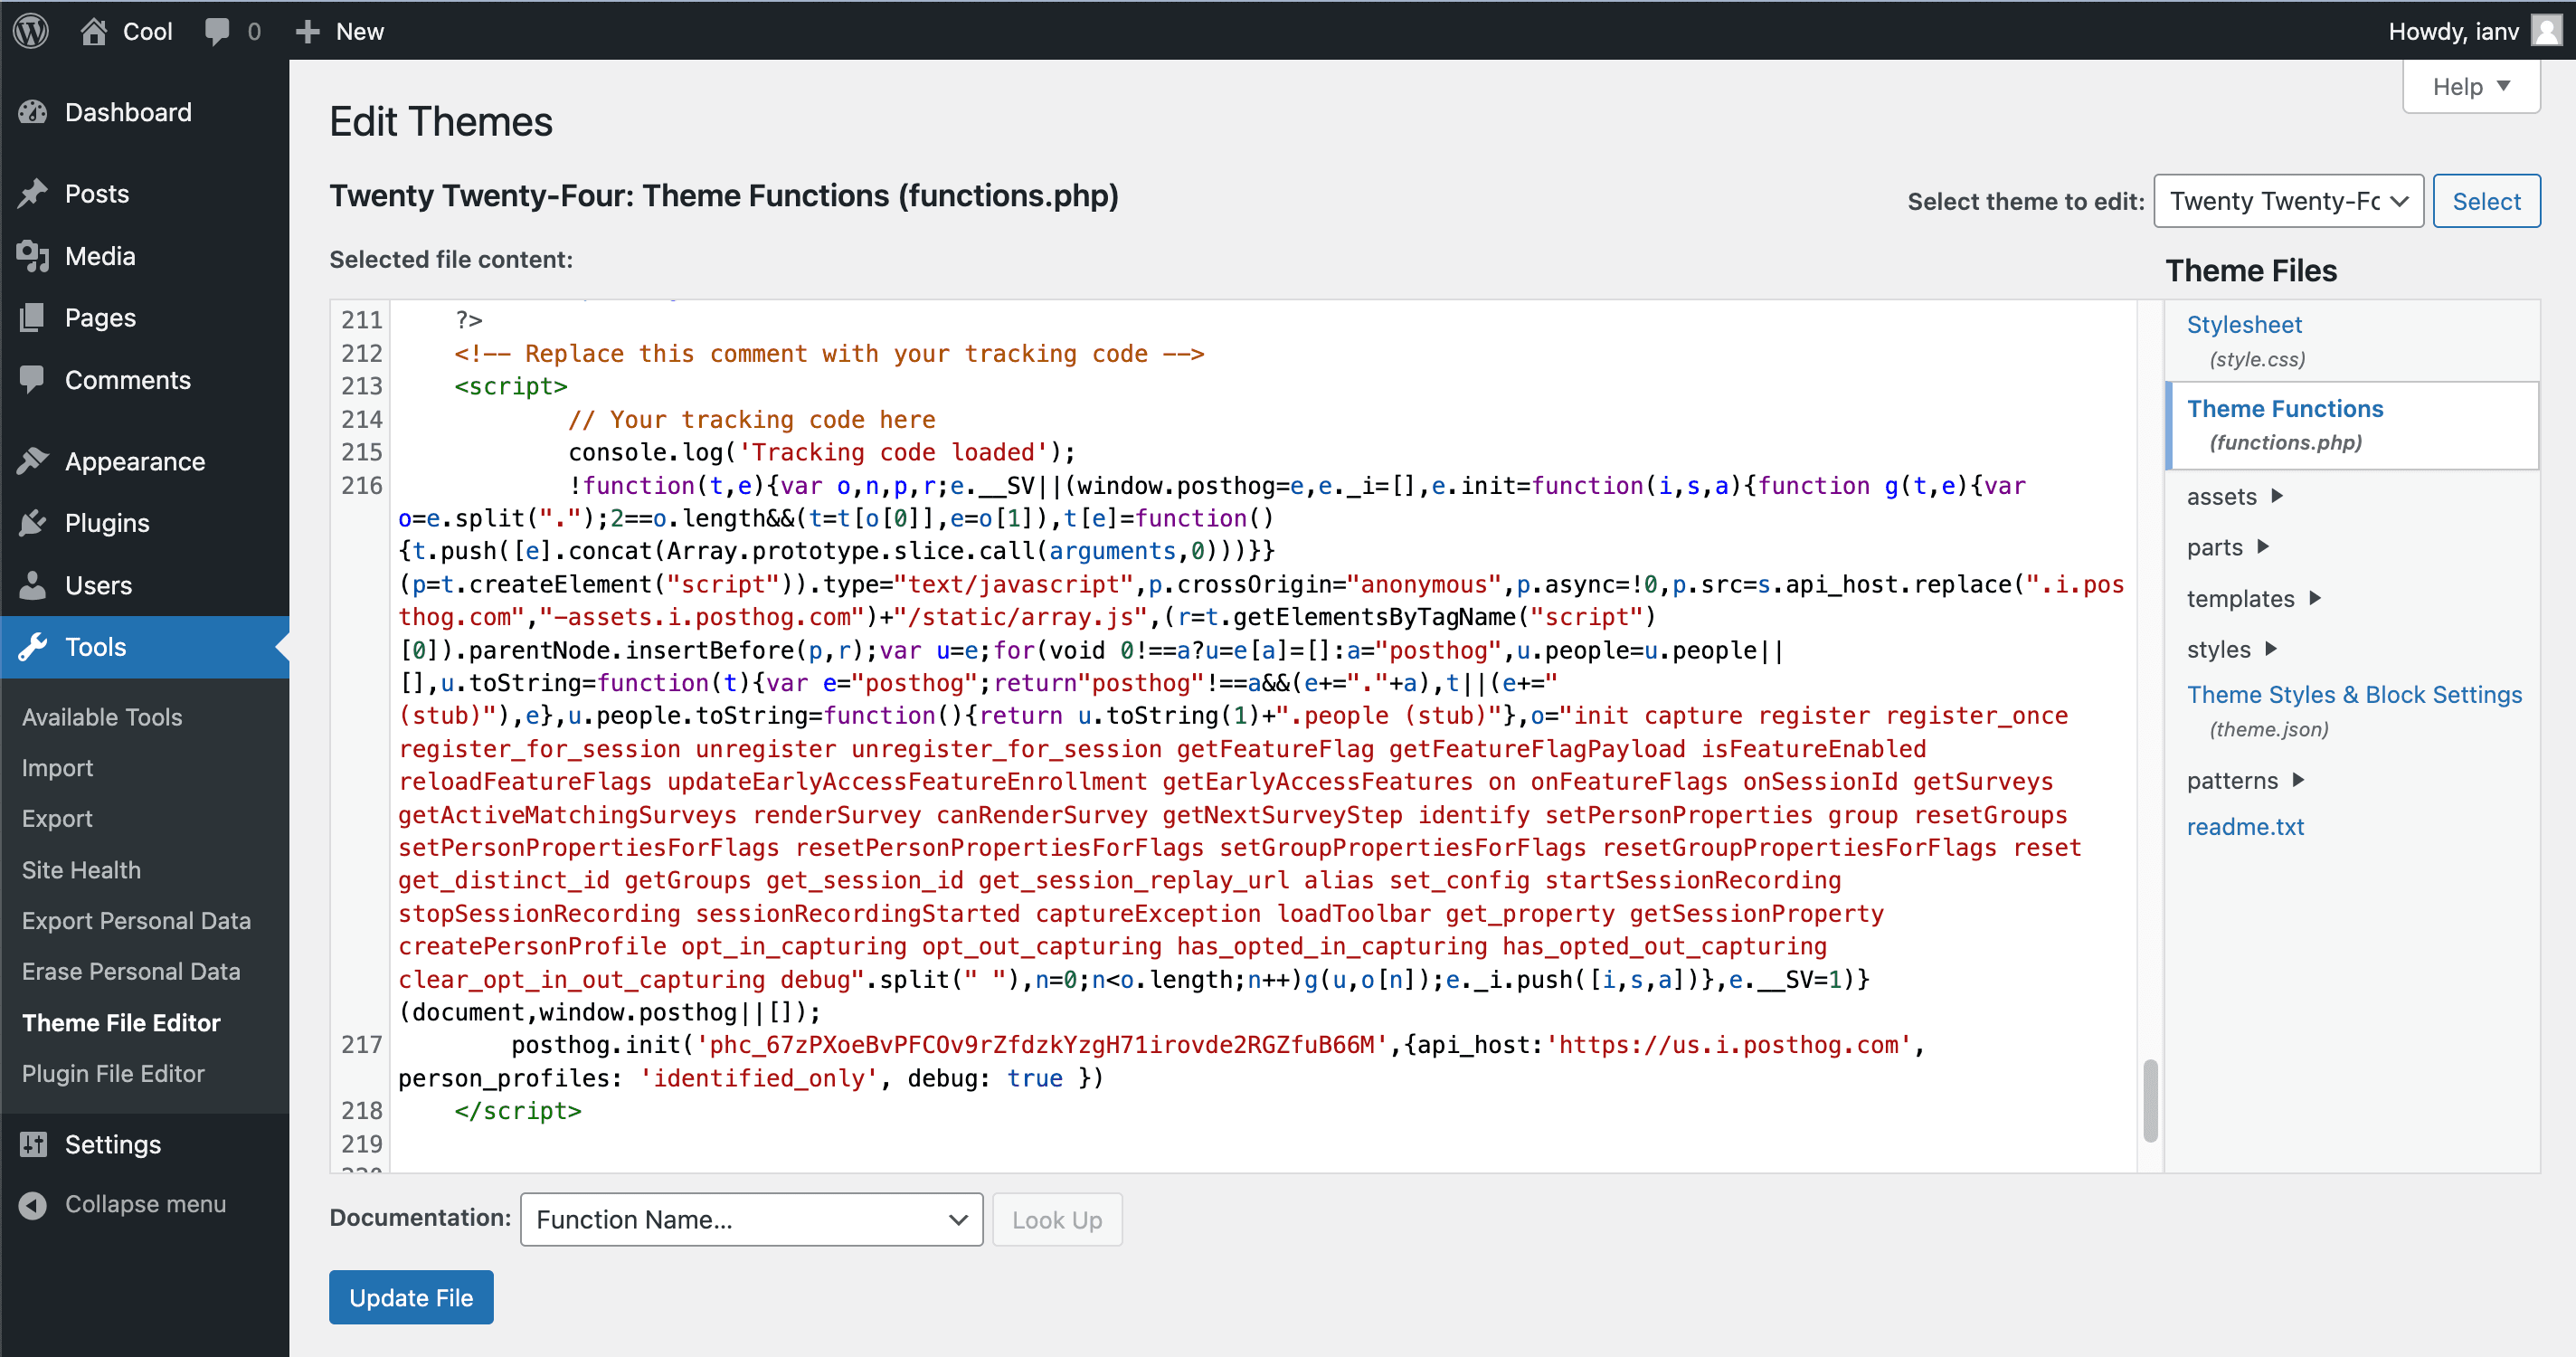
Next, create an add_posthog function with your snippet like this:
Finally, add the add_action hook to add the code to your site. Your functions.php file should look like this:
After saving your changes or clicking Update File, PostHog should begin to autocapture pageviews, clicks, and more.
Option 3: Edit your theme's header file
If you are using an older version of WordPress, you can edit the header.php file directly.
To do this, start by going to your WordPress admin and navigating to Appearance -> Theme Editor.
Select your theme in the editor drop-down menu to the right and click the header.php file in the file column to the right.

You should now see the contents of the header.php template file in the code editing view. It is recommended that you copy all the text/code and save it somewhere as a back-up.
Find the closing </head> in the code editor and paste the PostHog snippet before it (see above image). Finally, click the Update File button at the bottom to save your changes. PostHog should begin to autocapture pageviews, clicks, and more.
To confirm PostHog is configured correctly, visit your website and then check if the events from your session appear in PostHog.
Notes:
- Using the Theme Editor is very convenient, but you have to consider the potential drawbacks of having template files writable, which many prefer to disable for security purposes. Also, wrongfully editing a file may cause problems so be sure to perform appropriate backups before attempting this.
- If your theme auto-updates, manually editing the
header.phpfile may lose your settings. Making a Child Theme is the recommended approach.