


Migrate from Mixpanel to PostHog
Contents
Prior to starting a historical data migration, ensure you do the following:
- Create a project on our US or EU Cloud.
- Sign up to a paid product analytics plan on the billing page (historic imports are free but this unlocks the necessary features).
- Set the
historical_migrationoption totruewhen capturing events in the migration. This is automated if you are running a managed migration.
✨ Use our managed migration instead: We recently added a new managed migration for Mixpanel. It automatically exports data from Mixpanel, transforms it into PostHog's event schema, and imports it into your PostHog project. Get started with it in managed migrations in-app or learn more in the managed migrations docs.
PostHog is a great alternative to Mixpanel, especially if you want to replace other tools for session replay and A/B testing.
These docs walk you through pulling, formatting, and ingesting data from Mixpanel into PostHog.
Curious about the similarities and differences between the two platforms? Read our comparison of PostHog vs Mixpanel.
To get started, you'll need both a Mixpanel account with data and a PostHog instance. We will use a tool, built by the team at Stablecog, to migrate the data and users over.
Want us to take care of the migration for you? Our forward-deployed engineers can get you up and running in super quick time.
Gathering details
To start with, log in to Mixpanel and go to the project with the data you want to migrate.
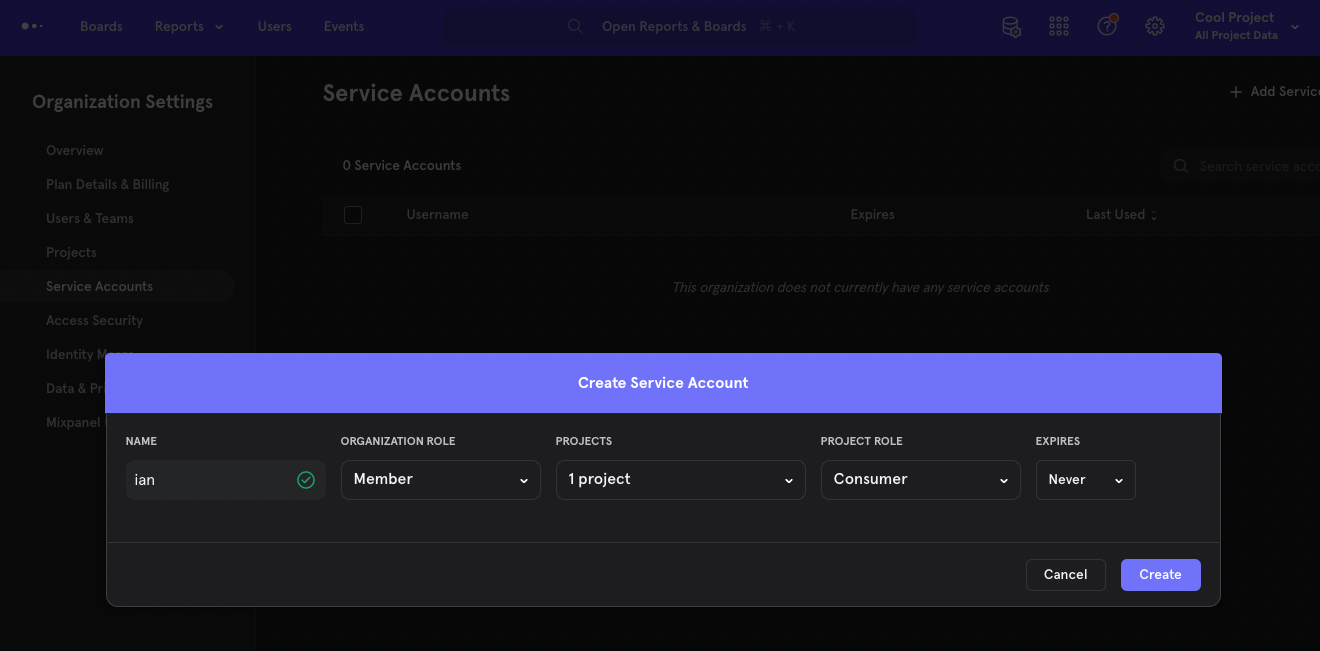
- Create a service account. Go to Organization Settings, click the Service Accounts tab, click the Add Service Account button, enter a name, then click Create.
- Hold on to the username and secret for now.
- You also need your Project ID which you can get from your Project Settings.
Next, get the details for PostHog.
- Get your project token from the getting started flow or your project settings.
- Finally, note your API host (either
https://us.i.posthog.comorhttps://eu.i.posthog.comor a custom domain)
With all this, we are ready to set up the migration tool.
Setting up the script
Note: The Mixpanel to PostHog migration tool is a community-built tool. Test for yourself and use at your own risk.
Go to the Mixpanel to Posthog Data Migrator repository and clone the repo.
Once done, go to the newly created mixpanel-to-posthog folder, create a .env file, and add the details you collected.
In our example, that is:
Next, in the terminal, make sure you have installed Go, then run the tool in the folder location.
This triggers prompts about Mixpanel's API URL, dates (to avoid rate limits and system crashes), and any data you missed. This should look like this:
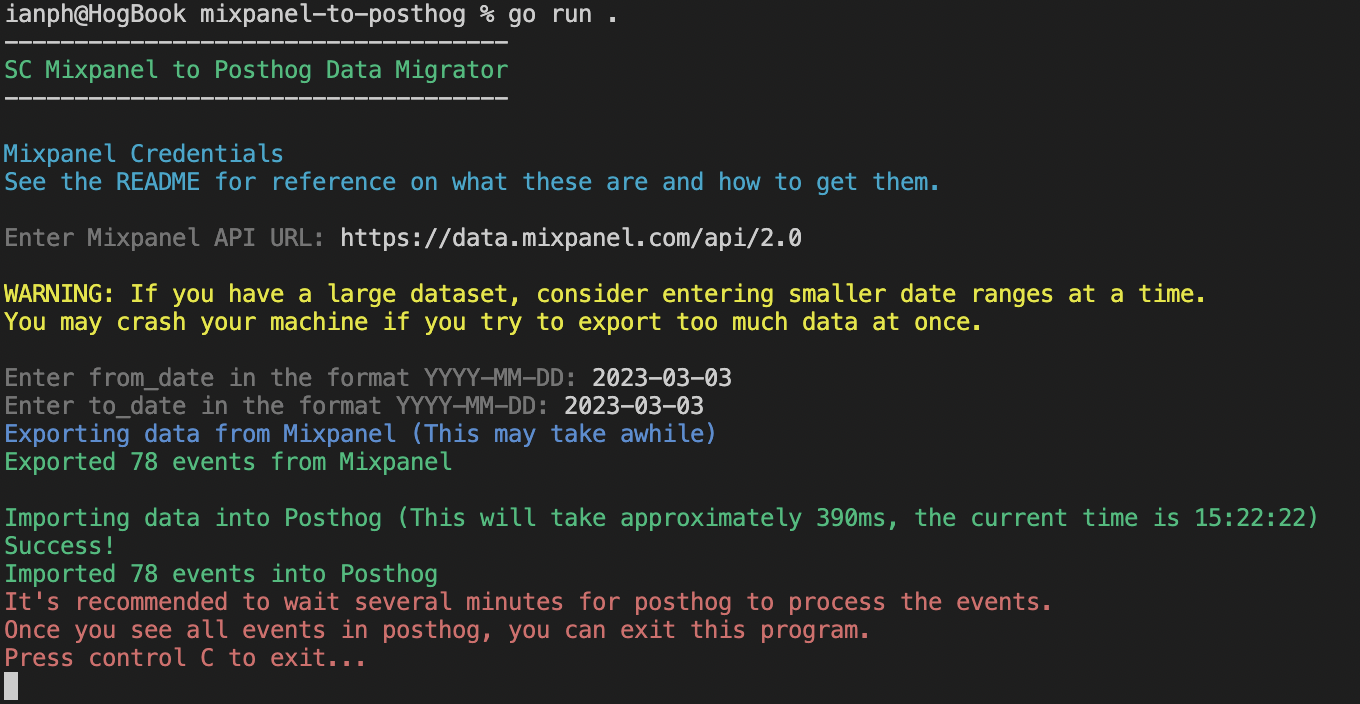
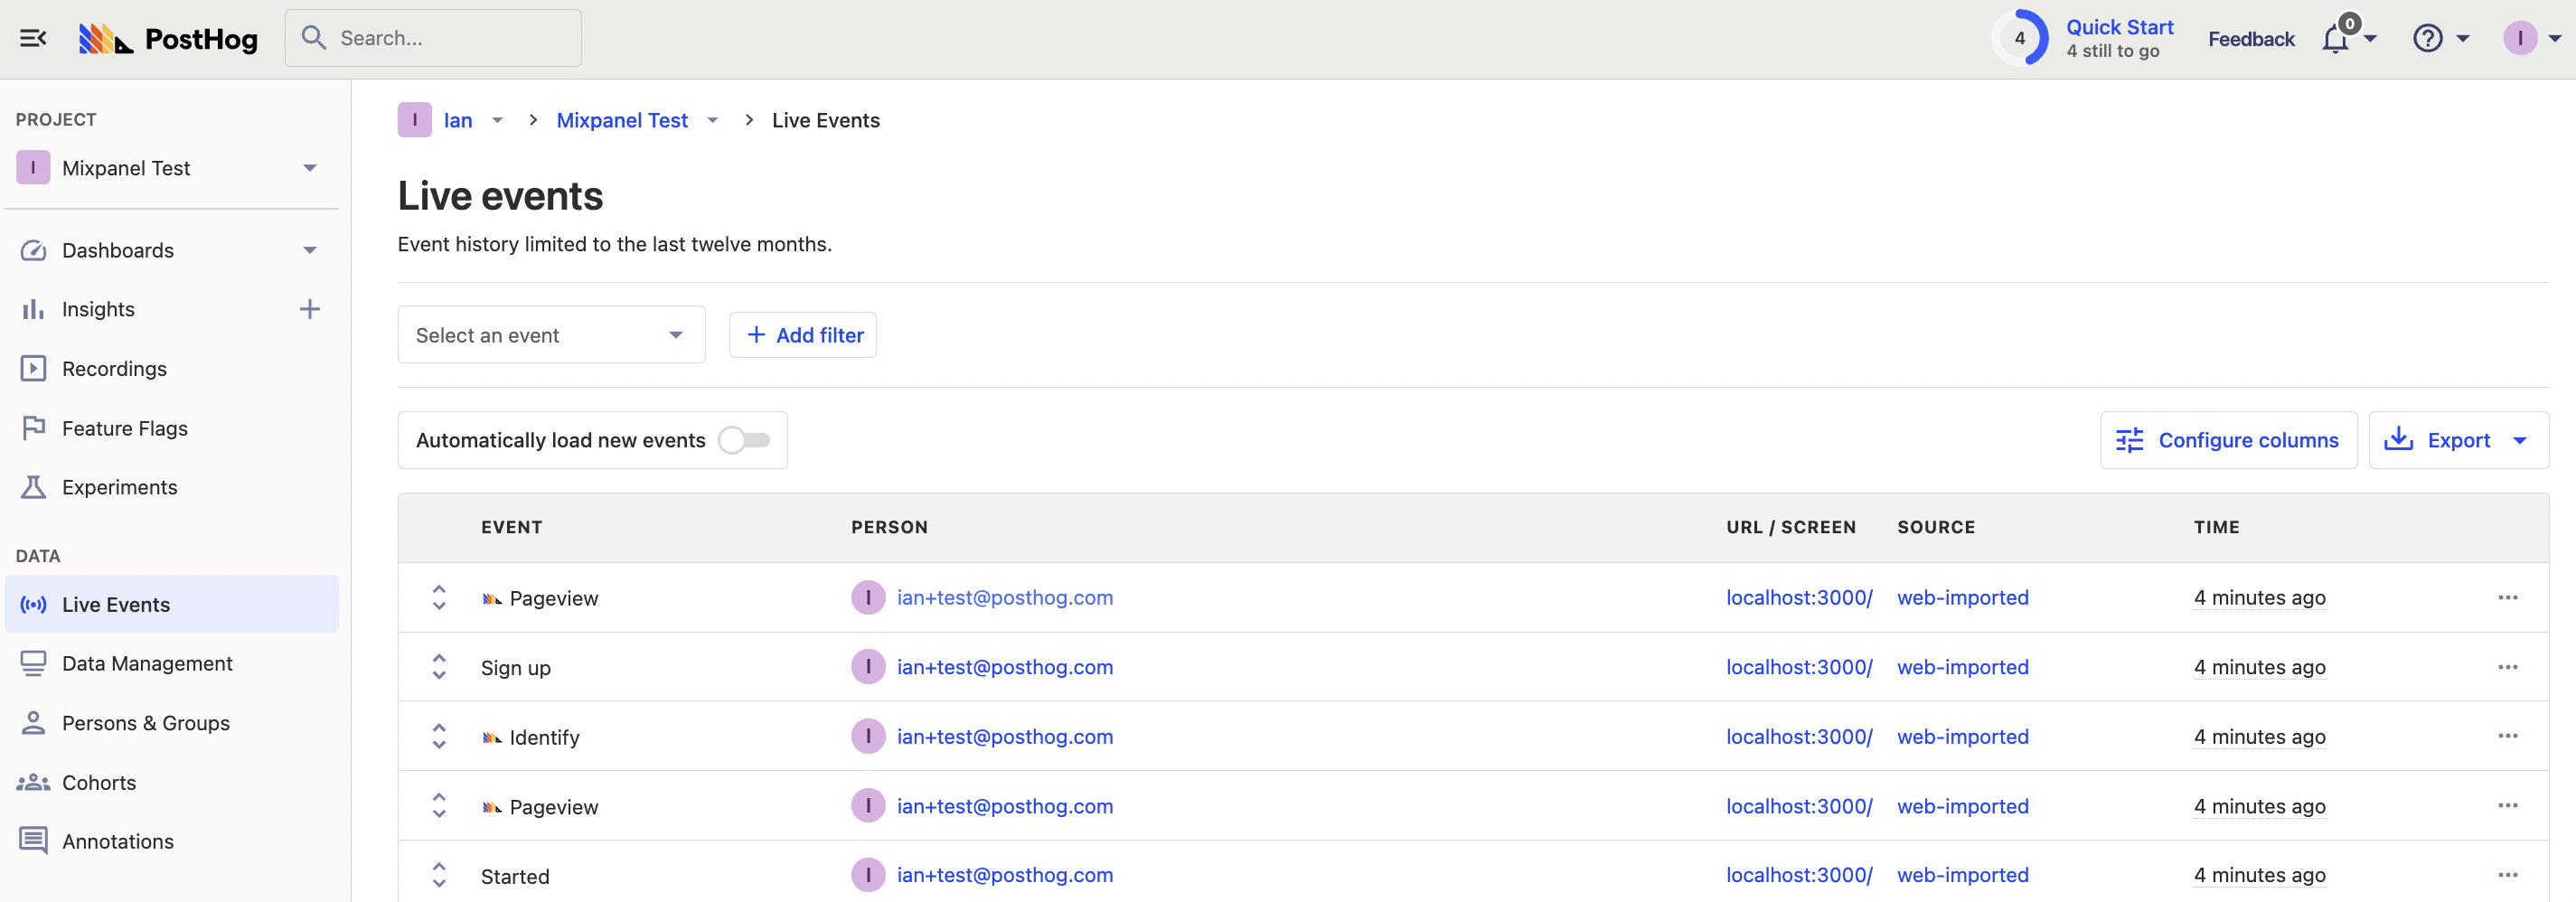
Once successful, you can find your new data in your PostHog instance.
Importing users: The tool also includes the ability to migrate users from Mixpanel to PostHog. To do this, go to Mixpanel, select all columns, all users, get a
.csvfile, and then run the tool with the-users-csv-fileflag:Terminal
What the tool is doing
If you are interested in writing your own script, or just want to learn more about how Mixpanel and PostHog work, here is what the tool is doing:
- Load the details from the
.envfile and prompt for any missing details (like date range). - Make
GETrequests to the Mixpanel export API using the details. - Decode and format the response data from Mixpanel to one for PostHog. Although Mixpanel's schema is similar, there are many conversions needed to convert to PostHog's Schema. These include:
- Changing event names like
$mp_web_page_viewto$pageview, - Changing event properties like
current_url_pathto$pathname - Dropping some Mixpanel-specific properties
- Formatting the
distinct_iddepending on if it is the$device_idor not
- Return a slice of formatted
MixpanelDataLineinstances. Basically, a list of formatted event objects ready to import into PostHog. - Loop through the "slice" of formatted
MixpanelDataLineinstances and use the PostHog Client (set up with the.envdetails) to capture events.