

Autocapture
Contents
PostHog can automatically capture a variety of events in your app without specific tracking code. This page covers the different types of events that PostHog can capture and how to configure them.
Types of autocaptured events
PostHog can automatically capture these types of data without specific tracking code:
| Type | Description |
|---|---|
| Interaction | Captures clicks, taps, and other user interactions |
| Navigation | Captures pageviews, pageleaves, and screen views |
| Clipboard | Captures copy and paste actions |
| Heatmap | Shows where users interact with your product the most |
| Dead clicks | Captures clicks that don't trigger a change to the page |
| Exception | Captures errors and crashes. See the error tracking docs for more information. |
| Session | Records real user behavior for playback. See the session replay docs for more information. |
| Web vitals | Captures largest contentful paint, first input delay, cumulative layout shift, and first contentful paint |
| Lifecycle | Captures app launches, backgrounds, and updates. |
Supported SDKs
Autocapture is available in the following SDKs, each with a different set of captured events:
- JavaScript Web – enabled by default
- React – enabled by default
- Android – navigation, lifecycle, and deep-link autocapture enabled by default; interaction autocapture is not supported
- iOS – enabled by default (element interactions –
$autocaptureevents disabled by default) - React Native – disabled by default
- Flutter – disabled by default
You can also autocapture session and exception events. See session replay and error tracking for more information.
Interaction autocapture
Web interaction autocapture
The JavaScript web SDK captures the following events by default:
- Interactions like clicks with a tag like
a,button,form,input,select,textarea,label - Form submissions and form changes
- Changes on content with
contenteditable="true". - Copies from clipboard
Autocaptures are displayed with names like clicked span with text "Delete". You can filter for Autocapture events to see all interactions.
Configuring interaction autocapture
You can configure posthog-js to autocapture information that users copy or cut on your page with the capture_copied_text config option.
You can configure the following options:
| Option | Description |
|---|---|
url_allowlistType: (string \| RegExp)[] | List of URLs to enable autocapture on. Can be strings to match or regexes (e.g., ['https://example.com', 'test.com/.*']). Useful when you want to autocapture on specific pages only. If both url_allowlist and url_ignorelist are set, the allowlist is checked first, then the ignorelist (which can override the allowlist). |
url_ignorelistType: (string \| RegExp)[] | List of URLs to not enable autocapture on. Can be strings to match or regexes (e.g., ['https://example.com', 'test.com/.*']). Useful when you want to autocapture on most pages but not some specific ones. |
dom_event_allowlistType: DomAutocaptureEvents[] | List of DOM events to enable autocapture on (e.g., ['click', 'change', 'submit']). |
element_allowlistType: AutocaptureCompatibleElement[] | List of DOM elements to enable autocapture on (e.g., ['a', 'button', 'form', 'input', 'select', 'textarea', 'label']). We consider the element tree from root to target, so if button is in the allowlist, clicks on button or its children (like svg) are captured, but not clicks on parent div elements. |
css_selector_allowlistType: string[] | List of CSS selectors to enable autocapture on (e.g., ['[ph-capture]']). We consider the element tree from root to target, so if ['[id]'] is in the allowlist, clicks on elements with IDs or their parents with IDs are captured. Everything is enabled when there's no allowlist. |
css_selector_ignorelistType: string[] | List of CSS selectors to ignore autocapture on (e.g., ['.ph-no-autocapture', '[data-ph-no-autocapture]']). We consider the element tree from root to target, so matching elements or their parents are ignored. If unset, PostHog ignores .ph-no-autocapture and [data-ph-no-autocapture] by default. An empty list ignores nothing. Providing any custom list replaces the defaults, so include them explicitly if you still want them honored. |
element_attribute_ignorelistType: string[] | Exclude certain element attributes from autocapture (e.g., ['aria-label'] or ['data-attr-pii']). |
capture_copied_textType: boolean | When set to true, autocapture will capture the text of any element that is cut or copied. |
Here's a full example of how to configure autocapture:
Disabling interaction autocapture
You can disable interaction autocapture in two ways:
- In your project settings
- By setting
autocapture: falsein the config
Note: Disabling interaction autocapture does not disable navigation autocapture (pageviews and pageleaves). See navigation autocapture for how to disable those separately.
Capturing additional properties in autocapture events
If you add a data attribute onto an element in the format data-ph-capture-attribute-some-key={someValue}, then any autocapture event from that element or one of its children will have the property some-key: 'someValue' added to it. This can be useful when you want to add additional information to autocapture events.
As an example, say you have a notification bell with a value like this:
You can include the unread count in the autocapture event by adding the data-ph-capture-attribute class like this:
The autocapture event for clicks on the bell will include the unread count as an unread-notifications-count property.
Tracking metadata
You can also attach metadata to autocapture events by adding data attributes to the element that triggers the event. This helps you track something like a customer performing a transaction (adding an item to a cart or completing a purchase).
The below ecommerce example helps you understand what users are interested in, even if they don't complete a transaction. It can also reveal which products users are interested in when correlated with information like marketing campaigns, regionality, or device type.
Replace the {productXx} values with the relevant information available on the webpage. Now when the Add to cart button is clicked, the autocapture event will include the product information in the event's properties, like:
Sending custom properties with autocaptured form submissions
To prevent accidental sensitive data capture, we do not automatically capture form values from form submissions. To add custom properties to form submissions, you can use the data-ph-capture-attribute attribute on the form element.
In this example, the product-id property will be sent with the form submission event. The product-name input will not be captured.
The following example shows how you can use the data-ph-capture-attribute attribute dynamically in a React component. The product-name property will be sent with the form submission event.
Rage clicks autocapture
A rage click is captured when a user clicks three times in rapid succession in roughly the same spot. Specifically, PostHog fires a $rageclick event once it sees three clicks that are each within 30 pixels and 1 second of the previous one. All three thresholds (click count, pixel distance, and timeout) are configurable – see Configuring rageclick.
The event is captured as a $rageclick event. You can use it to identify opportunities to improve your UI, as it often points to where users are frustrated with your product.
Reducing rage click false positives
Rage click detection is a proximity-and-timing heuristic – it doesn't know whether the clicks were productive, so legitimate patterns like double-click-to-select in a text field, rapid quantity steppers, or fast pagination can trip it once they hit the third click within the window.
With the latest SDK defaults, PostHog automatically ignores the most common culprits: navigation controls (next, previous, >, <), quantity steppers (+, -), and repeated clicks on text-selection surfaces (inputs, textareas, and contenteditable elements). You can tune this with content_ignorelist and ignore_text_selection, or exclude specific elements with the .ph-no-rageclick class or a css_selector_ignorelist.
We recommend confirming rage clicks against session replays before treating them as a hard frustration signal.
iOS interaction autocapture
The PostHog iOS SDK can capture UIKit interaction events when captureElementInteractions is enabled. Autocaptured interaction events display as the autocaptured interaction type in the activity tab, such as touched ... or value_changed ....
See the iOS autocapture documentation for supported events, configuration options, and privacy controls.
React Native interaction autocapture
The PostHog React Native SDK can automatically capture touch events when the user interacts with the screen.
See the React Native autocapture docs for supported events, configuration options, and privacy controls.
Navigation and lifecycle event autocapture
Web navigation autocapture
PostHog automatically captures navigation events as $pageview and $pageleave events.
Configuring page navigation autocapture
You can configure the following options:
| Option | Description |
|---|---|
capture_pageview | Type: boolean, 'history_change' (default). When set to history_change, autocapture will capture pageviews. This also works on single-page apps. |
capturePageleaves | Type: boolean, 'if_capture_pageview' (default). When set to true, autocapture will capture pageleaves. If set to 'if_capture_pageview', it only captures pageleaves if capturePageviews is also set to true or 'history_change'. |
For example, your initialization code might look like this:
Disabling page navigation autocapture
You can disable $pageview and $pageleave autocapture by setting capture_pageview: false and capture_pageleave: false in the SDK config:
iOS navigation and lifecycle autocapture
PostHog can automatically captures navigation and lifecycle events as the user navigates in the app and when the app is launched, updated, or backgrounded.
PostHog captures the following events:
| Event Name | Description |
|---|---|
$screen | Screen view changes, with screen name as property |
Application Installed | First app launch |
Application Updated | App version updates |
Application Opened | App becomes active/foreground |
Application Backgrounded | App moves to background |
Configuring screen navigation and lifecycle autocapture
Screen navigation and application lifecycle autocapture are enabled by default because captureScreenViews and captureApplicationLifecycleEvents default to true. You can disable them by setting either option to false in the config.
| Option | Description |
|---|---|
captureScreenViews | Type: boolean. Defaults to true. Set to false to disable screen view autocapture. |
captureApplicationLifecycleEvents | Type: boolean. Defaults to true. Set to false to disable application lifecycle event autocapture. |
For example, your initialization code might look like this:
Android navigation and lifecycle autocapture
Android lifecycle, screen, and deep-link autocapture are documented in the Android SDK capturing events guide. Configuration options are documented in the Android SDK configuration reference.
Android does not currently support interaction autocapture for arbitrary taps or gestures.
React Native navigation and lifecycle autocapture
PostHog can automatically capture navigation and lifecycle events as the user navigates in the app and when the app is launched, updated, or backgrounded.
See the React Native autocapture docs for supported events and configuration details.
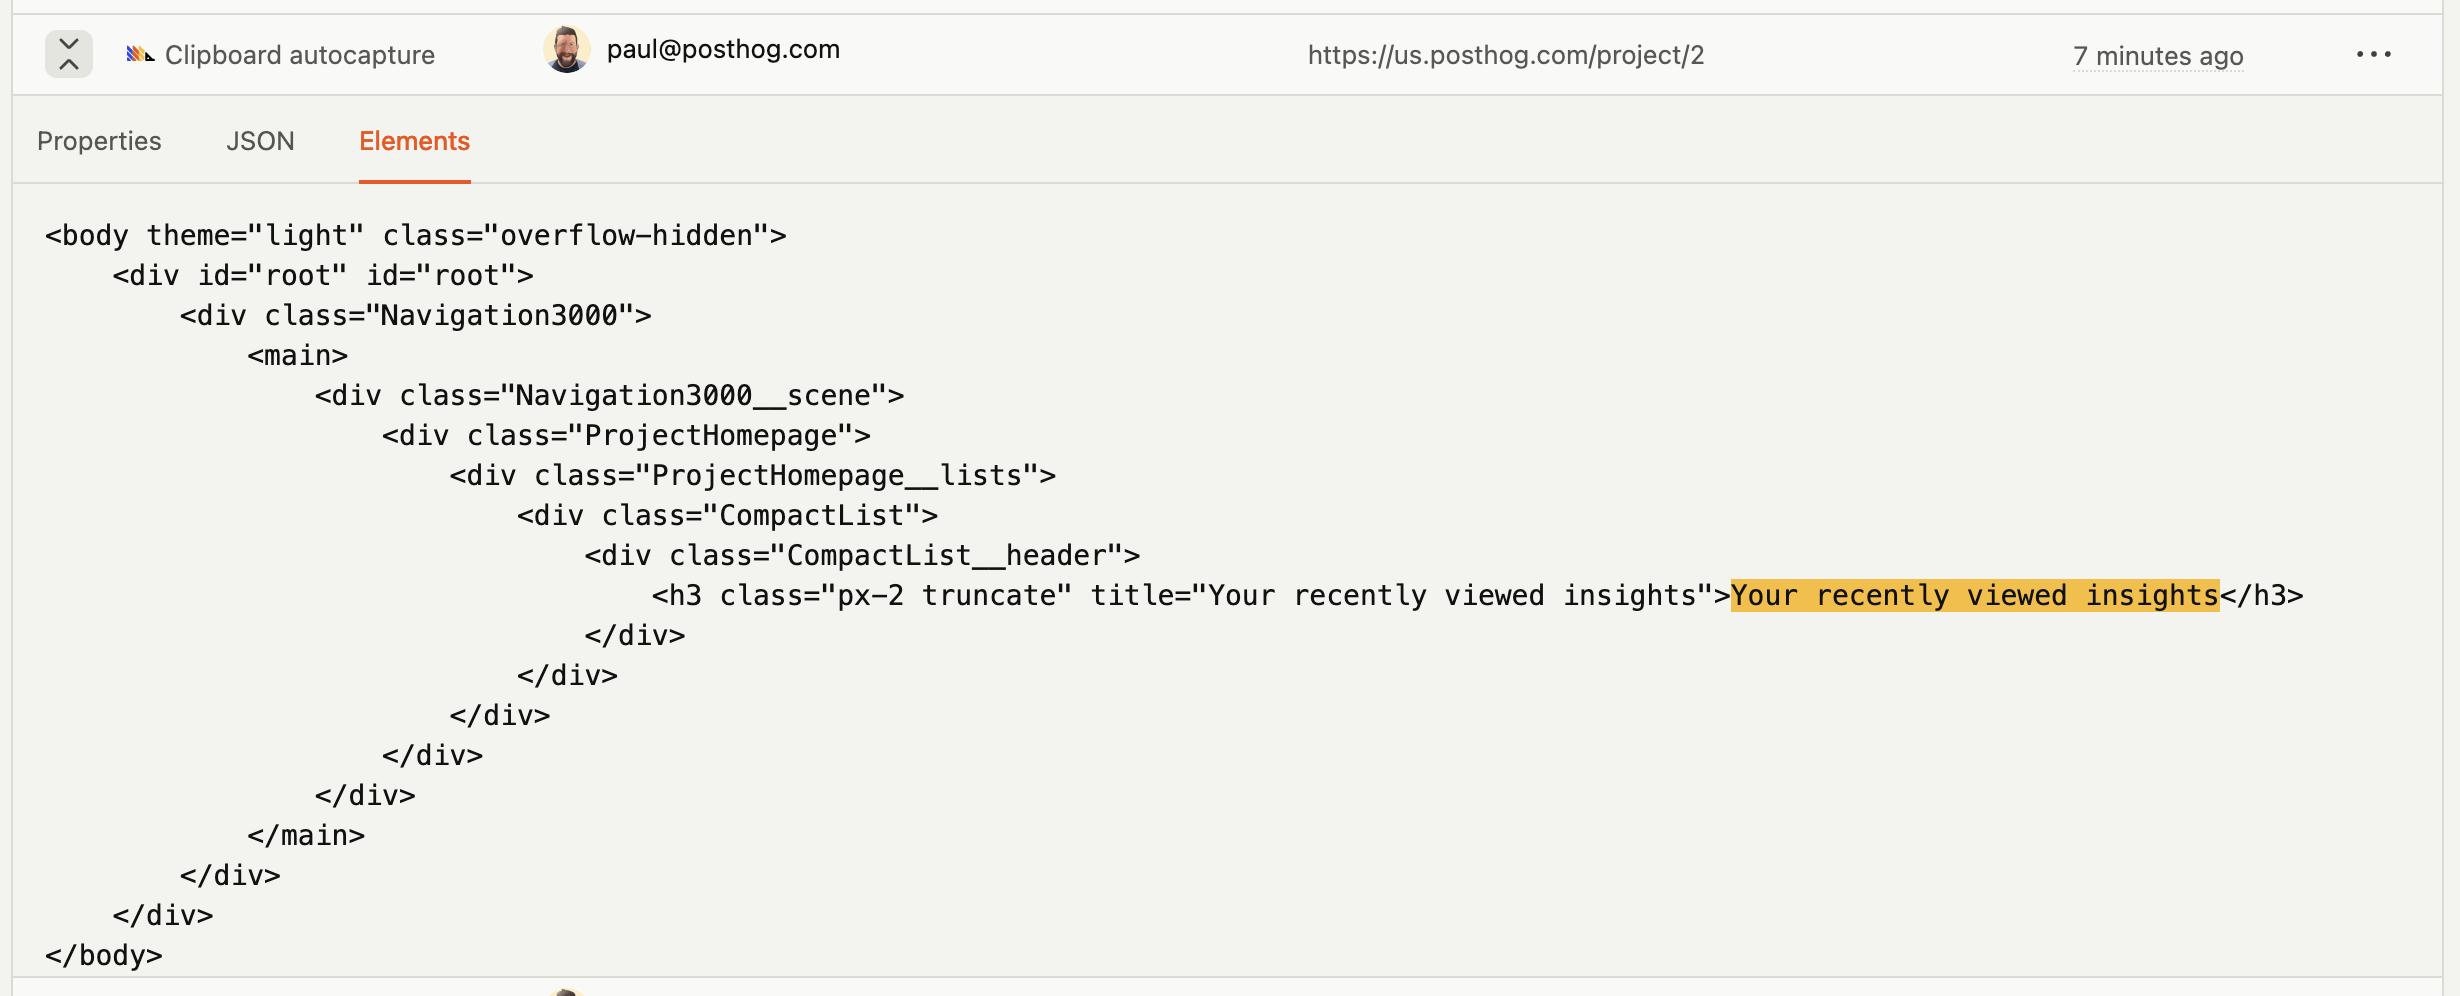
Clipboard autocapture
Note: This is only available for the JavaScript web SDK and framework libraries for web like React and Next.js.
When enabled with capture_copied_text set to true, we capture the copied or cut text as a Clipboard autocapture event. You can then use the $selected_content property in analysis or use the activity page to view the copied content in context.
Clipboard autocapture respects other privacy settings. For example, won't capture content from a password field.
Note: Browsers don't directly allow access to copied data for privacy reasons so when
posthog-jssees a clipboard event, we capture any text currently selected in the browser.import { useSelector } from 'react-redux'
Heatmap autocapture
Note: This is only available for the JavaScript web SDK and framework libraries for web like React and Next.js.
If you use our JavaScript libraries and enable heatmap autocapture in your project settings, we can capture general clicks, mouse movements, and scrolling to create heatmaps. No additional events are created.
Whereas autocapture creates events whenever it can uniquely identify an interacted element, heatmaps are generated based on overall mouse or touch positions and are useful for understanding more general user behavior across your site.
Dead clicks autocapture
A dead click (or slow click) is a click which isn't followed by a change to the page.
Dead clicks are a great way to identify opportunities to improve your UI, showing you where your users expect to be able to interact with the page but cannot.
You can collect dead clicks with the Web SDK by enabling them in your project settings.
Or by setting your config:
To exclude an element from dead click capture without disabling autocapture, session replay, or heatmaps for that element, add the .ph-no-deadclick class:
For custom selectors, pass capture_dead_clicks.css_selector_ignorelist in your JavaScript web config:
Providing a custom ignore list replaces the defaults, so include .ph-no-capture if you still want it to suppress dead click capture.
Note: The PostHog heatmap captures dead clicks for free, collecting only the coordinates of dead clicks to display in heatmaps. Enabling the autocapture of dead clicks here allows for deeper analysis and is priced as a standard product analytics event.
Analyzing autocaptured events and properties
Autocapture events and properties can be used like any other event type. You can use them in trends, funnels, cohorts, surveys, and more. Beyond this, they come with some special features:
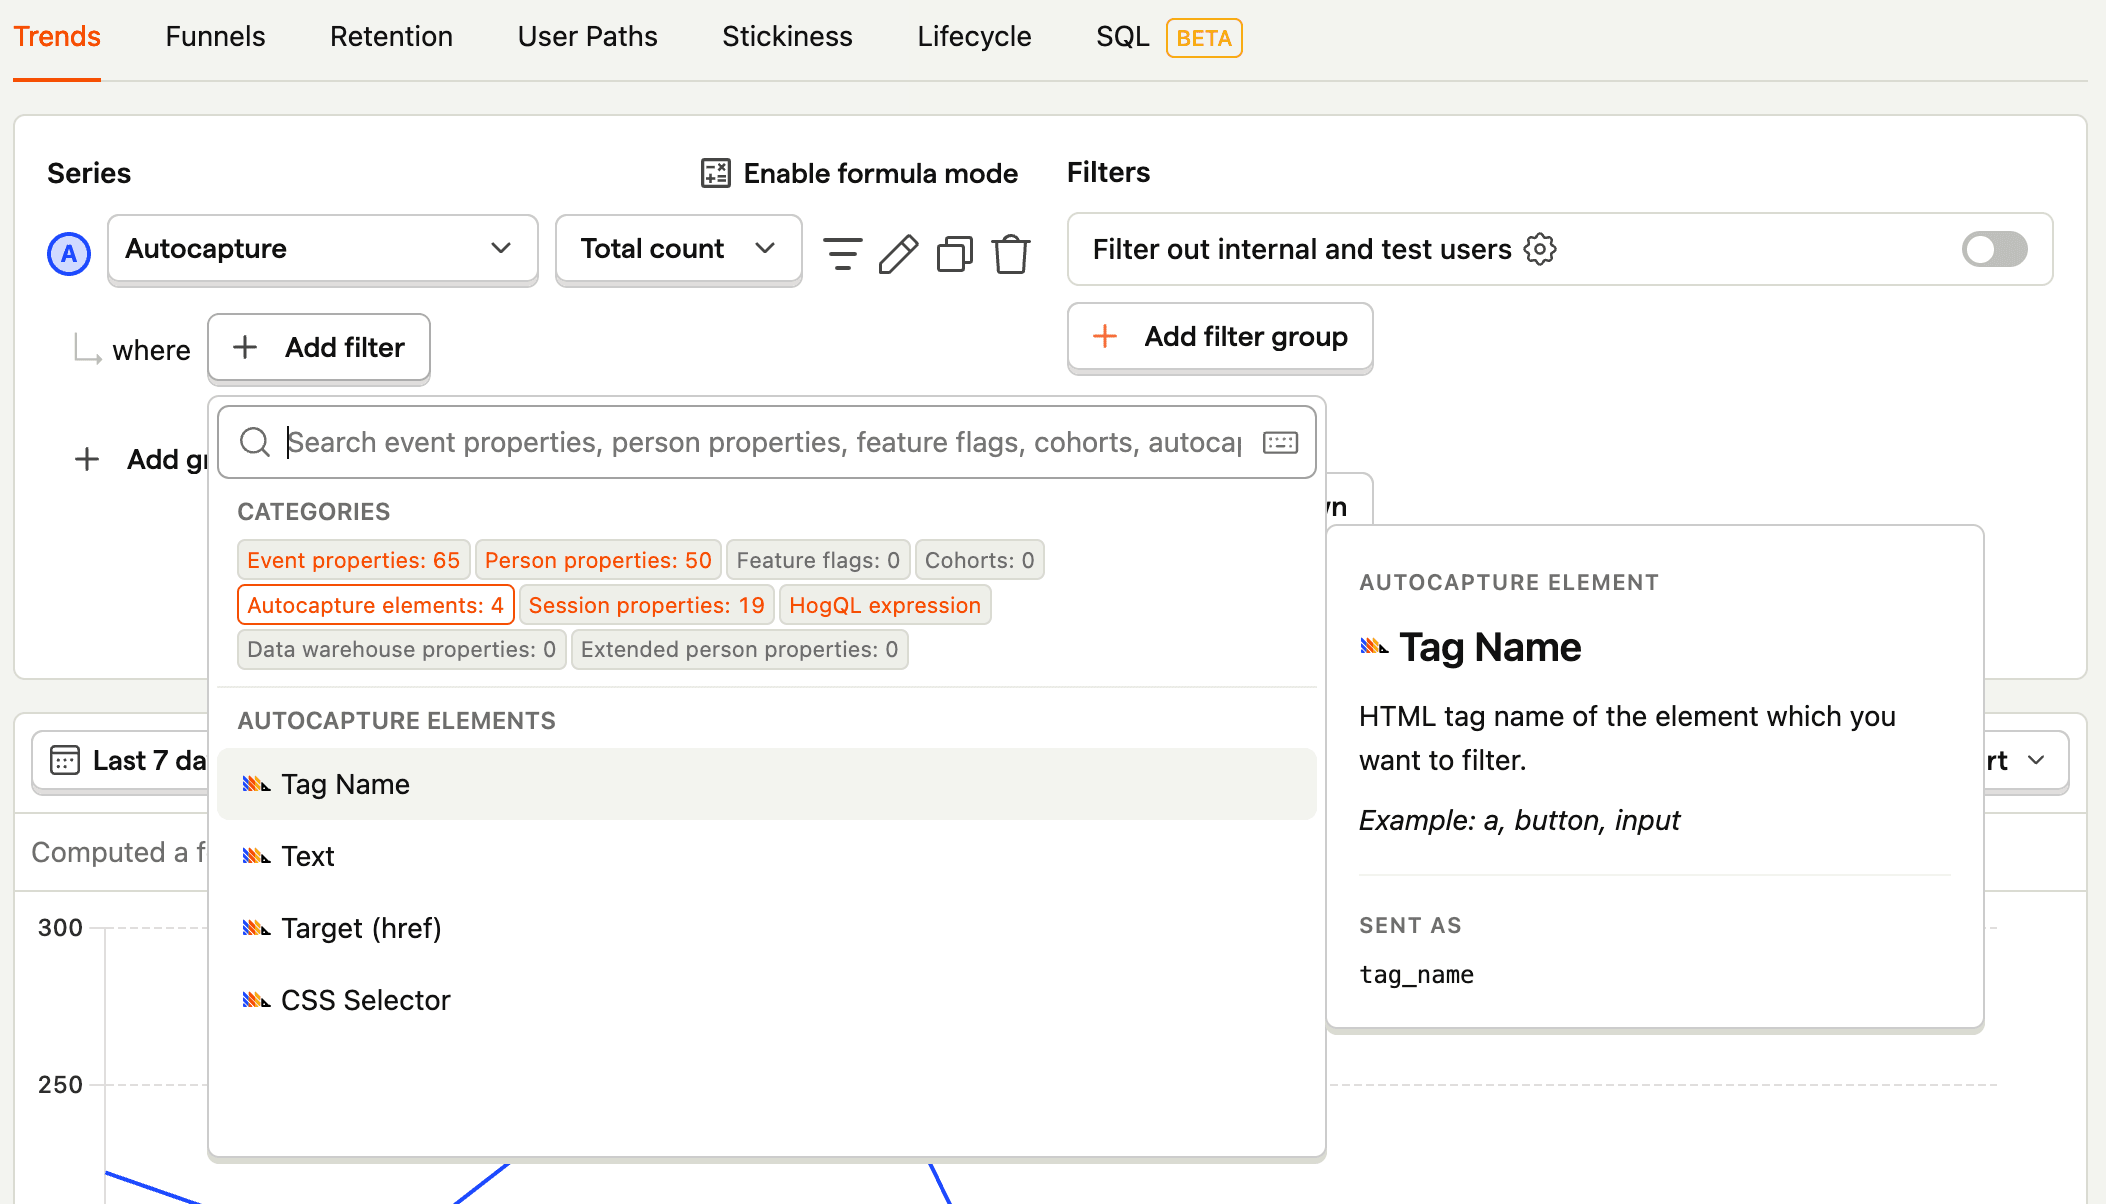
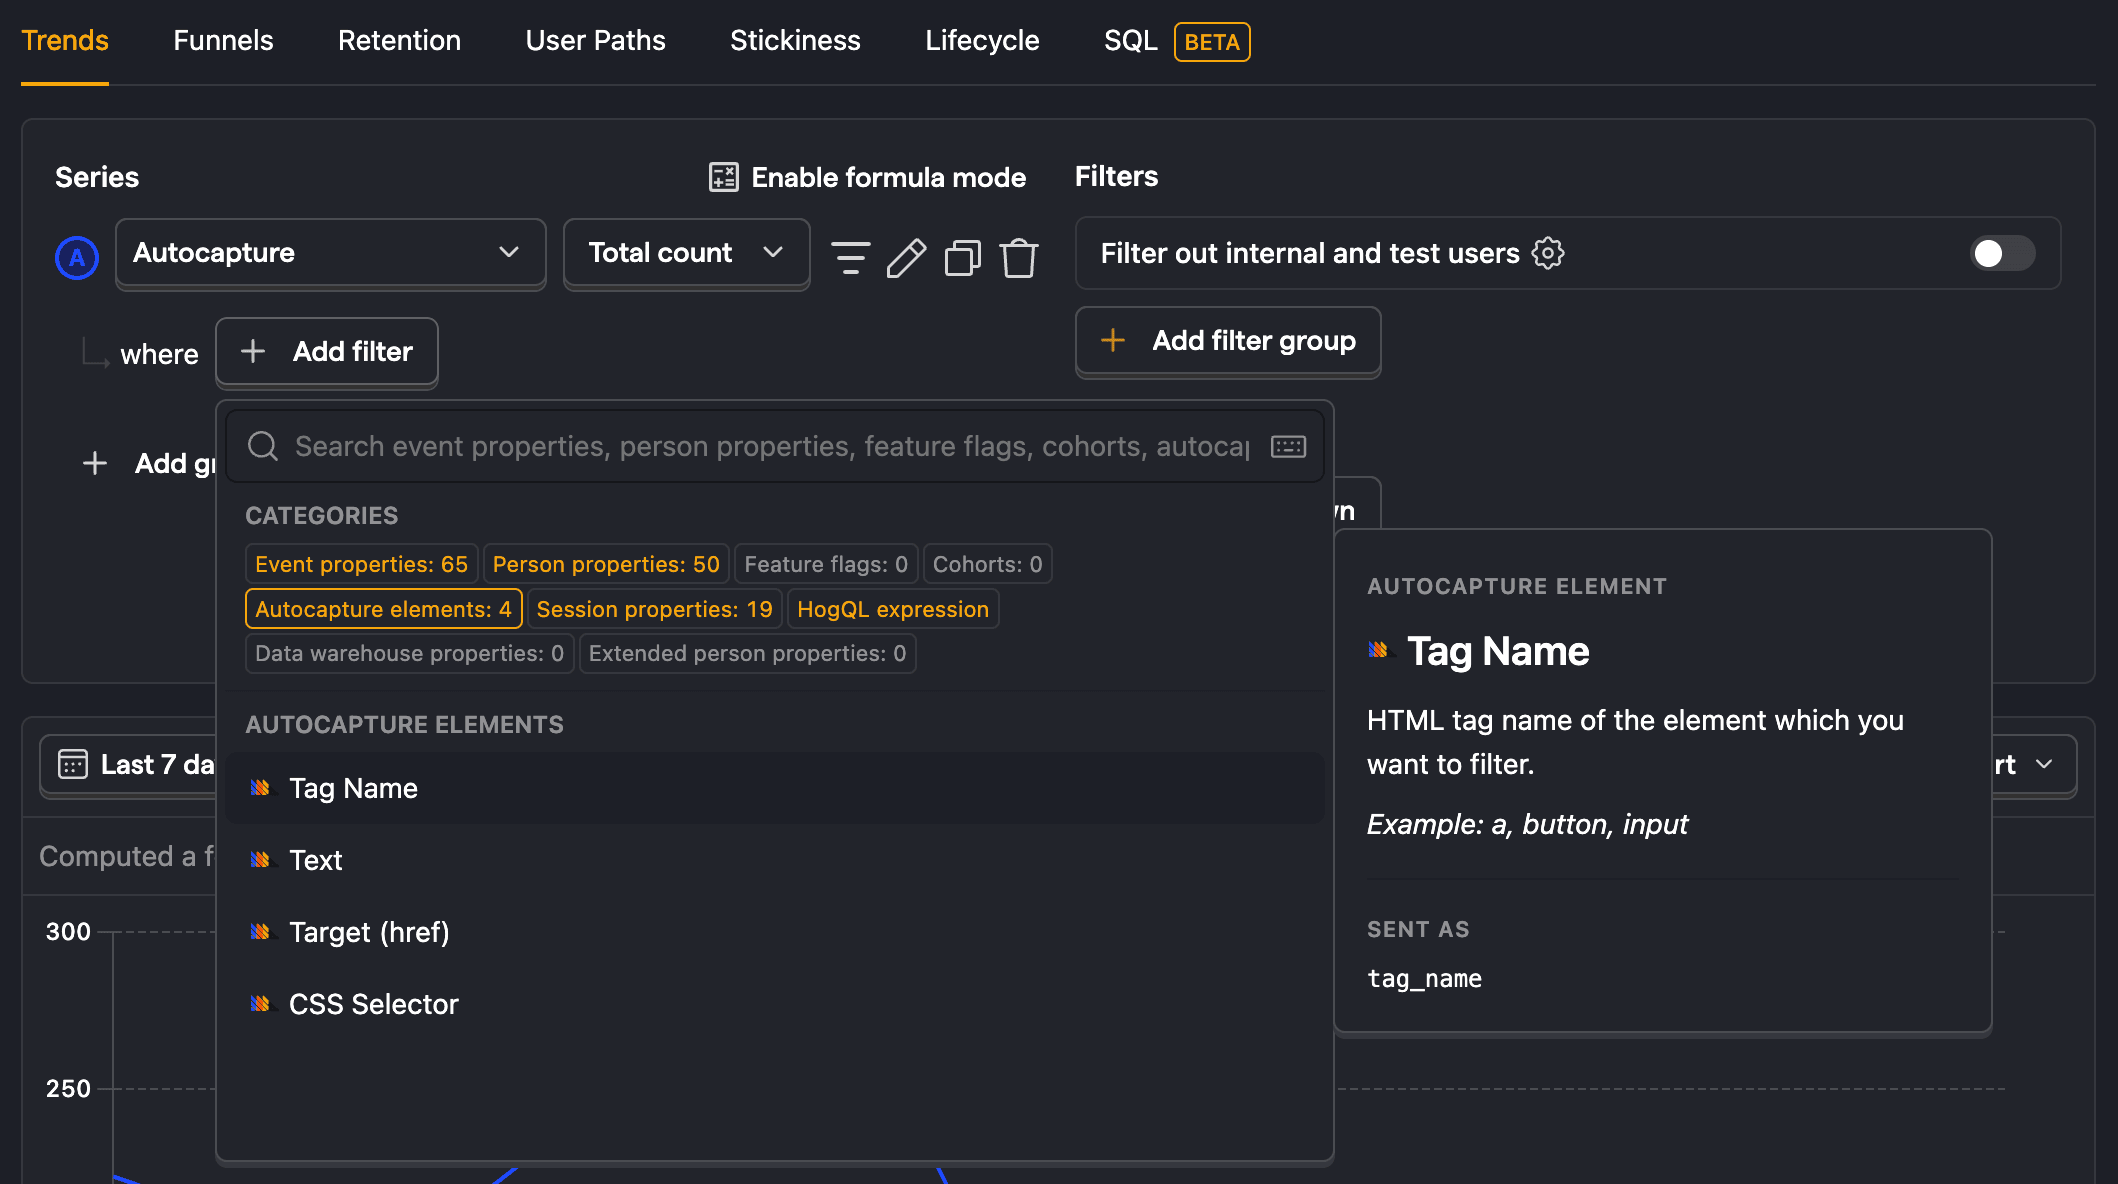
- When using the autocapture event series, you can filter by the autocaptured element's tag name, text,
hreftarget, and/or CSS selector.
Autocapture events can be organized and renamed using actions.
You can query autocapture
elements_chainusing SQL.
Common autocapture filtering patterns
Searching for autocapture events by text
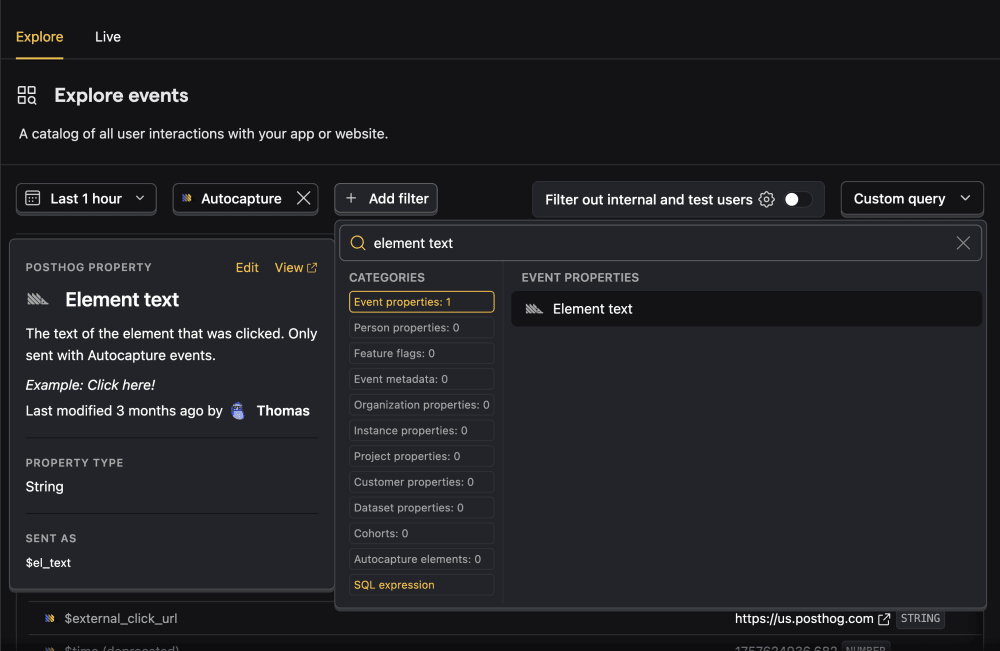
For UI interactions, you may see autocaptured events such as clicked span with text "Delete". You can filter these events by the UI text by using the Element text property.

Filter by interaction type
Autocaptured events have a more specific event type. For example, you can filter for all clicks by filtering for Autocapture events with the Event type property set to click. Check the interaction autocapture docs for more information on the different interaction types.
Filter for interactions with specific elements
Autocaptured events can also be filtered by its CSS selector. For example, you can filter for all interactions with a specific element by filtering for the CSS selector property as #my-element or .button--submit.
Captured properties
Autocaptured events (and client-side custom events) have many default properties. These are distinguished by $ prefix in their name, the PostHog logo next to them in the activity tab, and the verified event logo. You can find them in PostHog or in the references.
| Name | Key | Example value |
|---|---|---|
| Timestamp | $timestamp | 2024-05-29T17:32:07.202Z |
| OS | $os | Mac OS X |
| OS Version | $os_version | 10.15.7 |
| Browser | $browser | Chrome |
| Browser Version | $browser_version | 125 |
| Device Type | $device_type | Desktop |
| Current URL | $current_url | https://example.com/page |
| Host | $host | example.com |
| Path Name | $pathname | /page |
| Screen Height | $screen_height | 1080 |
| Screen Width | $screen_width | 1920 |
| Viewport Height | $viewport_height | 950 |
| Viewport Width | $viewport_width | 1903 |
| Library | $lib | web |
| Library Version | $lib_version | 1.31.0 |
| Referrer URL | $referrer | https://google.com |
| Referring Domain | $referring_domain | www.google.com |
| Active Feature Flags | $active_feature_flags | ['beta_feature'] |
| Event Type | $event_type | click |
| UTM Source | $utm_source | newsletter |
| UTM Medium | $utm_medium | email |
| UTM Campaign | $utm_campaign | product_launch |
| UTM Term | $utm_term | new+product |
| UTM Content | $utm_content | logolink |
| Google Click ID | $gclid | TeSter-123 |
| Google Ads Source | $gad_source | google_ads |
| Google Search Ads 360 Click | $gclsrc | dsa |
| Google DoubleClick Click ID | $dclid | testDclid123 |
| Google Web-to-app Measure | $wbraid | testWbraid123 |
| Google App-to-web Measure | $gbraid | testGbraid123 |
| Facebook Click ID | $fbclid | testFbclid123 |
| Microsoft Click ID | $msclkid | testMsclkid123 |
| Twitter Click ID | $twclid | testTwclid123 |
| LinkedIn Ad Tracking ID | $la_fat_id | testLaFatId123 |
| Mailchimp Campaign ID | $mc_cid | testMcCid123 |
| Instagram Share Id | $igshid | testIgshid123 |
| TikTok Click ID | $ttclid | testTtclid123 |
| IP Address | $ip | 192.168.1.1 |
Notes:
- If enabled, GeoIP data is added also as properties at ingestion.
- Many of these are also captured as session properties.
- These properties can be hidden in activity by checking the Hide PostHog properties box.
On autocaptured iOS events, you can find the following properties (on top of the default event properties):
| Property | Description |
|---|---|
description | Type of user interaction |
text | Element text/value (sanitized) |
screen_name | Current view controller name |
elements_chain | View hierarchy from target to root |
Where description is one of the following types of user interaction:
| Description | When Captured |
|---|---|
"touch" | Tap gestures on views |
"swipe" | Swipe gestures |
"pan" | Pan/drag gestures |
"pinch" | Pinch to zoom |
"rotation" | Rotation gestures |
"long_press" | Long press gestures |
"scroll" | Scroll view changes |
"value_changed" | Control value changes |
"submit" | Form submission |
"toggle" | Switch/checkbox changes |
"primary_action" | Main control actions |
"menu_action" | Menu actions |
"change" | General editing changes |
Where elements_chain is a list of elements from the target to the root of the view hierarchy.
| Element Type | Format |
|---|---|
| With Text | "ClassName:text=\"value\"" |
| With Base Class | "ClassName:attr__class=\"baseClass\"" |
| With Label | "ClassName:attr_id=\"label\"" |
| Plain | "ClassName" |
Where rules are:
| Rule | Description |
|---|---|
| Length Limit | Maximum 255 characters |
| Whitespace | Multiple spaces/line breaks → single space |
| Unicode | Zero-width characters removed |
| Sensitive | Password fields automatically excluded |
Where text is the text of the element.
| Control Type | Debounce Interval |
|---|---|
| UISlider | 0.3 seconds |
| UISwitch | 0.4 seconds |
| UIPickerView | 0.0 seconds |
| UIScrollView | 0.0 seconds |
| Text Fields | 0.0 seconds |
On autocaptured React Native events, you can find the following properties (on top of the default event properties):
| Property | Description |
|---|---|
description | Type of user interaction (e.g., "touch") |
text | Element text/value (sanitized) |
screen_name | Current screen name |
elements_chain | Component hierarchy from target to root |
The elements_chain follows a similar format to iOS, showing the component tree structure with props and text content where available.