


How to control which sessions you record
Contents
There are several ways to control which sessions you record:
Programmatically start and stop recordings
Most users should initialize PostHog with the default settings (which starts recording automatically) and use the other options on this page — like URL triggers, event triggers, feature flags, or sampling — to control what gets recorded. Manual control is only needed for advanced use cases where you need to programmatically start and stop recording at specific points in your application.
For older projects, there is a section for 'Authorized domains for replay' in the project replay settings. Ensure your domain is added if the section is present.
Set
disable_session_recording: truein your config.
- Manually start recording by calling
posthog.startSessionRecording(). Similarly, you can stop the recording at any point by callingposthog.stopSessionRecording().
By default, startSessionRecording obeys any ingestion controls you've set - so you might call start and not record a session because of sampling or some other control.
You can pass override options to startSessionRecording to change this.
Note: Calling these methods will have no effect if session recordings are disabled in your PostHog Project Settings.
Requires PostHog iOS SDK version >= 3.19.0.
Setting config.sessionReplay = false in your PostHog configuration will prevent PostHog from automatically starting session recordings on SDK setup.
You can manually control when to start and stop session recordings using the following methods:
startSessionRecording(resumeCurrent: Bool)- Set resumeCurrent to
trueto resume a previous session recording (Default). - Set resumeCurrent to
falseto start a new session recording.
- Set resumeCurrent to
stopSessionRecording()- Stops/pauses the current session recording.
Note: Calling these methods will have no effect if session recordings are disabled in your PostHog Project Settings. Manual starts still respect project ingestion controls, including sampling and event triggers.
Record or ignore specific screens
You can combine these methods with your navigation to record only certain screens, or to pause recording on sensitive ones. For example, using a UINavigationControllerDelegate, stop recording when a sensitive screen appears and resume otherwise:
Invert the check (startSessionRecording only for screens in an allowlist, stopSessionRecording otherwise) if you'd rather record just a specific set of screens.
Requires PostHog Android SDK version >= 3.16.0.
Setting config.sessionReplay = false in your PostHog configuration will prevent PostHog from automatically starting session recordings on SDK setup.
You can manually control when to start and stop session recordings using the following methods:
startSessionReplay(resumeCurrent: Boolean)- Set resumeCurrent to
trueto resume a previous session recording (Default). - Set resumeCurrent to
falseto start a new session recording.
- Set resumeCurrent to
stopSessionReplay()- Stops/pauses the current session recording.
Note: Calling these methods will have no effect if session recordings are disabled in your PostHog Project Settings.
Record or ignore specific screens
You can combine these methods with your navigation to record only certain screens, or to pause recording on sensitive ones. For example, registering ActivityLifecycleCallbacks, stop recording when a sensitive activity resumes and resume otherwise:
Invert the check (startSessionReplay only for screens in an allowlist, stopSessionReplay otherwise) if you'd rather record just a specific set of screens.
Requires
posthog-react-native>= 4.36.0 andposthog-react-native-session-replay>= 1.3.0. Fromposthog-react-native4.47.0+,posthog-react-native-session-replayis renamed to@posthog/react-native-plugin(>= 2.0.1).
Setting sessionReplay to false in your PostHog configuration will prevent PostHog from automatically starting session recordings on SDK setup.
You can manually control when to start and stop session recordings using the following methods:
startSessionRecording(resumeCurrent?: boolean)- Set resumeCurrent to
trueto resume a previous session recording (Default). - Set resumeCurrent to
falseto start a new session recording.
- Set resumeCurrent to
stopSessionRecording()- Stops/pauses the current session recording.
Note: Calling these methods will have no effect if session recordings are disabled in your PostHog Project Settings.
Record or ignore specific screens
You can combine these methods with your navigation to record only certain screens, or to pause recording on sensitive ones. For example, using @react-navigation/native, stop recording when a sensitive screen is focused and resume when the user leaves:
Invert the check (startSessionRecording only for screens in an allowlist, stopSessionRecording otherwise) if you'd rather record just a specific set of screens.
Requires PostHog Flutter SDK version >= 5.14.0. Available on iOS, Android, and Web.
Setting config.sessionReplay = false in your PostHog configuration will prevent PostHog from automatically starting session recordings on SDK setup.
You can manually control when to start and stop session recordings using the following methods:
startSessionRecording({bool resumeCurrent = true})- Set resumeCurrent to
trueto resume a previous session recording (default). - Set resumeCurrent to
falseto start a new session recording.
- Set resumeCurrent to
stopSessionRecording()- Stops/pauses the current session recording.
Note: Calling these methods will have no effect if session recordings are disabled in your PostHog Project Settings. Manual starts still respect project ingestion controls, including sampling and event triggers.
Record or ignore specific screens
You can combine these methods with your navigation to record only certain screens, or to pause recording on sensitive ones. For example, using a NavigatorObserver, stop recording on a sensitive route and resume otherwise:
Invert the check (startSessionRecording only for screens in an allowlist, stopSessionRecording otherwise) if you'd rather record just a specific set of screens.
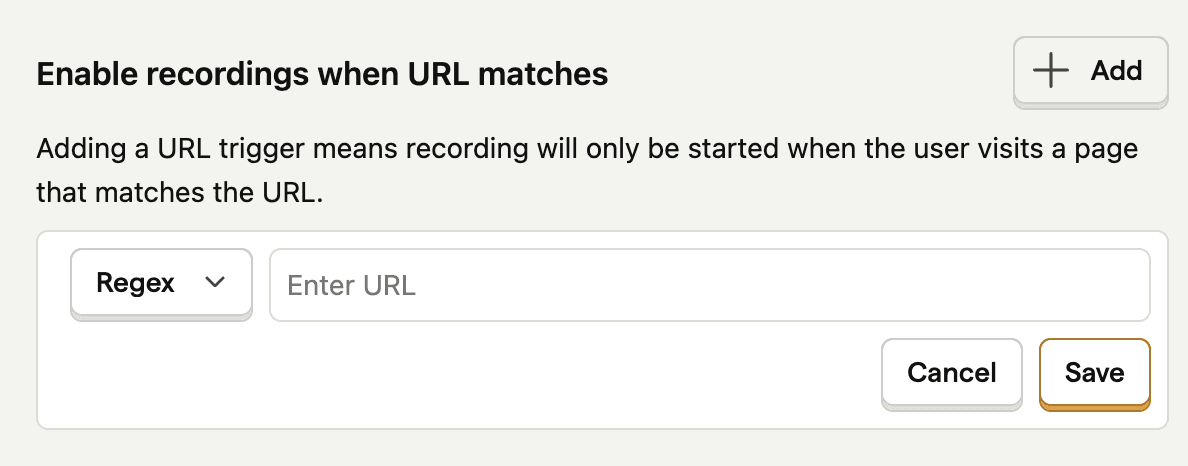
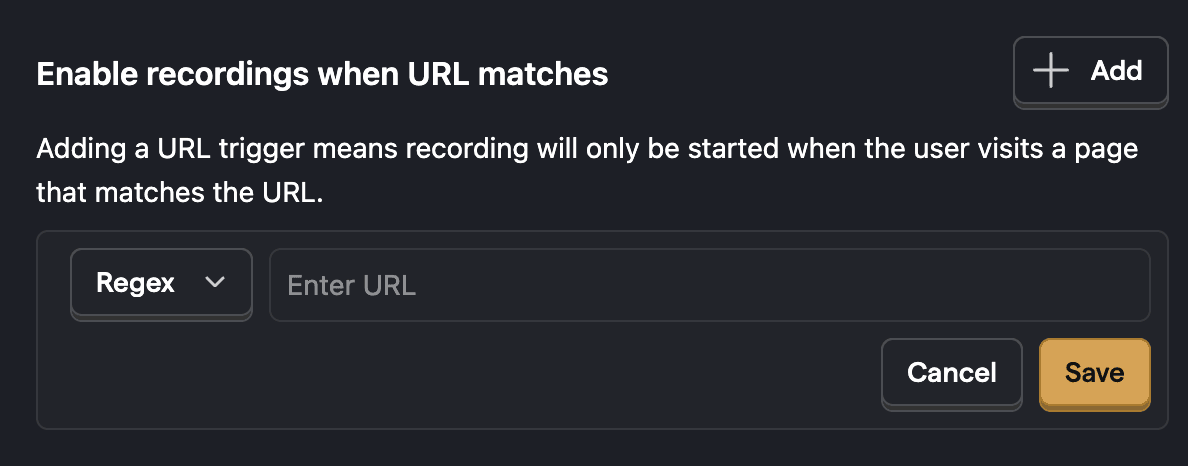
With URL trigger conditions
You can opt to only start recordings once your user visits a certain page. After the URL matches, the recording continues even after they leave the matching page. The client keeps a buffer in-memory (see how the buffer works below), so you'll still be able to see how they arrived at the page.
With Event trigger conditions
You can opt to only start recordings once your user emits a particular event. After the event is captured, the recording continues for the rest of the session. On the web, the client keeps a buffer in-memory (see how the buffer works below), so you'll still be able to see activity leading up to that event.


Event triggers are supported on the following SDKs:
- Web - posthog-js 1.186.0+
- iOS - 3.48.0+
- Android - 3.40.1+
- React Native - 4.52.0+
- Flutter - 5.25.0+
On mobile platforms, there's no URL or in-memory pre-buffer. Recording starts when the matching event is captured and continues for the rest of the session. A new session re-arms the trigger and requires a fresh matching event.
Triggering on exceptions
If you use error tracking, exceptions are captured as events. You can select the exception event as an event trigger to start session recording.


How the trigger buffer works
When using URL or event triggers, the client buffers recording data in-memory while waiting for a trigger to match. Here's how it works:
- While waiting for a trigger ("trigger pending"), the client takes a full snapshot once per minute
- Only data from the most recent snapshot up to when the trigger fires is kept
- This means the buffer contains up to 1 minute of activity before the trigger
The actual buffered duration varies depending on timing. For example:
- If a snapshot was taken 45 seconds before the trigger fires, you'll see ~45 seconds of activity before the trigger
- If a snapshot was taken 5 seconds before the trigger fires, you'll only see ~5 seconds of activity
This approach balances providing useful context with browser performance — keeping multiple snapshots would be more expensive for the browser.
Note: Full page navigations (page refreshes) clear the buffer and start over from a new snapshot.
With feature flags
You can select a feature flag to control whether to record sessions or not. Recordings will only be collected for users when the flag is enabled for them.
- Create a boolean or multiple variant flag that determines whether to record sessions or not.
- Go to the replay ingestion settings page.
- Link your newly created flag in the Enable recordings using feature flag.


Sampling
Sampling enables you to record a percentage of all sessions. To set a sampling rate, go to the replay ingestion settings page.
Sampling is supported on the following SDKs:
- Web - posthog-js 1.85.0+
- Android - 3.34.0+
- iOS - 3.42.0+
- React Native - 4.37.0+
- Flutter - 5.26.0+
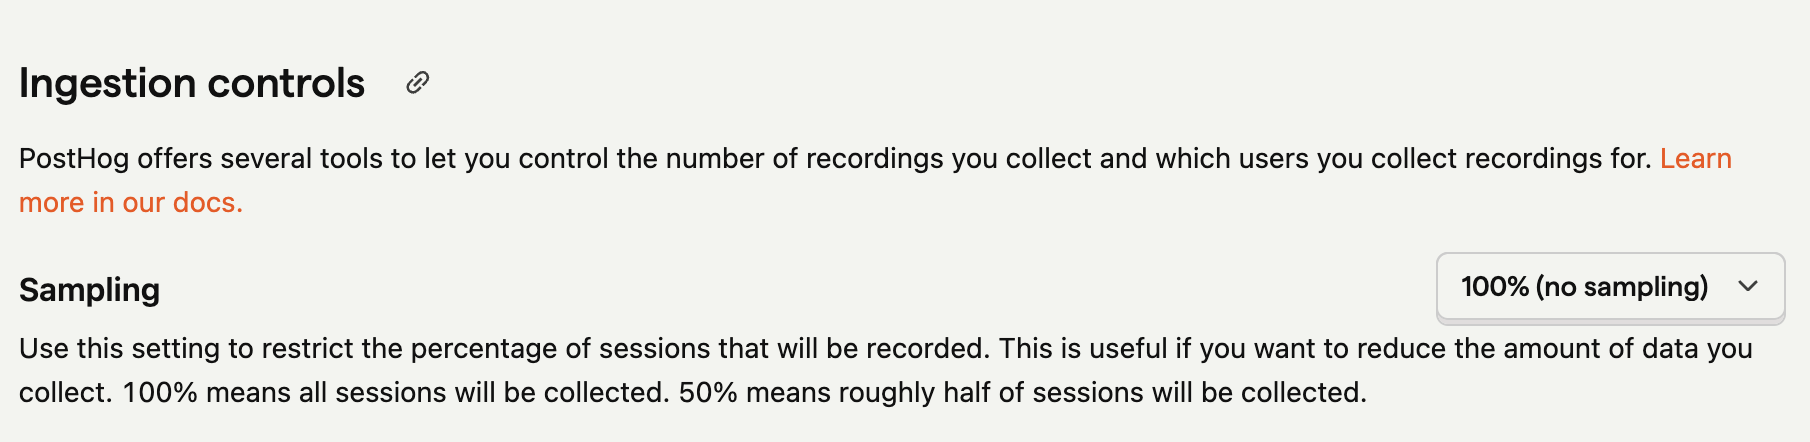
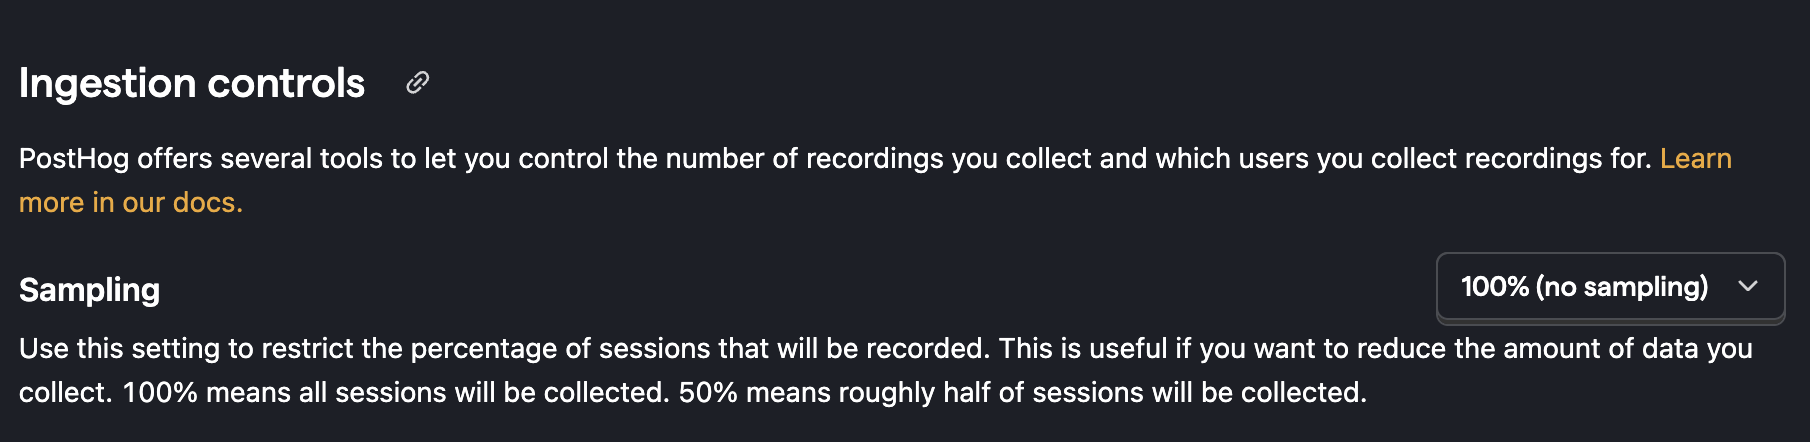
Our recommendation is to start with capturing 100% of sessions and decrease it as needed. This helps you get a sense of how many sessions you’re recording and how much data you’re collecting.
How sampling works
Sampling is deterministic based on the session ID. When a new session starts, PostHog converts the session ID into a number between 0 and 1 using a hash function. This number is then compared to your configured sample rate (for example, 0.1 for 10% or 0.2 for 20%).
If the generated number is less than the sample rate, the session is recorded. Because the same session ID always produces the same number, the decision to record or not is consistent throughout the session's lifetime.
This means:
- Sessions are selected based on their ID, not by time period or order
- The same session will always get the same recording decision, even across page refreshes
- At 20% sampling, roughly 20% of your unique sessions will be recorded, distributed evenly across your traffic
Note: Sampling reduces the number of sessions you record, but you cannot control which specific sessions are selected — the selection is determined by the session ID hash.
Combining controls
Since version 1.238.0 of the web SDK you can control how multiple triggers are combined. Choosing whether recording will start when all triggers match or when any trigger matches.
For example if you set an event trigger for Exception events, a URL trigger for the checkout page, and sampling to 20%.
With any matching
You'll capture 20% of every session, and any session that has an exception event or is on the checkout page.
With all matching
You'll capture 20% of any session on the checkout page that has an exception event.
If you use "any" matching with 100% sampling and other conditions (URL triggers, event triggers, or feature flags), the 100% sampling causes every session to be recorded. Your other conditions become ineffective because the sampling condition alone matches every session.
To fix this, either lower your sample rate or switch to "all" matching.
Trigger groups
Trigger groups are a more flexible way to configure recording triggers. Each trigger group can have its own combination of URL triggers, event triggers, feature flags, sample rate, minimum duration, and match type (ANY/ALL).
Multiple trigger groups can be active at the same time. A session is recorded if it matches any of your trigger groups. Within a group, conditions are combined based on that group's match type.
Note: Creating, editing, and deleting trigger groups requires project admin permissions. Non-admin project members can view trigger group configurations but cannot modify them.
For example, you could create:
- A group that records all sessions on your checkout page at 100% sample rate
- A group that records 10% of all sessions across your entire site
- A group that records any session where an exception event occurs
To create a trigger group, go to the replay ingestion settings page and click Add in the Trigger groups section.
If you delete your last trigger group, PostHog automatically replaces it with a default "Record all sessions" group at 100% sampling with no conditions. This keeps your project on trigger groups rather than reverting to legacy recording settings.
Migrating from legacy trigger settings
If you have existing legacy trigger settings (URL triggers, event triggers, feature flags, sampling, and match type configured outside of trigger groups), you can automatically convert them to trigger groups.
- Go to the replay ingestion settings page.
- Click Create from legacy triggers in the Trigger groups section.
- Review the preview of trigger groups that will be created.
- Click Create to confirm.
You can edit the groups after creating them.
Note: When your legacy settings use "ANY" match type with both trigger conditions (URLs, events, or feature flags) and sampling below 100%, the migration creates two groups:
- A group with your trigger conditions at a 100% sample rate
- A group with no conditions at your legacy sample rate
This preserves the original behavior where recording starts if any condition matches or the session was sampled.
Minimum duration
In your replay ingestion settings, you can set a minimum duration for sessions to be recorded.
Supported on the following SDKs:
- Web: posthog-js 1.291.0+
- iOS: 3.53.0+
- Android: 3.44.0+
- React Native: 4.52.0+
- Flutter: 5.24.3+
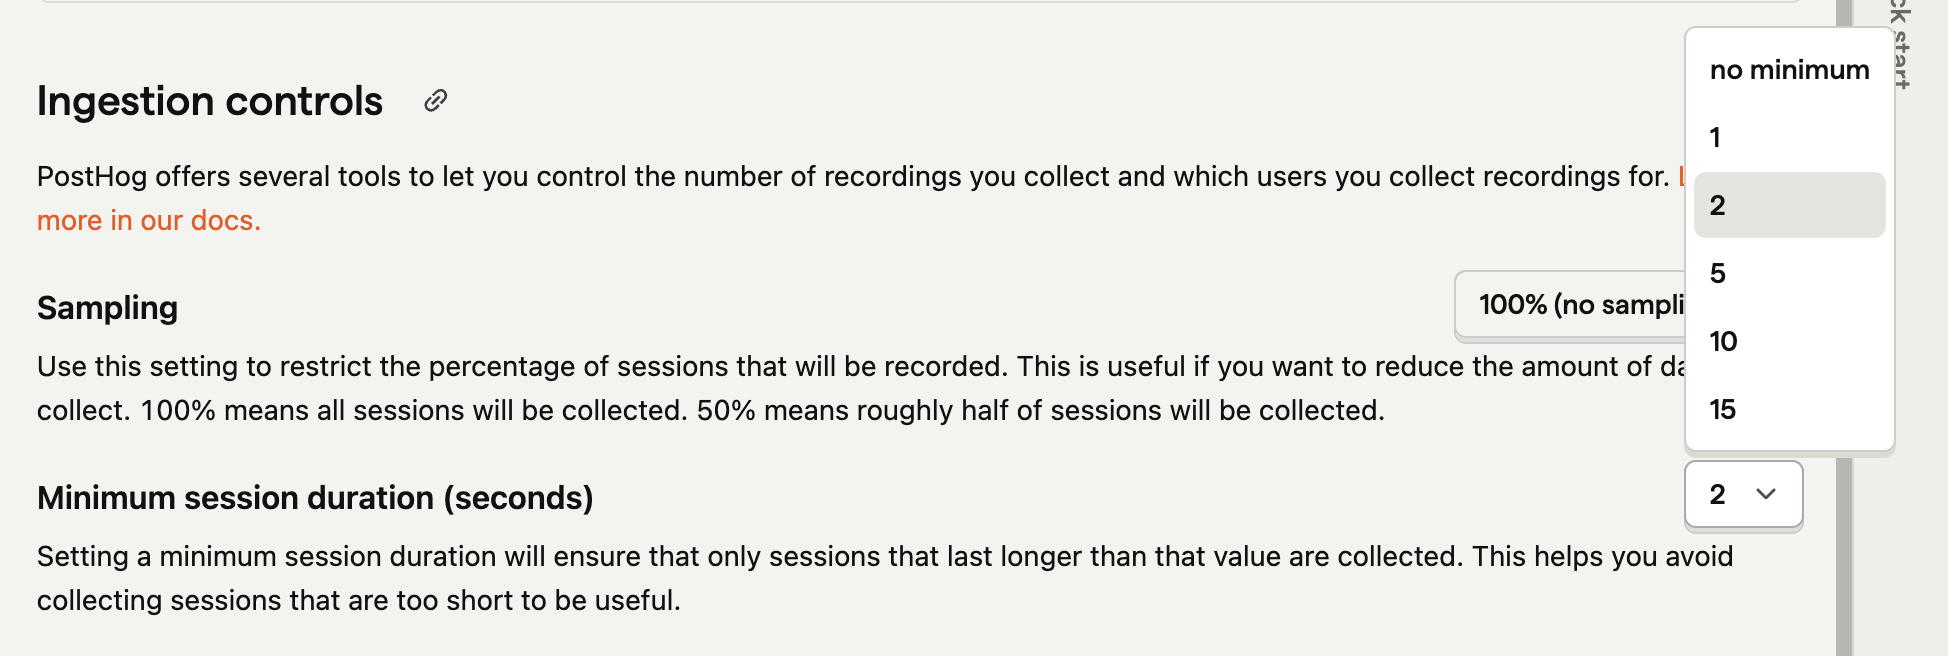
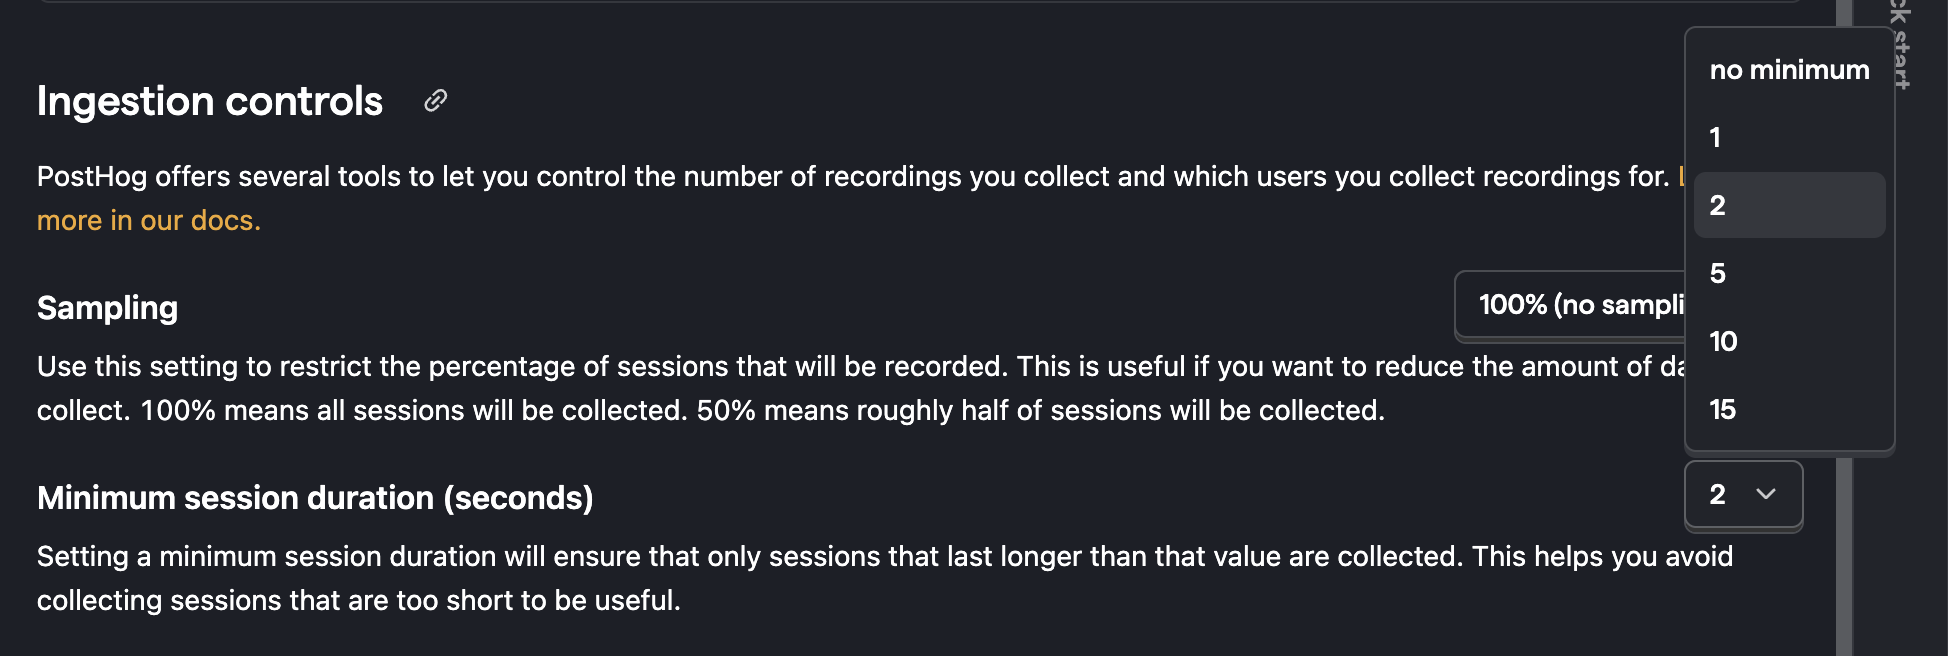
There are two modes for how minimum duration is enforced, controlled by the strictMinimumDuration configuration option. This is useful if you want to exclude sessions that are too short to be useful. For example, you might want to exclude sessions that are less than 2 seconds long to avoid recording sessions where users quickly bounce off your site.
Legacy mode (default)
In legacy mode (strictMinimumDuration: false or not set), the minimum duration is checked against the total session age. When a session starts, the browser records the start time. If the minimum duration has passed since the session start time, the recording data is sent to the backend.
Limitation: If you set a high minimum duration and your user visits multiple pages (causing full page refreshes), the in-memory buffer may be cleared by navigation. When the session reaches the minimum age, we'll start sending data, but you might miss the beginning of the session because the buffer was cleared by the page refresh.
For example, with a 12 second minimum:
- User visits page A for 6 seconds, then navigates to page B
- After 6 more seconds on page B (12 seconds total session age), we start sending the recording
- Result: You get 6 seconds of recording from page B, but miss the 6 seconds from page A
Strict mode (available in 1.291.0+)
In strict mode (strictMinimumDuration: true), the minimum duration is checked against the actual buffered recording data (from first to last timestamp), not the session age. We only start sending the recording once we have the minimum duration of continuous data in the buffer.
Note: This will become the default behavior in a future release. To opt in now, add to your config:
Key difference: If the user navigates to a new page before reaching the minimum duration, the buffer is cleared and we start over. The recording will only be sent once we have enough continuous data on a single page.
For example, with a 12 second minimum:
- User visits page A for 6 seconds, then navigates to page B
- The buffer is cleared on navigation
- User must stay on page B for 12 seconds before we start sending the recording
- Result: You get the full recording from page B once it reaches 12 seconds
Once a session has passed the minimum duration threshold on any page, subsequent page navigations in the same session will continue to send recordings immediately.
This mode is more accurate for filtering out short sessions, especially on sites with full page refreshes, but may result in missing more session data if users bounce quickly across multiple pages.
Choosing the right mode
- Use legacy mode if you want to capture as much session data as possible and are okay with potentially missing early parts of sessions after page refreshes
- Use strict mode if you want to ensure you only record sessions where users actually spend the minimum duration on a single page, accepting that you may miss more bouncing users
Mobile behavior
On mobile, minimum duration is enforced using buffer length, similar to web strict mode:
- Snapshots are buffered, and PostHog checks the duration of buffered replay data (from the oldest to newest buffered snapshot)
- Recording starts sending only after that buffered duration reaches the configured minimum duration
- After this threshold is reached once in a session, new snapshots are sent normally for the rest of that session
If the session changes before the threshold is reached, the buffer is cleared, and the next session starts buffering from zero.
Billing Limits
You can set a billing limit. We'll stop ingesting recordings when you reach your limit.