


How to setup Ghost analytics and session replay

Contents
With all the drama in the world of WordPress, it’s a great time to explore Ghost, a robust blogging and newsletter CMS. You can self-host Ghost on your own server, or lean on managed hosting from Ghost.org.
However you host, adding PostHog for web analytics, product analytics, and session replay is a quick process that gives you immediate insight about how people are finding your site, enjoying your writing, and exploring your archives. PostHog is free, so sign up and follow along.
Adding PostHog using Ghost’s code injection
Grab the PostHog snippet from your project settings:
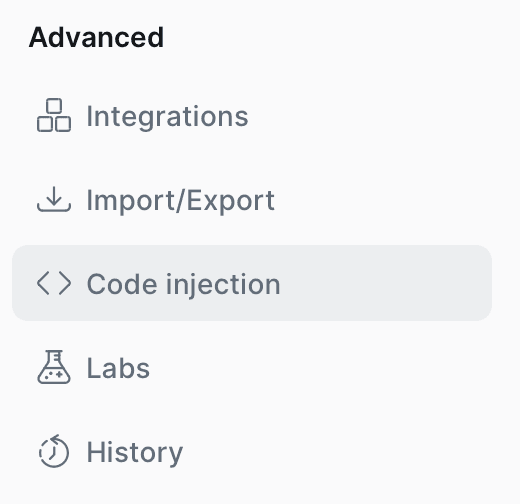
In your Ghost publication’s settings, click the settings button, labeled with a gear icon:

Scroll toward the bottom of the sidebar, looking for Advanced, and select Code Injection. Open the code injection setting:
Paste the PostHog script into the Site header code block:
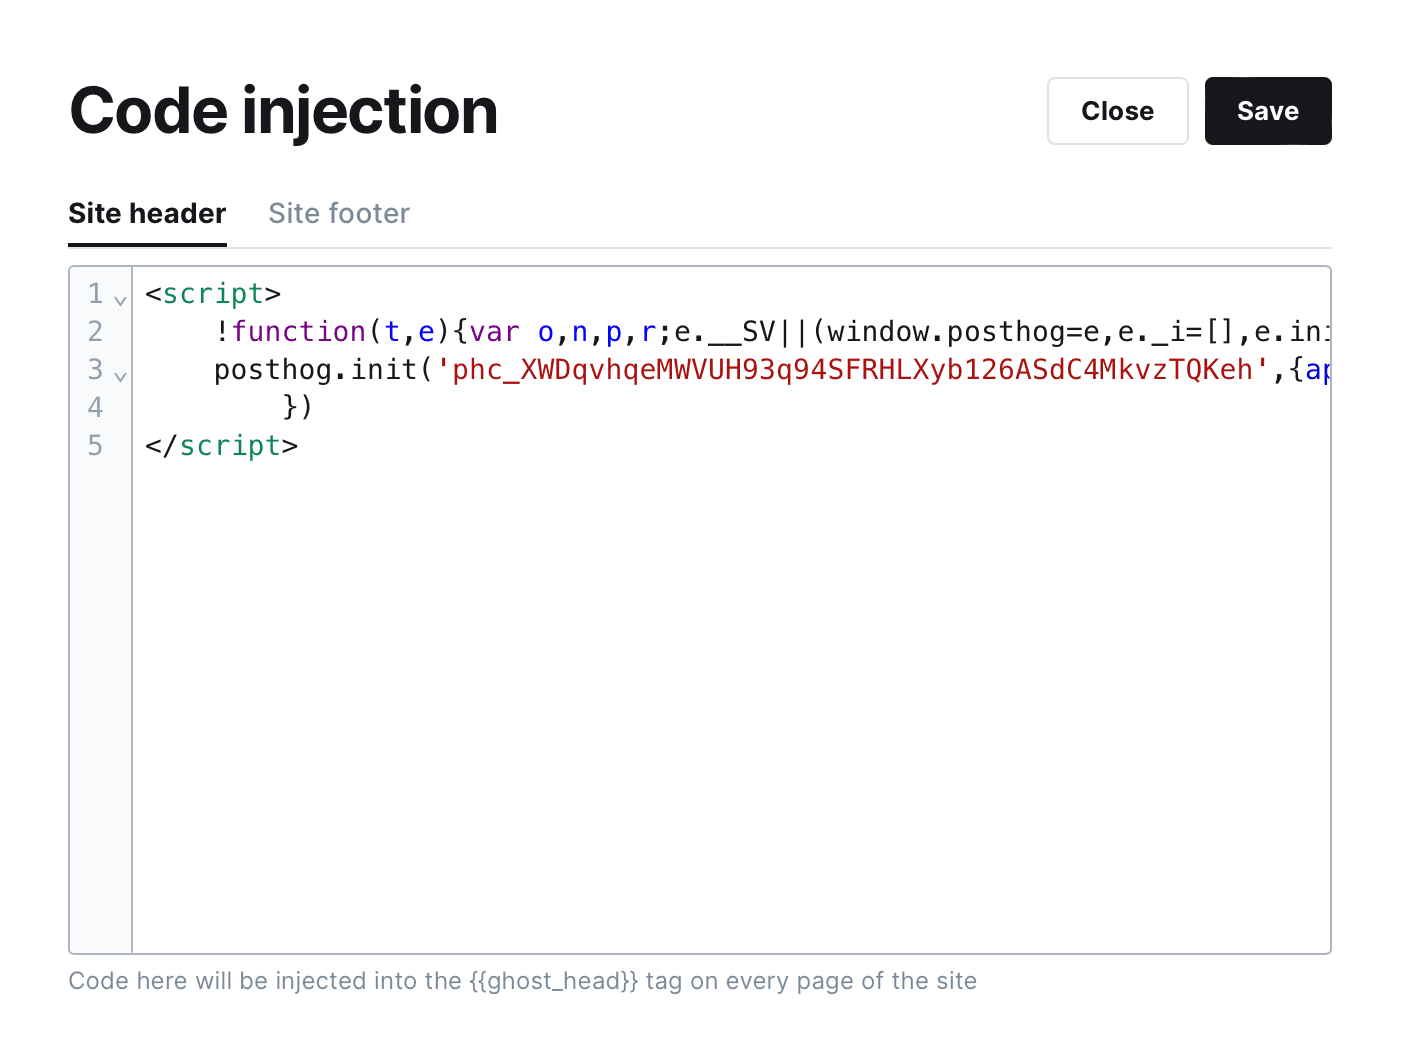
Click Save, and you’re all set. Explore your blog to generate some activity, then head to PostHog to see the results.
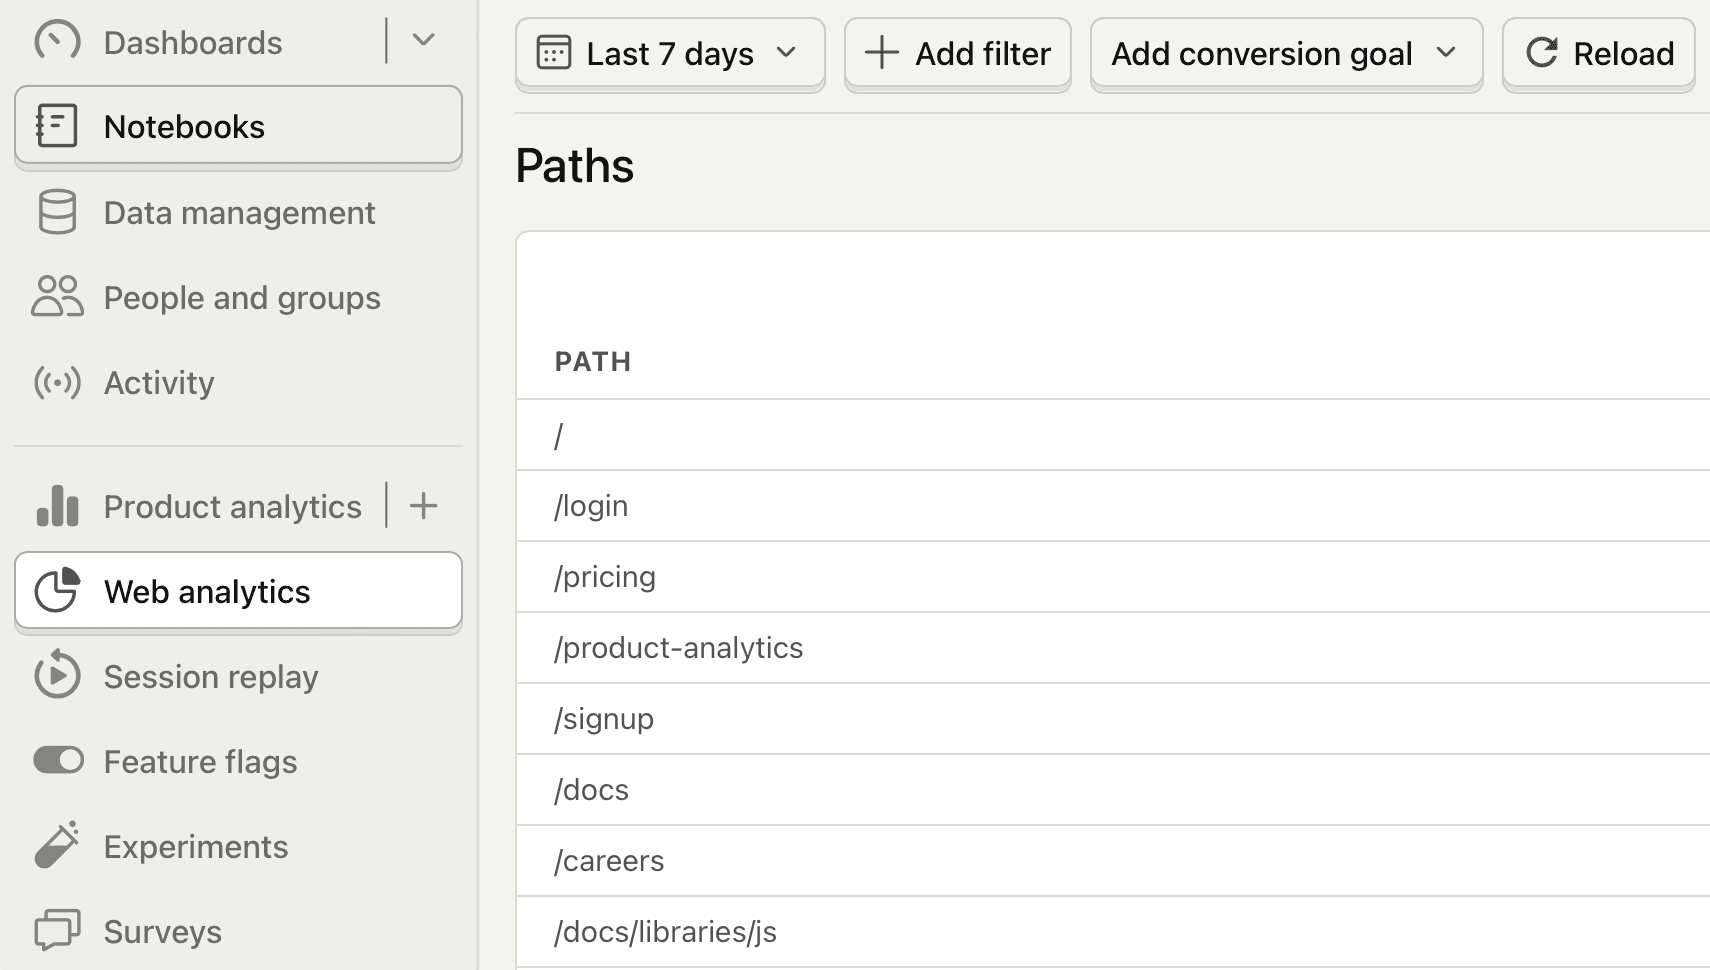
Hit the web analytics tab to see the basics, including your top-performing content in the paths report. Channels will show you high level traffic sources. Use the retention report to see how often readers are coming back once they find you.
Once set up, you can enable session replay in your project settings under Record user sessions to give you a look at real reader behavior through your site. Click its tab to explore replays.
Further reading
- What to do after installing PostHog in 5 steps
- How to track performance marketing in PostHog
- How to do cookieless tracking with PostHog

Subscribe to our newsletter
Product for Engineers
Read by 100,000+ founders and builders
We'll share your email with Substack
PostHog is the leading platform for building self-driving products. With a full suite of developer tools – AI observability, product analytics, session replay, feature flags, experiments, error tracking, logs, and more – PostHog captures all the context agents need to diagnose problems, uncover opportunities, and ship fixes. A data warehouse and CDP tie it all together, unifying that context into one source agents can read across. You can steer it all from Slack, the web app, the desktop (PostHog Code), or your own editor via the MCP.