How to use PostHog in a web worker

Dec 18, 2024

Web workers enable you to run computationally expensive tasks or scripts in background threads. This prevents the main webpage thread from slowing down or being blocked.

Because the web worker runs on a background thread, it can't access the DOM, browser APIs, or window object methods. Instead, it communicates with the main thread through a messaging system.

This means PostHog requires a different setup for a web worker than a normal web implementation. This tutorial helps you with this different setup by building a basic app with a web worker script and then setting up PostHog to work with it.

Creating our basic app with a web worker

To start, we'll create our worker.js file. This will receive a message from the main thread, do some "heavy" math work, and then return the results back.

JavaScript
// worker.js
onmessage = function(e) {
if (e.data === 'start') {
let result = performWork();
// Send the result back to the main thread
postMessage(result);
}
};
function performWork() {
// Simulate some heavy computation
let result = 0;
for(let i = 0; i < 1000000; i++) {
result += Math.sqrt(i);
}
return result;
}

Next, we create an index.html file in the same folder to trigger the web worker and display the results:

HTML
<!DOCTYPE html>
<html>
<head>
<title>Web worker tutorial</title>
</head>
<body>
<button onclick="startTask()">Start Task</button>
<div id="result"></div>
<script>
function handleWorkerMessages() {
const worker = new Worker('worker.js');
worker.onmessage = function(e) {
document.getElementById('result').textContent = `Result received: ${e.data}`;
};
return worker;
}
function startTask() {
const worker = handleWorkerMessages();
worker.postMessage('start');
}
</script>
</body>
</html>

Finally, we need to run a basic server because web workers can only be loaded from proper web servers, not from local files. We use Python's built-in server to do this:

Terminal
python3 -m http.server

Once you run that script, we can go to http://localhost:8000 and click Start Task to see our web worker in action.
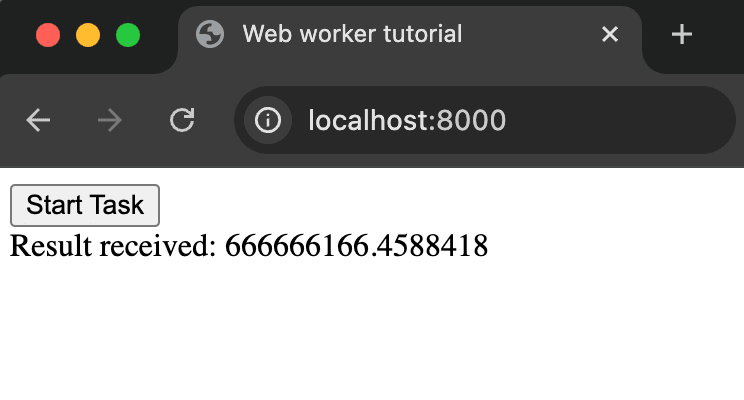
Web worker working

Adding PostHog to our app

Because of the limitation of web workers, we can't simply add PostHog to the worker.js file. Instead, we start by adding the script snippet to the index.html file. This requires your project API key and client API host, both of which you can get in your project settings.

Our updated index.html file will look like this:

HTML
<!DOCTYPE html>
<html>
<head>
<title>Web worker tutorial</title>
<script>
!function(t,e){var o,n,p,r;e.__SV||(window.posthog=e,e._i=[],e.init=function(i,s,a){function g(t,e){var o=e.split(".");2==o.length&&(t=t[o[0]],e=o[1]),t[e]=function(){t.push([e].concat(Array.prototype.slice.call(arguments,0)))}}(p=t.createElement("script")).type="text/javascript",p.crossOrigin="anonymous",p.async=!0,p.src=s.api_host.replace(".i.posthog.com","-assets.i.posthog.com")+"/static/array.js",(r=t.getElementsByTagName("script")[0]).parentNode.insertBefore(p,r);var u=e;for(void 0!==a?u=e[a]=[]:a="posthog",u.people=u.people||[],u.toString=function(t){var e="posthog";return"posthog"!==a&&(e+="."+a),t||(e+=" (stub)"),e},u.people.toString=function(){return u.toString(1)+".people (stub)"},o="init capture register register_once register_for_session unregister unregister_for_session getFeatureFlag getFeatureFlagPayload isFeatureEnabled reloadFeatureFlags updateEarlyAccessFeatureEnrollment getEarlyAccessFeatures on onFeatureFlags onSessionId getSurveys getActiveMatchingSurveys renderSurvey canRenderSurvey getNextSurveyStep identify setPersonProperties group resetGroups setPersonPropertiesForFlags resetPersonPropertiesForFlags setGroupPropertiesForFlags resetGroupPropertiesForFlags reset get_distinct_id getGroups get_session_id get_session_replay_url alias set_config startSessionRecording stopSessionRecording sessionRecordingStarted captureException loadToolbar get_property getSessionProperty createPersonProfile opt_in_capturing opt_out_capturing has_opted_in_capturing has_opted_out_capturing clear_opt_in_out_capturing debug".split(" "),n=0;n<o.length;n++)g(u,o[n]);e._i.push([i,s,a])},e.__SV=1)}(document,window.posthog||[]);
posthog.init(
'<ph_project_api_key>',
{
api_host: 'https://us.i.posthog.com',
advanced_disable_decide: true
}
);
</script>
</head>
<body>
<button onclick="startTask()">Start Task</button>
<div id="result"></div>
<script>
function handleWorkerMessages() {
const worker = new Worker('worker.js');
worker.onmessage = function(e) {
document.getElementById('result').textContent = `Result received: ${e.data}`;
};
return worker;
}
function startTask() {
const worker = handleWorkerMessages();
worker.postMessage('start');
}
</script>
</body>
</html>

Note: We disable advanced_disable_decide as it causes a CORS error on our local server. This isn't the case in production so you shouldn't do this for a production-ready app.

Making PostHog work with the web worker

To make PostHog work with a web worker, we can set up a new posthog_event message in worker.js that includes the event name and properties.

JavaScript
// worker.js
onmessage = function(e) {
if (e.data === 'start') {
let result = performWork();
// Send PostHog event back to main thread
postMessage({
type: 'posthog_event',
eventName: 'worker_task_completed',
properties: {
result: result,
duration_ms: 1000
}
});
// Send the result back to the main thread
postMessage(result);
}
};
// ... rest of your existing code

We can then handle update the handleWorkerMessages function to handle the posthog_event message in index.html with our web PostHog initialization.

HTML
<!-- ... your existing code -->
<script>
function handleWorkerMessages() {
const worker = new Worker('worker.js');
worker.onmessage = function(e) {
if (e.data && e.data.type === 'posthog_event') {
posthog.capture(e.data.eventName, e.data.properties);
} else {
document.getElementById('result').textContent = `Result received: ${e.data}`;
}
};
return worker;
}
// ... your existing code

Now, when we run our task, we'll also see a worker_task_completed event captured in PostHog.

PostHog web worker event capture

You can use this strategy of posting messages back and forth to use any of PostHog's functionality like feature flags or A/B testing.

Further reading

Questions? Ask Max AI.

It's easier than reading through 562 docs articles.

Comments