


How to create sticky feature flags

Contents
Sticky feature flags ensure users maintain their original variant assignment even after rollout conditions change. This is crucial for experiments where you need consistent user experiences throughout the test period, regardless of changes to targeting rules or rollout percentages.
This tutorial shows how to set up sticky feature flags in PostHog by combining person properties with feature flag conditions to guarantee consistent variant assignments.
The problem with regular feature flags
Regular feature flags can reassign users to different variants when you modify rollout conditions. For example:
- You start an A/B experiment with 50% of users seeing variant A
- Later, you decrease it to 25% rollout
- Some users who previously saw variant A might now see variant B
This inconsistency can skew your experiment results and create a poor user experience.
How sticky flags work
Sticky flags solve this by:
- Setting a person property when a user first evaluates the flag
- Adding override conditions to the flag that check for existing assignments
- Guaranteeing consistency by prioritizing the stored assignment over new rollout rules
Setting up sticky feature flags
Step 1: Create your feature flag
First, create your feature flag in PostHog:
- Go to Feature Flags and click New feature flag
- Set your flag key (e.g.,
sticky-experiment) - Configure your initial rollout conditions
- Save the flag
Step 2: Capture person properties on evaluation
When evaluating the flag in your code, capture the result as a person property. Here's an example using the JavaScript SDK:
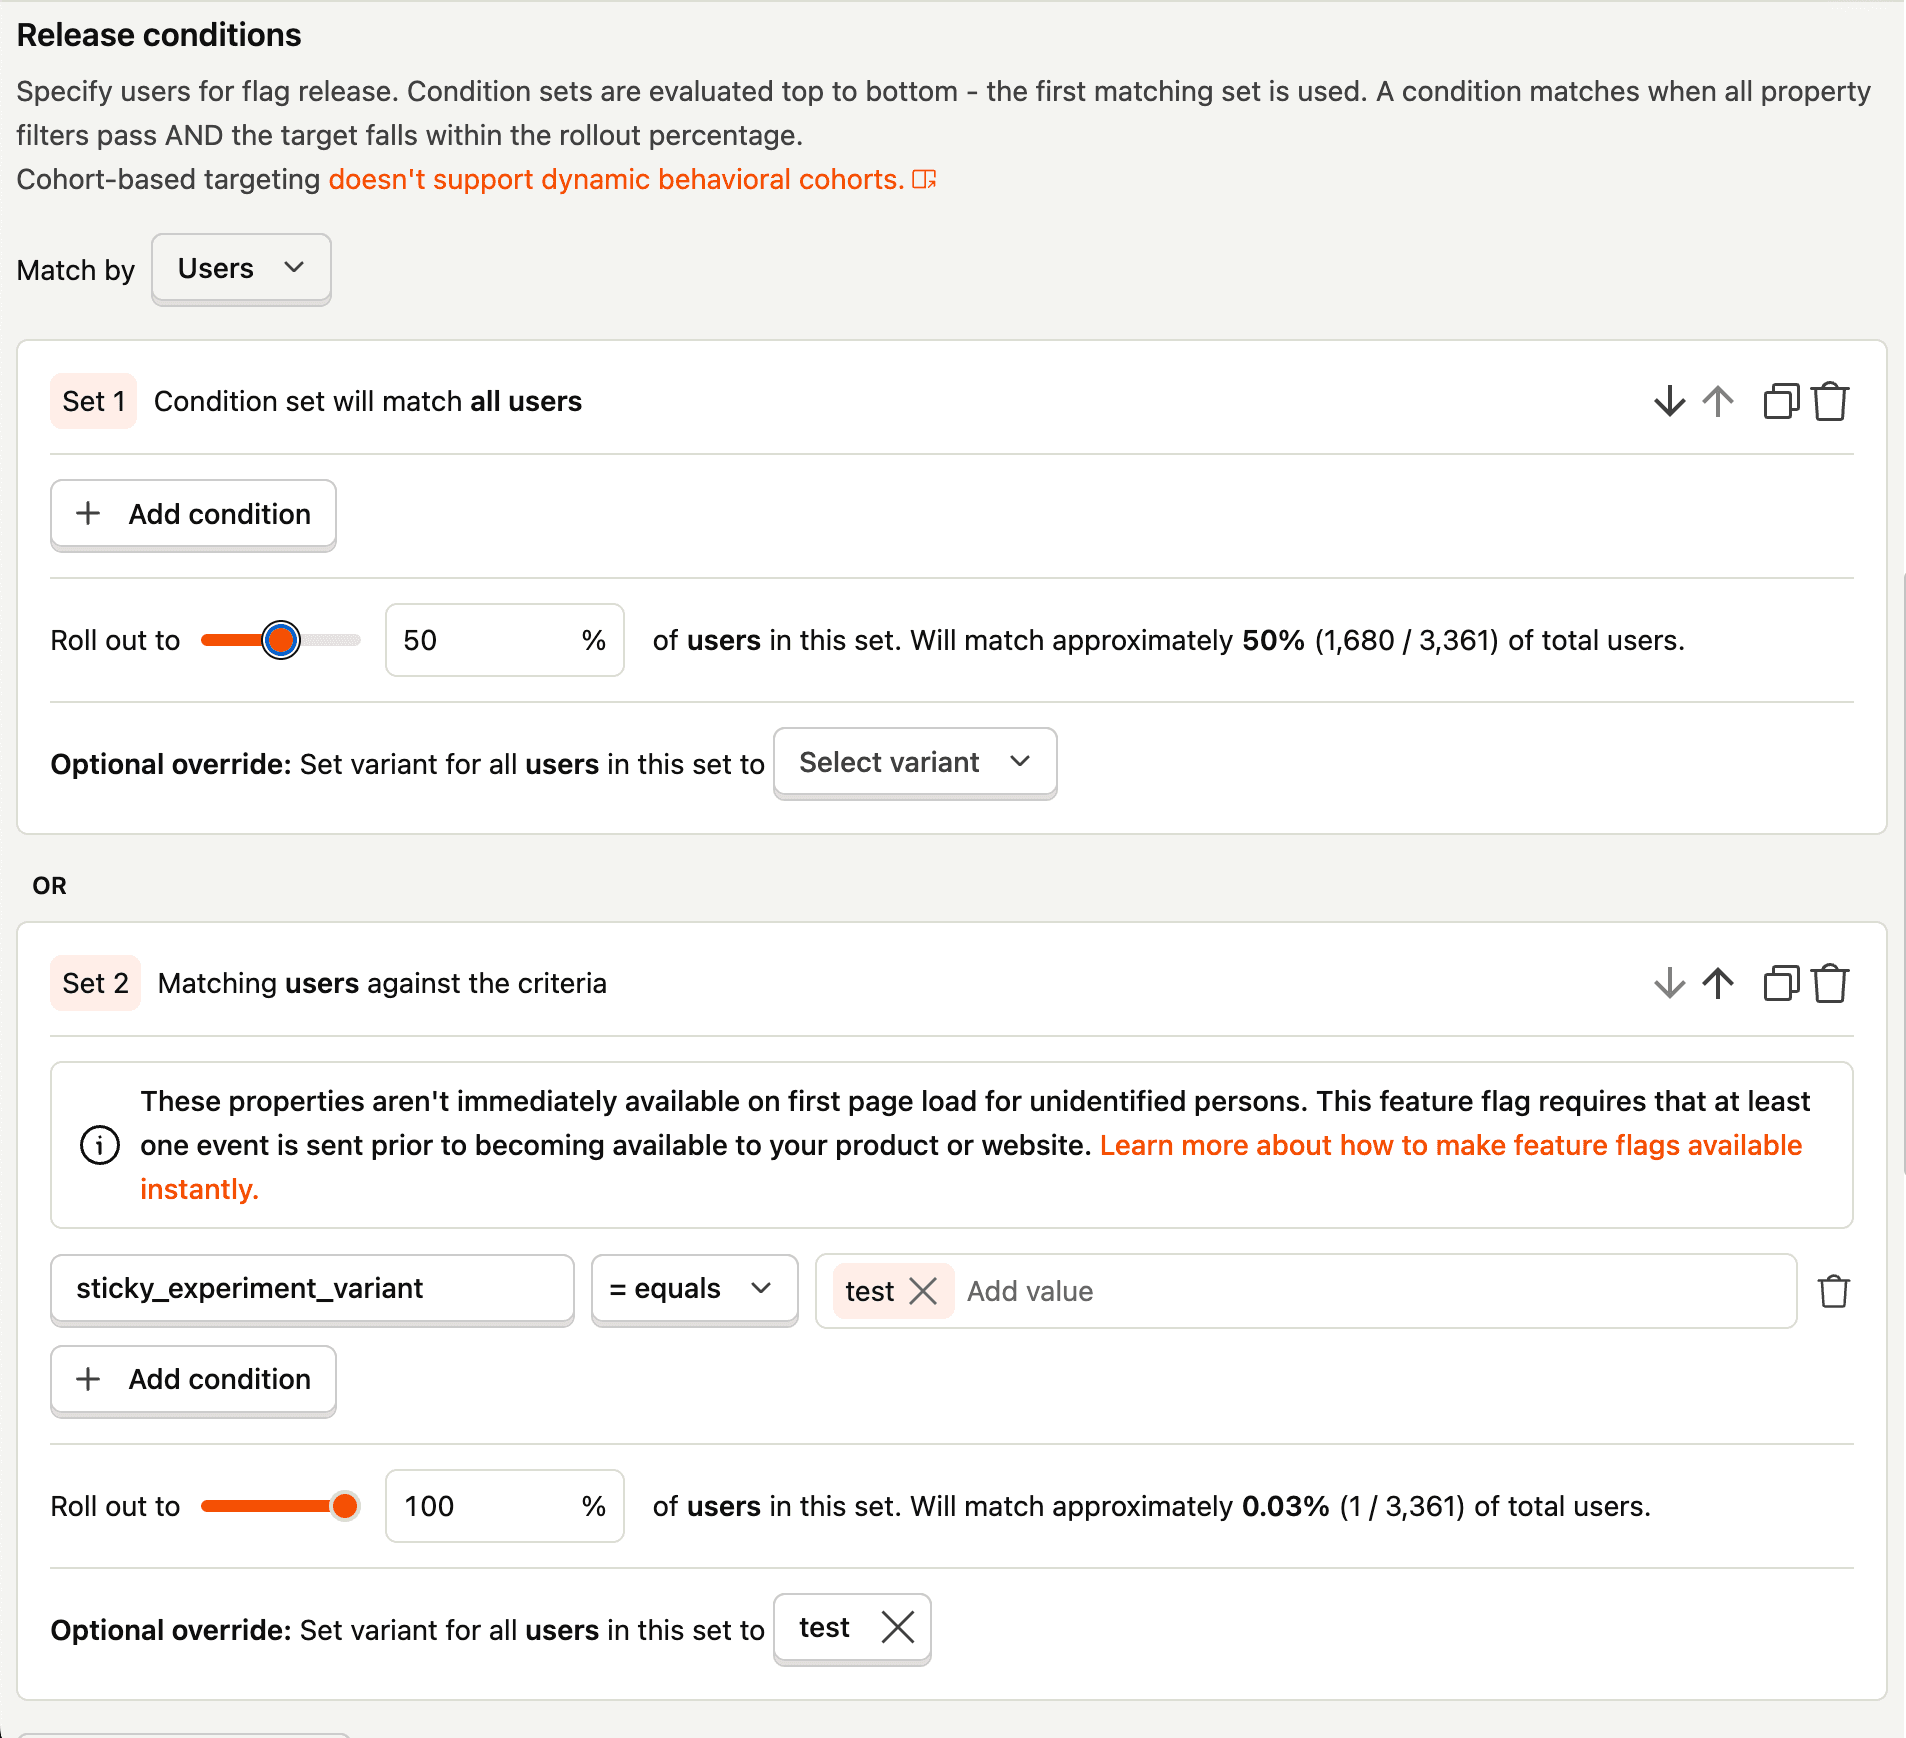
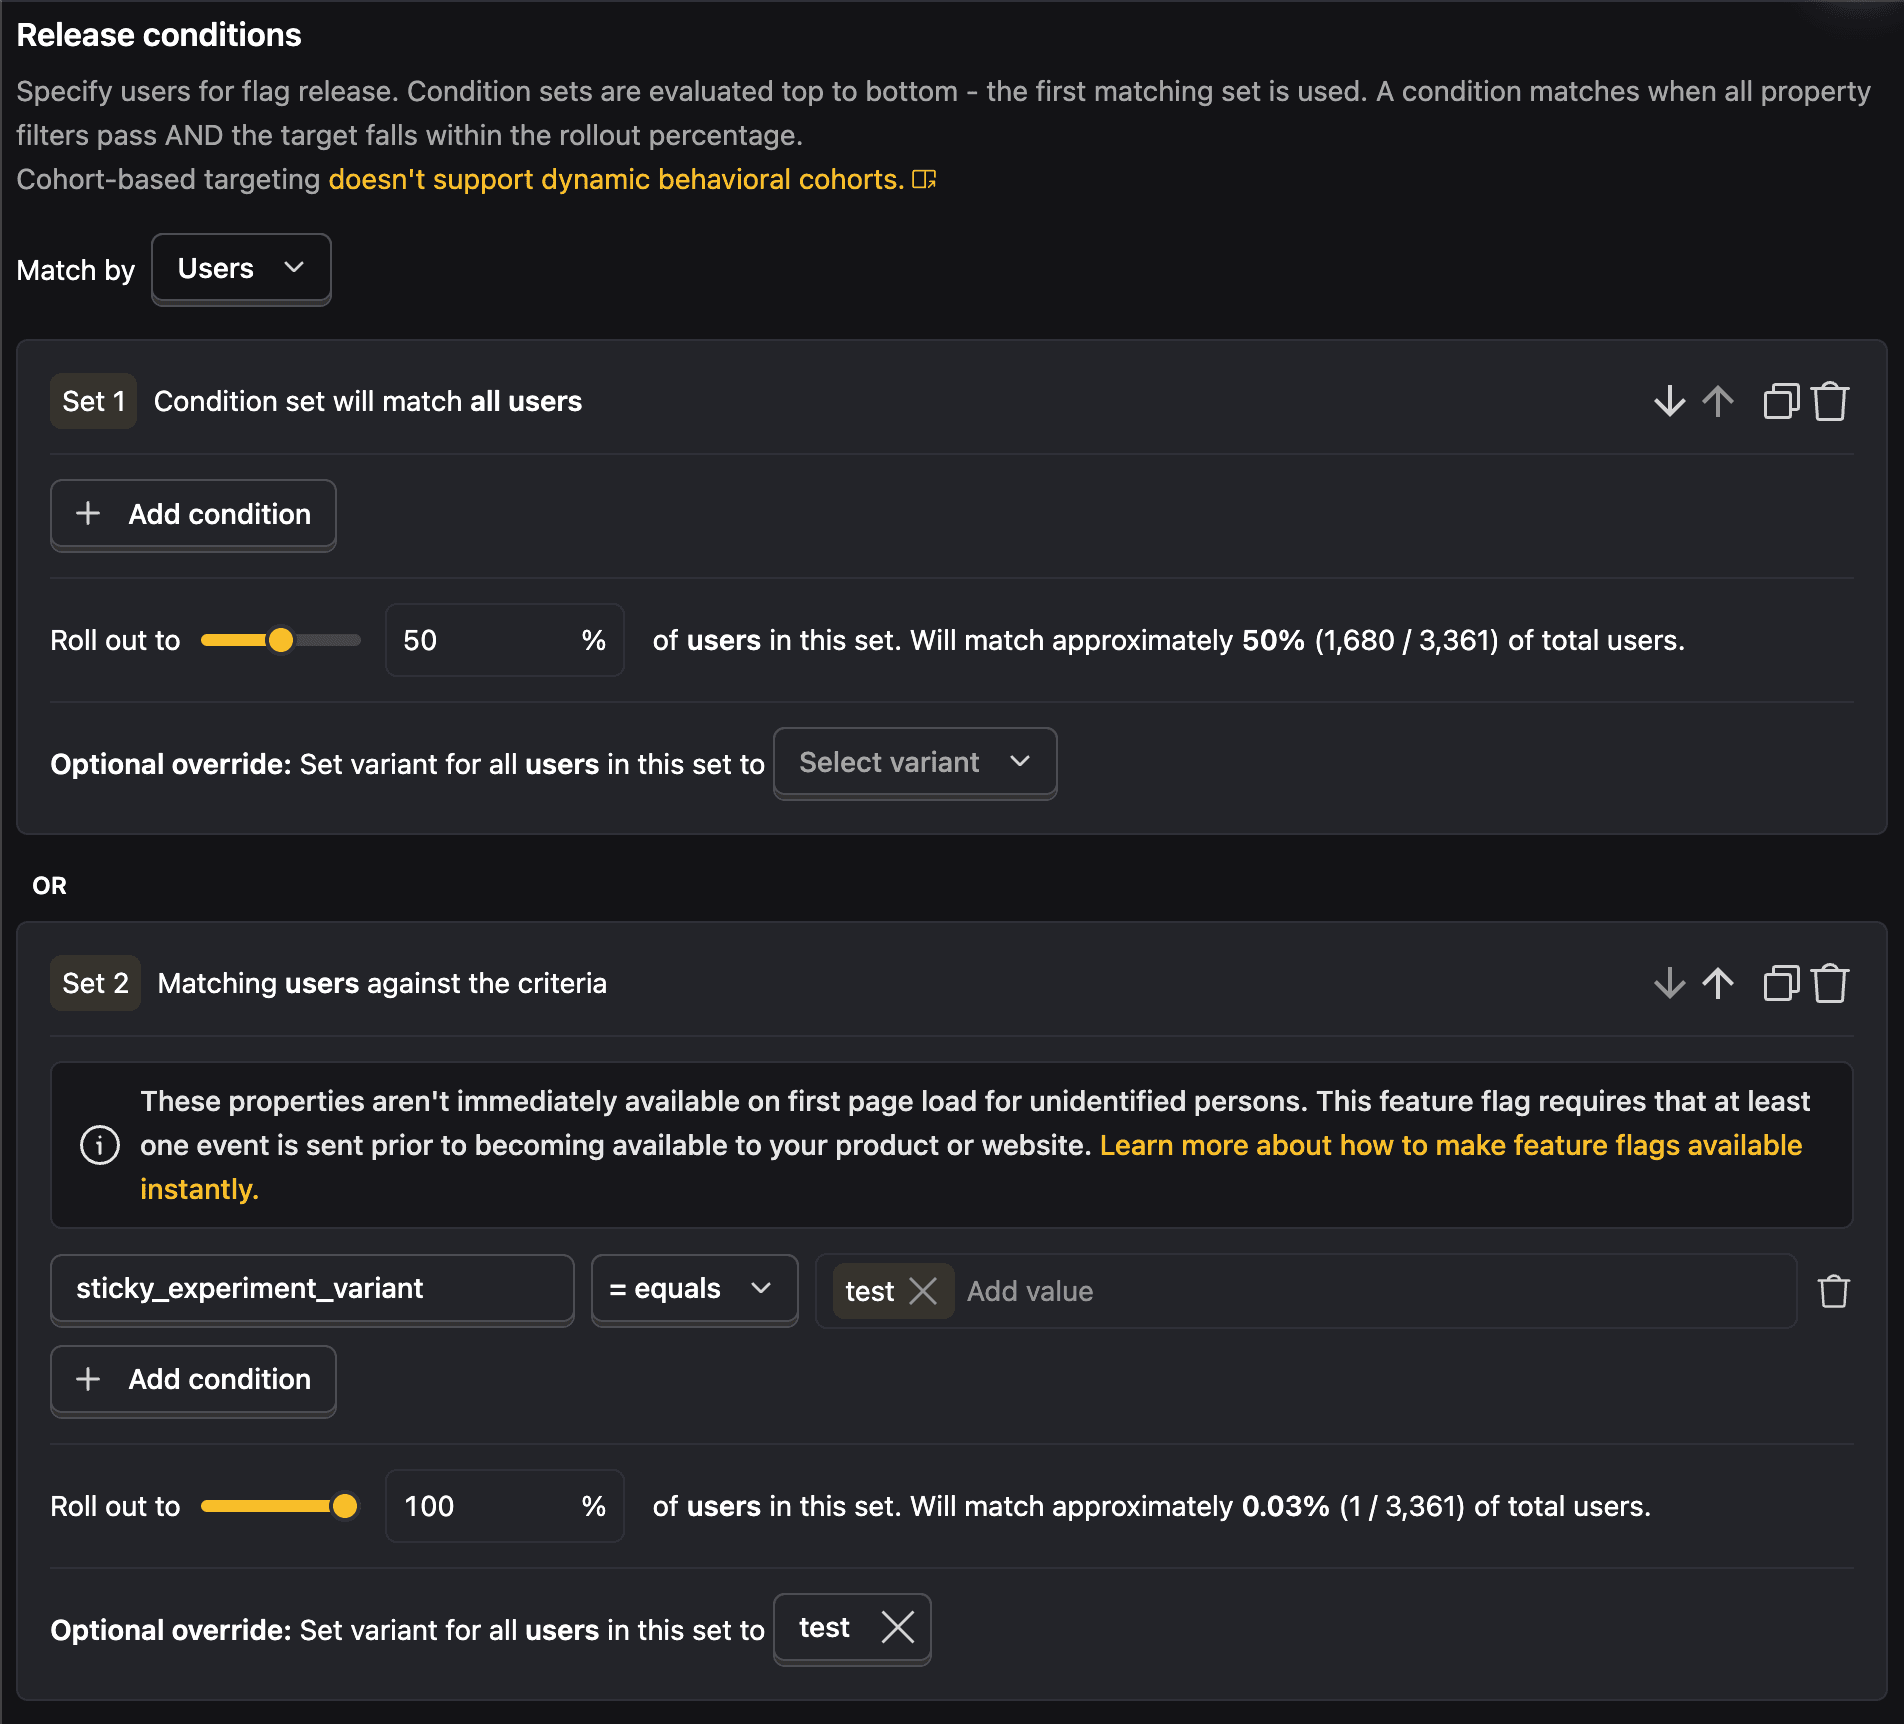
Step 3: Add override conditions to your flag
Now update your feature flag to check for existing assignments:
- Go back to your feature flag in PostHog
- Add new release conditions above your existing conditions
- Set up override rules for each variant:
For test variant override:
- Release condition: 100% of users where
sticky_experiment_variantequalstest - Value:
true(or your test variant value)
For control variant override:
- Release condition: 100% of users where
sticky_experiment_variantequalscontrol - Value:
false(or your control variant value)
Keep your original rollout conditions below these overrides for new users.
The flag will now:
- First check if the user has an existing assignment (override conditions)
- If yes, return that stored value
- If no assignment exists, evaluate using your original rollout conditions
Example implementation
Here's a complete example using React:
Server-side implementation
For server-side applications, the pattern is the same:
Best practices
When to use sticky flags
Use sticky flags for:
- A/B tests and experiments where consistent assignment is critical
- Personalization features where consistency improves user experience
When not to use sticky flags
Avoid sticky flags for:
- Simple on/off toggles where switching variants is acceptable
- Emergency kill switches where you need immediate universal changes
- Short-term features where the overhead isn't worth it
Managing sticky flags
Removing stickiness: To stop the sticky behavior, simply remove the override conditions from your flag. Users will then be re-evaluated using your main rollout conditions.
Cleaning up: After your experiment concludes, you can remove the person properties if desired, though they don't impact performance if left in place.
Property naming: Use clear, descriptive names for your person properties like experiment_name_variant to avoid conflicts.
Troubleshooting
Flag not updating: Person properties take a few seconds to propagate. If testing immediately after first evaluation, you might see inconsistent behavior. Wait 10-15 seconds between tests.
Further reading
Subscribe to our newsletter
build mode
Read by 75,000+ founders and builders
We'll share your email with Substack
PostHog is the leading platform for building self-driving products. With a full suite of developer tools – AI observability, product analytics, session replay, feature flags, experiments, error tracking, logs, and more – PostHog captures all the context agents need to diagnose problems, uncover opportunities, and ship fixes. A data warehouse and CDP tie it all together, unifying that context into one source agents can read across. You can steer it all from Slack, the web app, the desktop (PostHog Desktop), or your own editor via the MCP.