


How to set up a public beta program using early access management

Contents
Public betas are a way to get new features into the hands of users and get valuable feedback and analytics. In this tutorial, we show you how to add a basic public beta program to your app with PostHog’s early access management feature.
Our example uses Next.js, but this also works for other frameworks and languages.
Already have an app and PostHog set up? Skip creating the beta feature.
Creating a Next.js app and adding PostHog
First, create a Next.js app. To do so, install Node and run the command below. Select No for TypeScript, Yes for use app router, and the defaults for every other option.
Next, we go into our newly created beta-program folder and install PostHog.
After this, we initialize PostHog. Create a providers.js file in the app folder, then set up PostHog with your project token and instance address (which you get from your project settings). Make sure to include the use client directive, a check for the window, and opt-in to site apps (which we will use later).
We then import the PHProvider into layout.js and wrap our app in it.
After setting this all up and running npm run dev, we are ready to set up our public beta program.
Creating our beta feature in PostHog
Next, we create our beta feature in PostHog. As an example, we create a beta for a new set of docs.
To start, go to the early access management tab in PostHog and click "New public beta." Give your beta a name like "New docs," any other details you want, and click "Save as draft." This automatically creates a feature flag we can use. Finally, click "Release beta."
Adding our beta functionality
Next, we add our beta functionality. To do this, we check our new-docs feature flag with useFeatureFlagEnabled to show more documentation on our main page.js page.
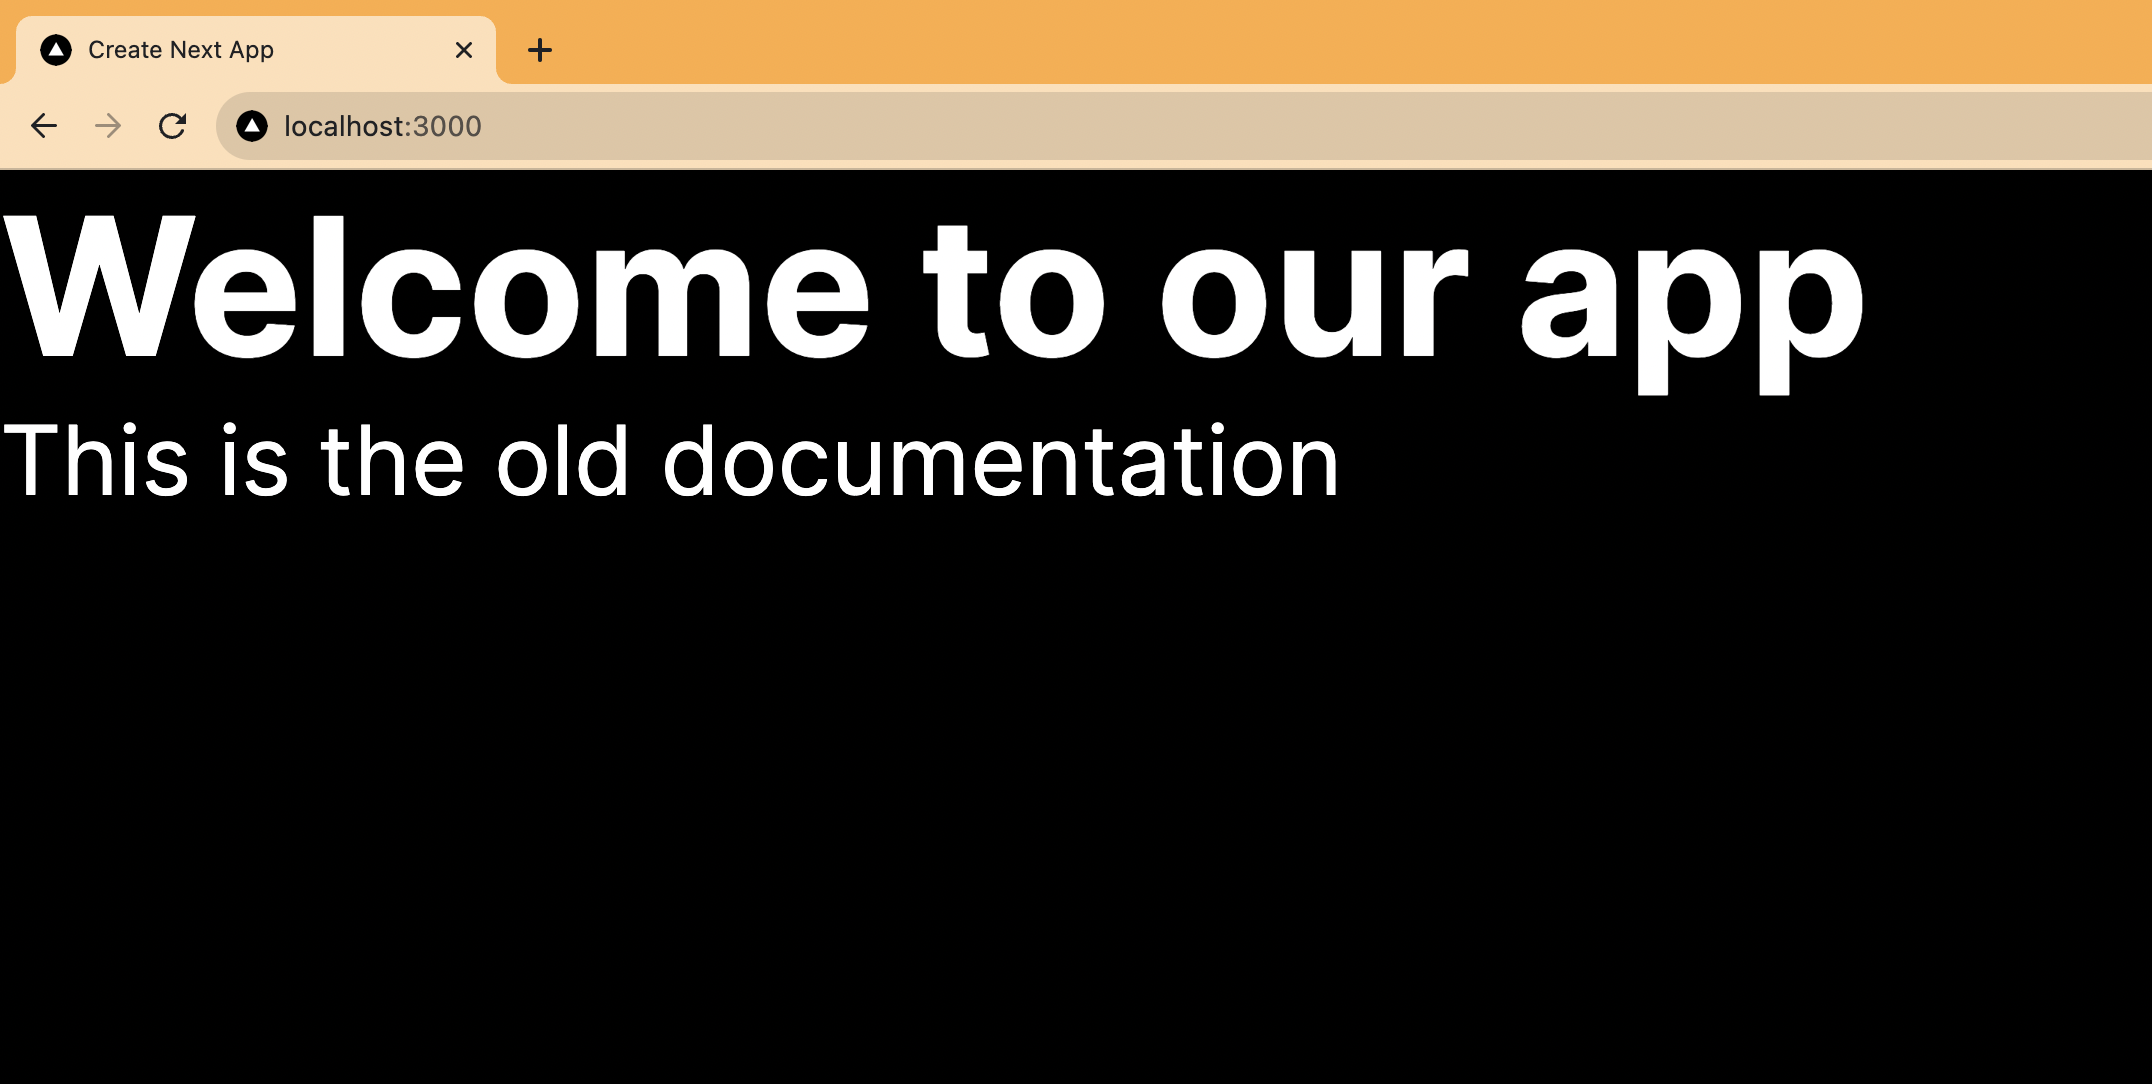
When we run npm run dev again and go to our localhost, we see the old documentation because we haven’t joined the beta yet.
Adding our public beta opt-in to our app
To make this beta a public one, we need a way for people to opt in on our site. The easiest way to do this is using PostHog’s early access modal site app.
To set this up, search for the "Early Access Features App," enable it, set a selector of #beta-button, and press save.
Because we set opt_in_site_apps: true in config earlier, all we do is add a button to our page.js file with the ID of beta-button. Clicking this button opens a modal that enables users to opt into public betas for your app.
When you head back to your browser and click the "Public Betas" button, a modal pops up allowing users to opt into the "New docs" beta. Once they do this, they see the new text we added behind the flag earlier.

This is a simple example of a public beta you can set up. At PostHog, we’ve used early access management to run public betas for full features like surveys, notebooks, and our data warehouse.
Creating a beta opt-in page
For full control over our beta opt-in page, we can create a custom page instead of using the modal.
To do this, first, create a new folder named beta. In this beta folder, create a file named page.js. In this file, we will:
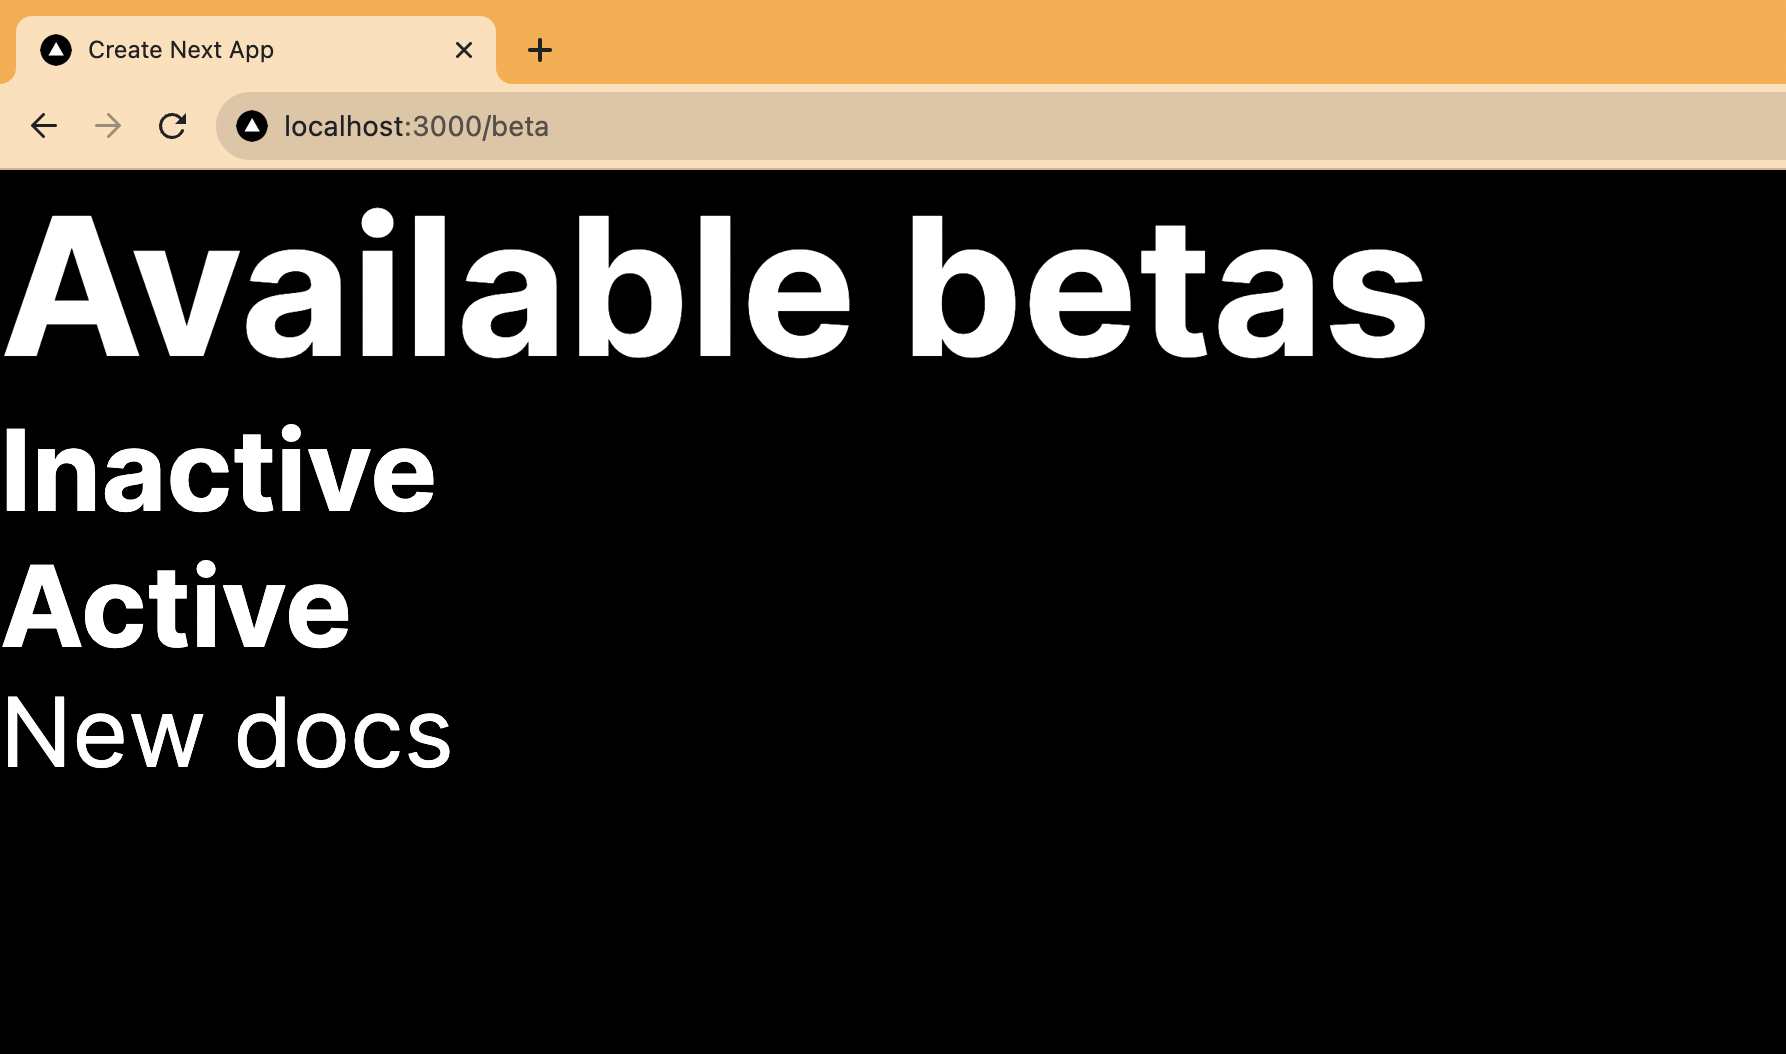
- Check for available betas and active feature flags.
- Create two lists: currently active betas and currently inactive betas.
- Display each list on the page with buttons to opt in or out of the beta.
- Toggle their early access enrollment when they click those buttons.
First, set up a basic page with PostHog, our active flags, states for active and inactive betas, and spots to display both of them.
Next, we set up a useEffect hook for our key logic. It filters the early access features (from getEarlyAccessFeatures) into active and inactive betas depending on if the flag key exists and then sets those two filtered lists in their states. We also just set all betas to inactive if they don’t have any active flags.
We then map the active and inactive beta states on our page.
This displays the active and inactive betas (you can create and launch another inactive beta feature to show that it works if you want).
The last piece is adding buttons to let users opt-in and out. To do this, we create a function that checks if the related flag key is in the activeBetas state.
- If the flag key is active, it then calls
updateEarlyAccessFeatureEnrollmentwith the key andfalse, removing them from the beta, and updates theactiveBetasstate. - If the flag key is inactive, it does the opposite. It calls
updateEarlyAccessFeatureEnrollmentwith the key andtrue,and removes them frominactiveBetasstate.
We also add buttons to call this function and opt in or out.
With this, our beta page is all set up. Users can opt-in and out of betas whenever they want. You can customize it further to your needs.
Further reading
- How to collect beta feedback from beta users
- Get feedback and book user interviews with surveys
- How to use Next.js middleware to bootstrap feature flags
Subscribe to our newsletter
build mode
Read by 75,000+ founders and builders
We'll share your email with Substack
PostHog is the leading platform for building self-driving products. With a full suite of developer tools – AI observability, product analytics, session replay, feature flags, experiments, error tracking, logs, and more – PostHog captures all the context agents need to diagnose problems, uncover opportunities, and ship fixes. A data warehouse and CDP tie it all together, unifying that context into one source agents can read across. You can steer it all from Slack, the web app, the desktop (PostHog Desktop), or your own editor via the MCP.