


How to setup PostHog for multiple environments (development, staging, production)

Contents
Many software development teams use multiple environments to split up their code, such as development, staging, and production. This ensures changes in development don’t affect production, helps teams test before release, and increases the quality of code that reaches end users.
Using multiple environments requires splitting the data from each of them. If not, development and staging data combine with production data and can cause inaccuracy and issues. This tutorial goes over how to prevent those issues by setting up PostHog for use in multiple environments.
Using multiple projects
The best practice for using PostHog across multiple environments is to use multiple projects. This enables developers to test event capture, session replays, and feature flags without polluting the data in production.
To create a new project, in your PostHog instance, click your project name and then the New project button. Be sure to name your project to make it clear it is not production, like development or staging.
This takes you through the project setup flow again and gives you a new project token. You can keep your old token for production, and add the new one in the relevant environment. You'll likely need environment variables for this (like a .env file) if you haven't set those up. Initializing PostHog with a different key in each environment connects them to a different project.
The downside of using multiple projects is that you cannot directly copy actions, dashboards, insights, experiments, and other data created in PostHog between them. This means you must manually recreate them in each project if needed. However, it is possible to copy feature flags across projects.
Feature flags with multiple projects
Sometimes, you may want to use the same feature flag keys across different PostHog projects. For example, when you're testing a new feature in staging before releasing to production. In this case, PostHog makes it easy to copy and sync feature flags across projects.
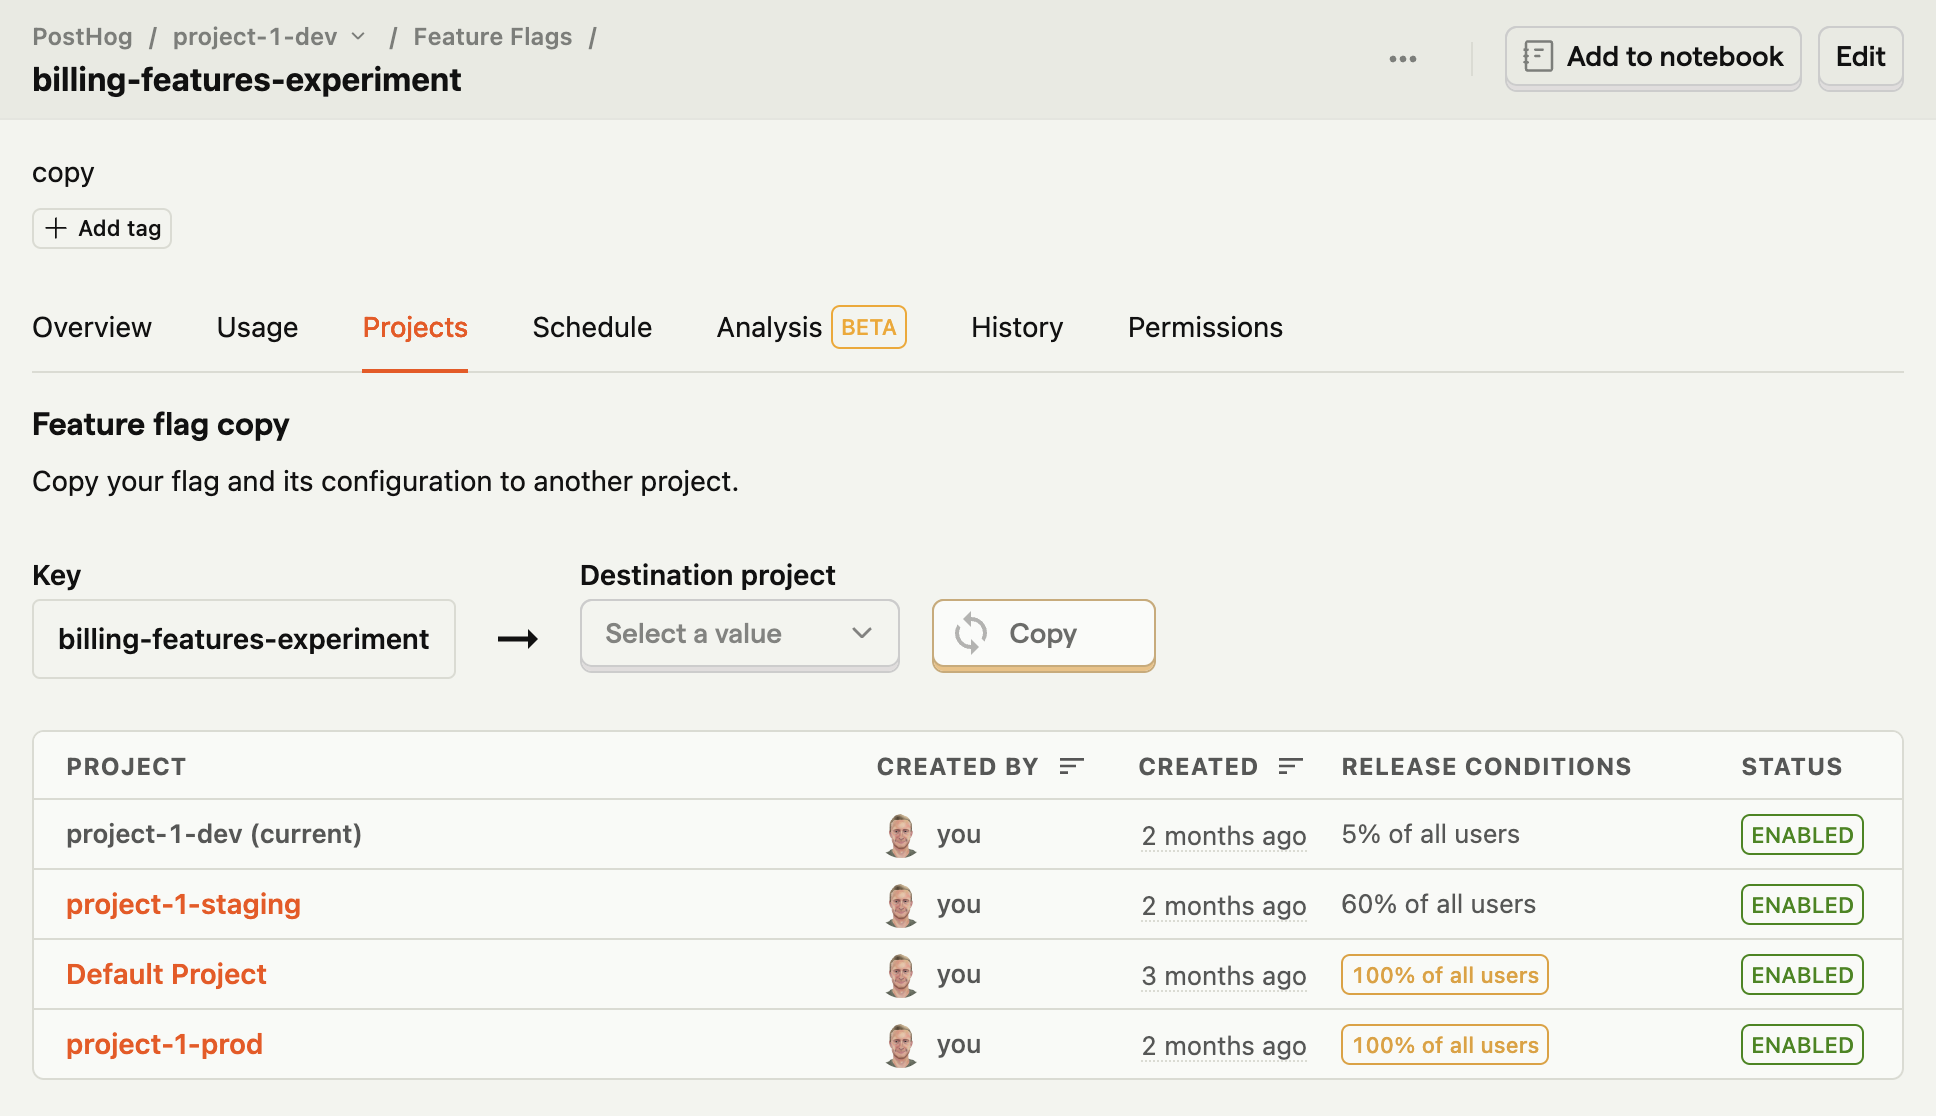
To copy or update a flag in another project:
- Navigate to the feature flag you want to copy.
- Select the
Projectstab. - Select the project you want to copy the flag to.
- Click
CopyorUpdate– this depends on whether the flag already exists in the target project. - View the table at the bottom to see the newly created or updated flag.

Conditional initialization
Opt-out of capturing on initialization
Another way to split up projects is by changing how you initialize PostHog based on the environment. For example, if you didn’t want to track your staging environment at all, initialize PostHog without a token and opt out of capturing immediately. This is what we do in our development environment.
The loaded method enables you to run code after PostHog has loaded. This makes it useful for changing PostHog's behavior between environments by using methods like set_config.
If you wanted to make opting in conditional, call opt_in_capturing() instead. You can see the full list of config options in our JavaScript docs.
Opt-out of capturing based on URL
Another popular option is checking if the URL includes localhost or 127.0.0.1 (local IP) and opting out of capturing if so. If you were using the HTML snippet, this would look like:
Setting this up correctly prevents capturing non-production event data. It enables you to continue using the same insights, feature flags, and other PostHog tools in development and staging because you only use a single project for all your data.
Filtering internal and test users
The previous options capture data to separate projects or don’t capture data at all, but there is another option. This is to capture data normally and filter internal users from your analysis.
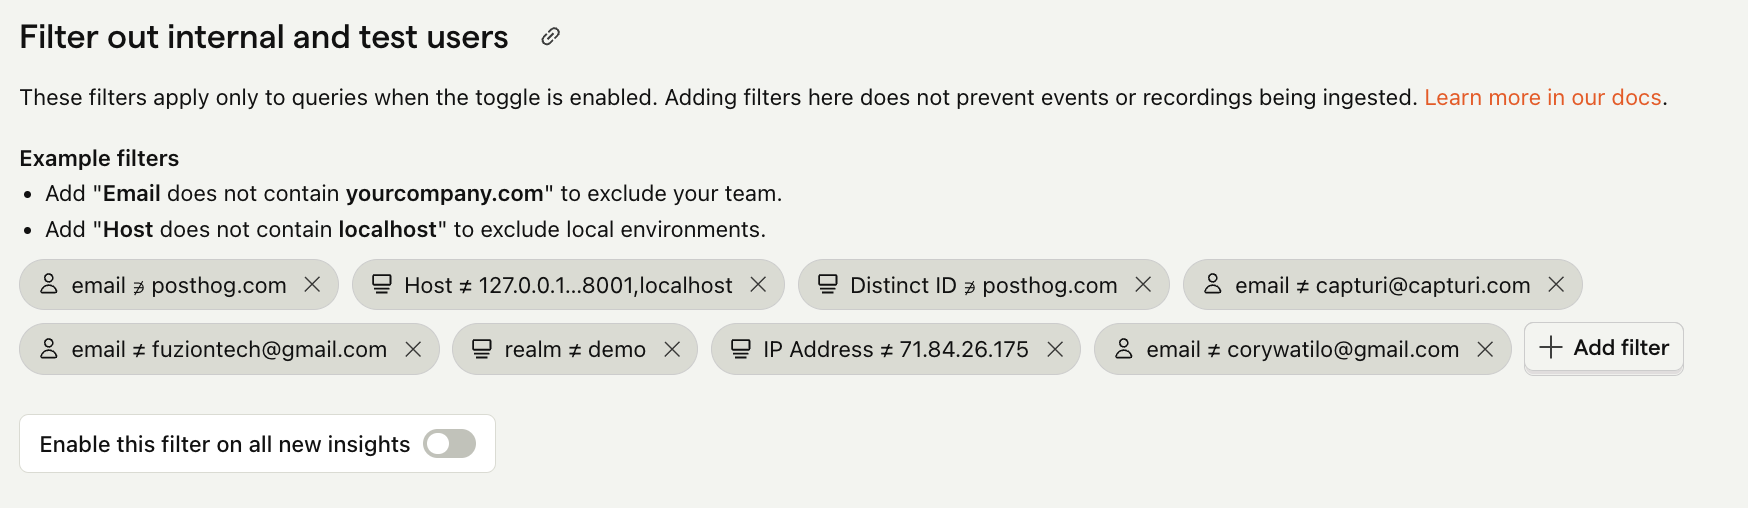
PostHog provides a toggle to filter internal users (as defined by you) from your analysis and visualization. To set this up, go to your project's Product Analytics settings and scroll down to Filter out internal and test users. Here you can add filters to identify your internal users and events so that they can be removed from insights. This could include filters like:
distinct ID does not contain your domainhost is not localhostenvironment is not development
As an example, here’s what our internal filters look like at PostHog:
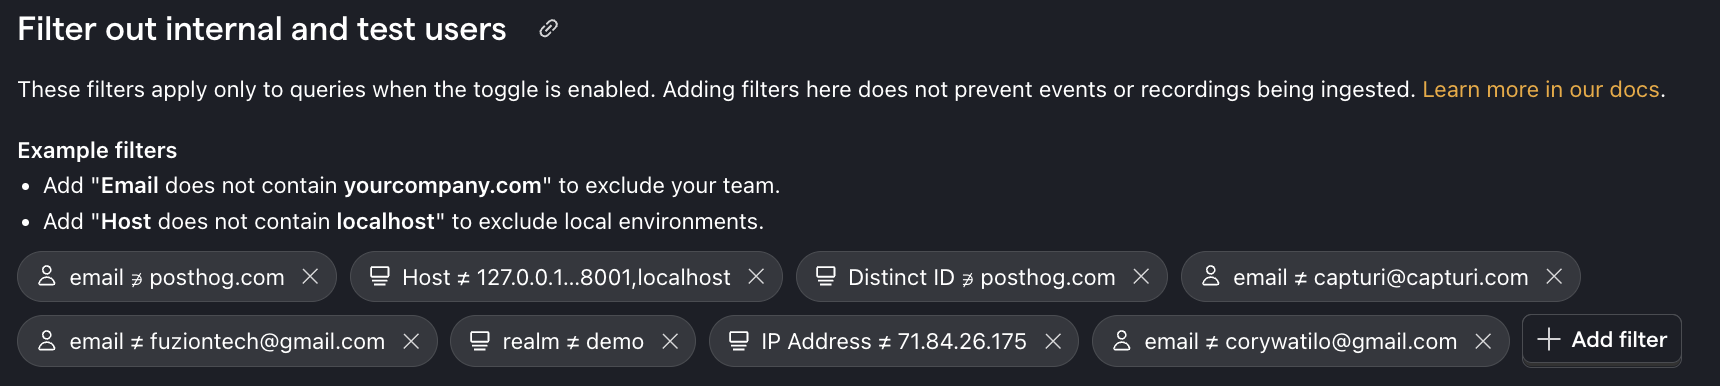
You can automatically enable filtering in all new insights with the toggle at the bottom, or enable it manually on each insight.
Note: Filtering internal and test users does not prevent the capture of data from these users and they still show up in the Activity tab.
Further reading
- How to capture fewer unwanted events
- What to do after installing PostHog in 5 steps
- Setting up Django analytics, feature flags, and more

Subscribe to our newsletter
Product for Engineers
Read by 100,000+ founders and builders
We'll share your email with Substack
PostHog is the leading platform for building self-driving products. With a full suite of developer tools – AI observability, product analytics, session replay, feature flags, experiments, error tracking, logs, and more – PostHog captures all the context agents need to diagnose problems, uncover opportunities, and ship fixes. A data warehouse and CDP tie it all together, unifying that context into one source agents can read across. You can steer it all from Slack, the web app, the desktop (PostHog Code), or your own editor via the MCP.