


How to run A/B tests in Bubble

Contents
Bubble is a great tool for building marketing websites. However, sometimes you may be unsure if a change actually improves your conversion rate. This is where A/B testing is helpful. It enables you to test and compare the results of your changes.
This tutorial shows you how to set up A/B tests with Bubble and PostHog to get the most out of your website.
1. Add PostHog to your Bubble site
First, sign up to PostHog. Then, go to your project settings and copy your web snippet. It looks like this:
With the snippet copied, go to your Bubble site settings by clicking on the icon in the left-hand menu. If you haven’t already, sign up for at least the Starter site plan. This enables you to add custom code.
Go to the SEO / metatags tab in site settings. Paste your PostHog snippet in the Script/meta tags in header section. Then, deploy your site to live.
2. Capture a custom event
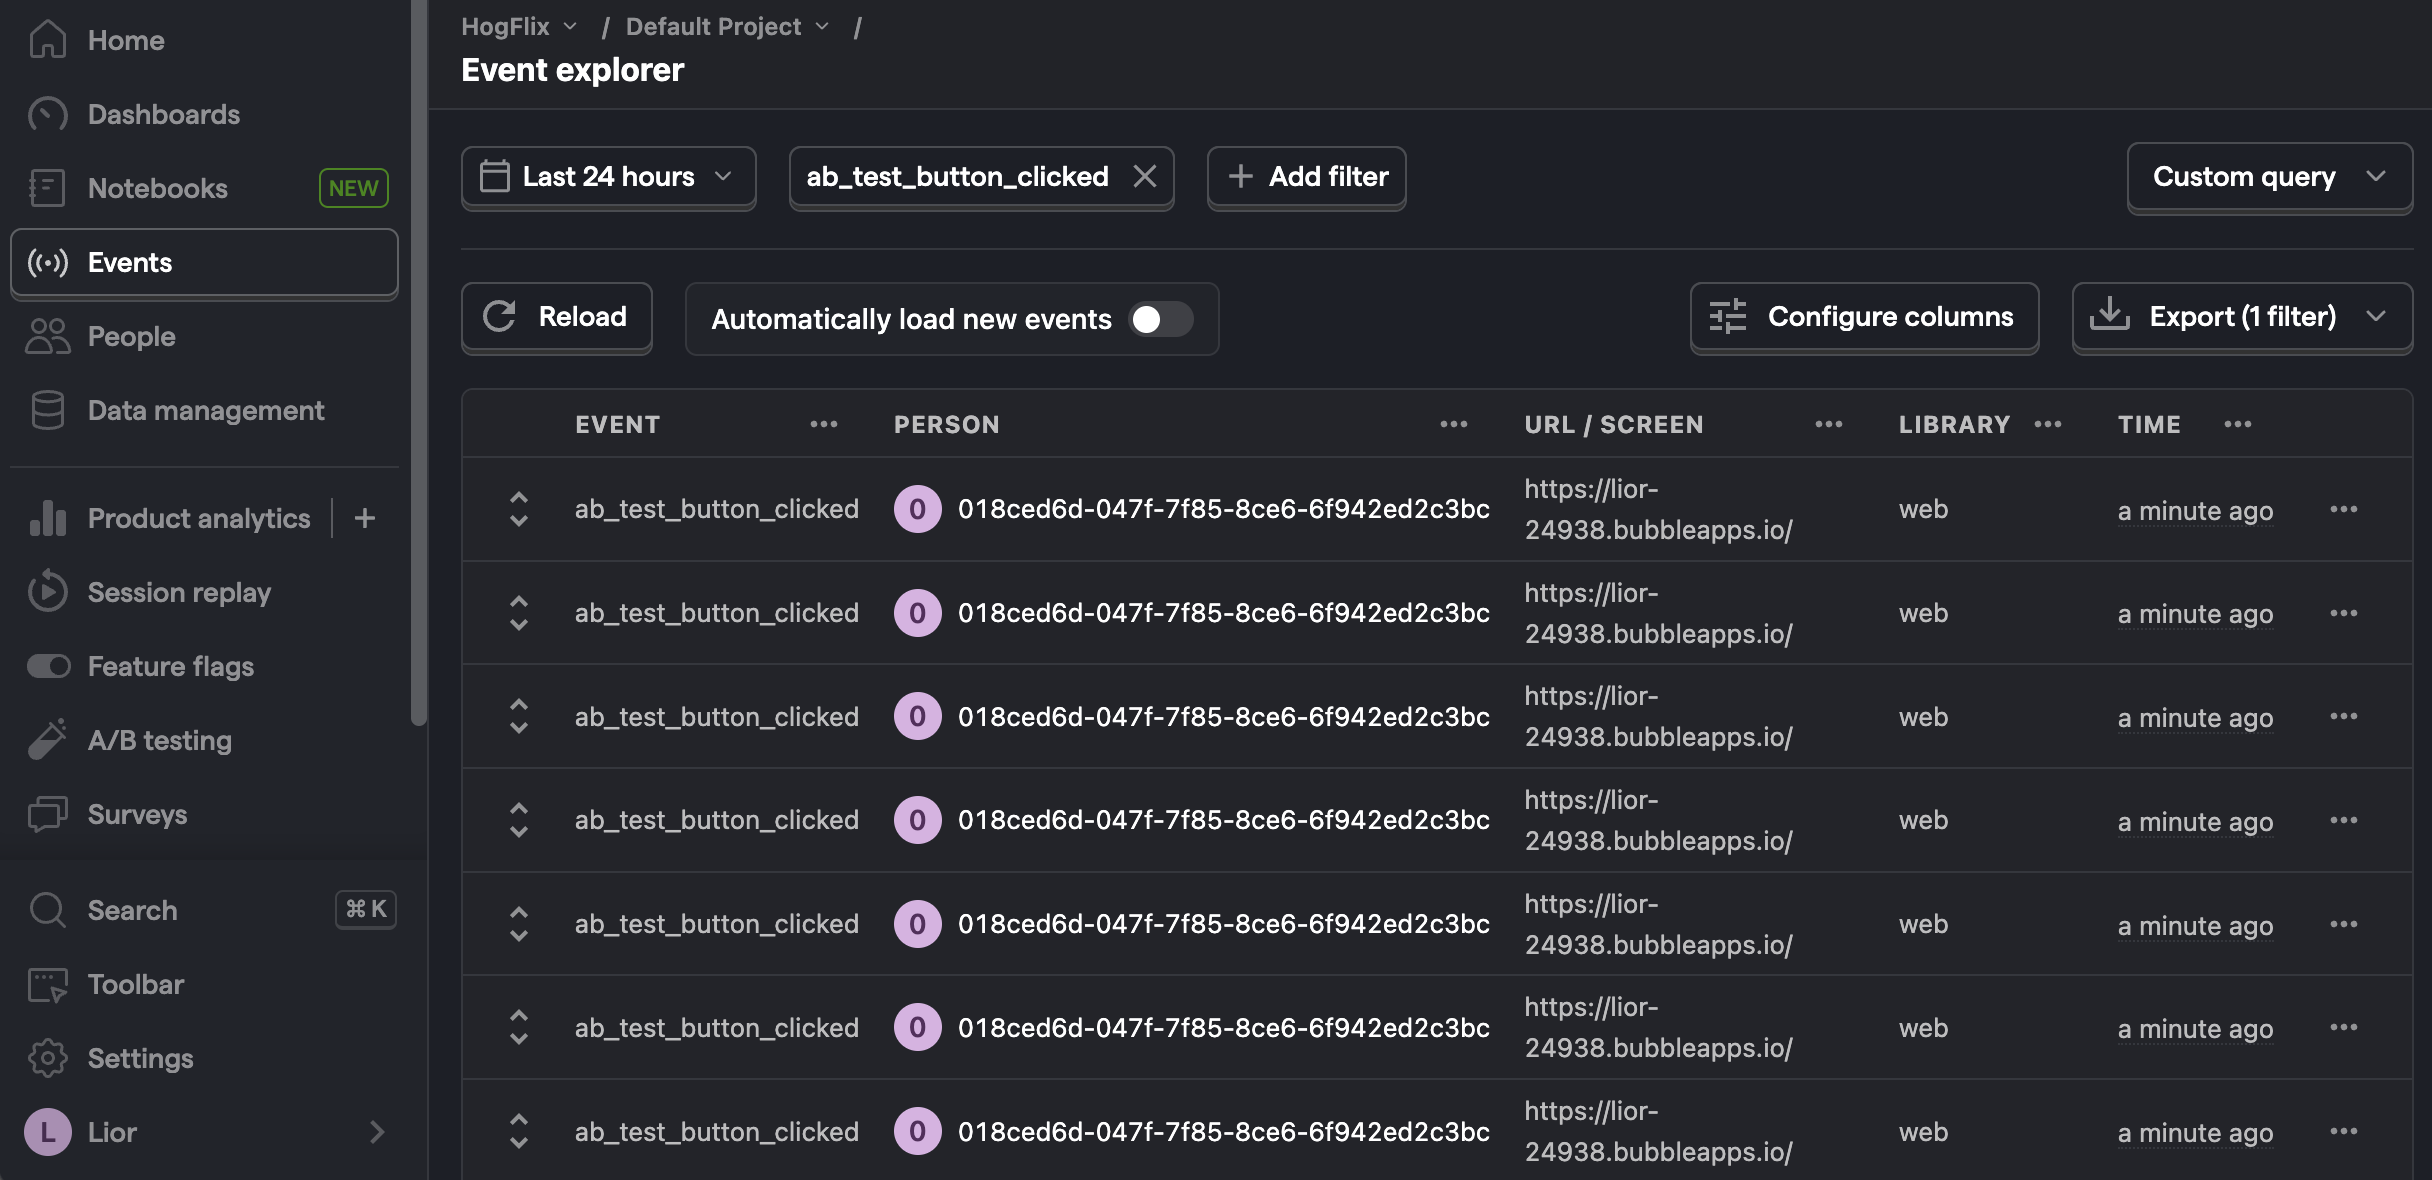
We're going to create an A/B test comparing how a button's text affects its click-through rate. To compare the results, we first capture a custom event and then set it as our goal metric for our A/B test.
To capture this event:
Install the Bubble Toolbox plugin. This enables us to run custom JavaScript code when the button is pressed.
Add a new button to your Bubble site. Click on the button and then on Add workflow in the popup menu.
Click on add an action. In the menu that appears, click on Plugins and then Run javascript. This will open a new menu where you can add JavaScript code.
Add the following code under the Script heading:
Finally, deploy your changes to live and then click your new button to see the event in PostHog.

3. Create an A/B test in PostHog
Next, go to the A/B testing tab and create an A/B test by clicking the New experiment button. Add the following details to your experiment:
- Name it "Bubble button experiment".
- Set "Feature flag key" to
bubble-button-experiment. - Use the default values for all other fields.
- Click Save as draft.
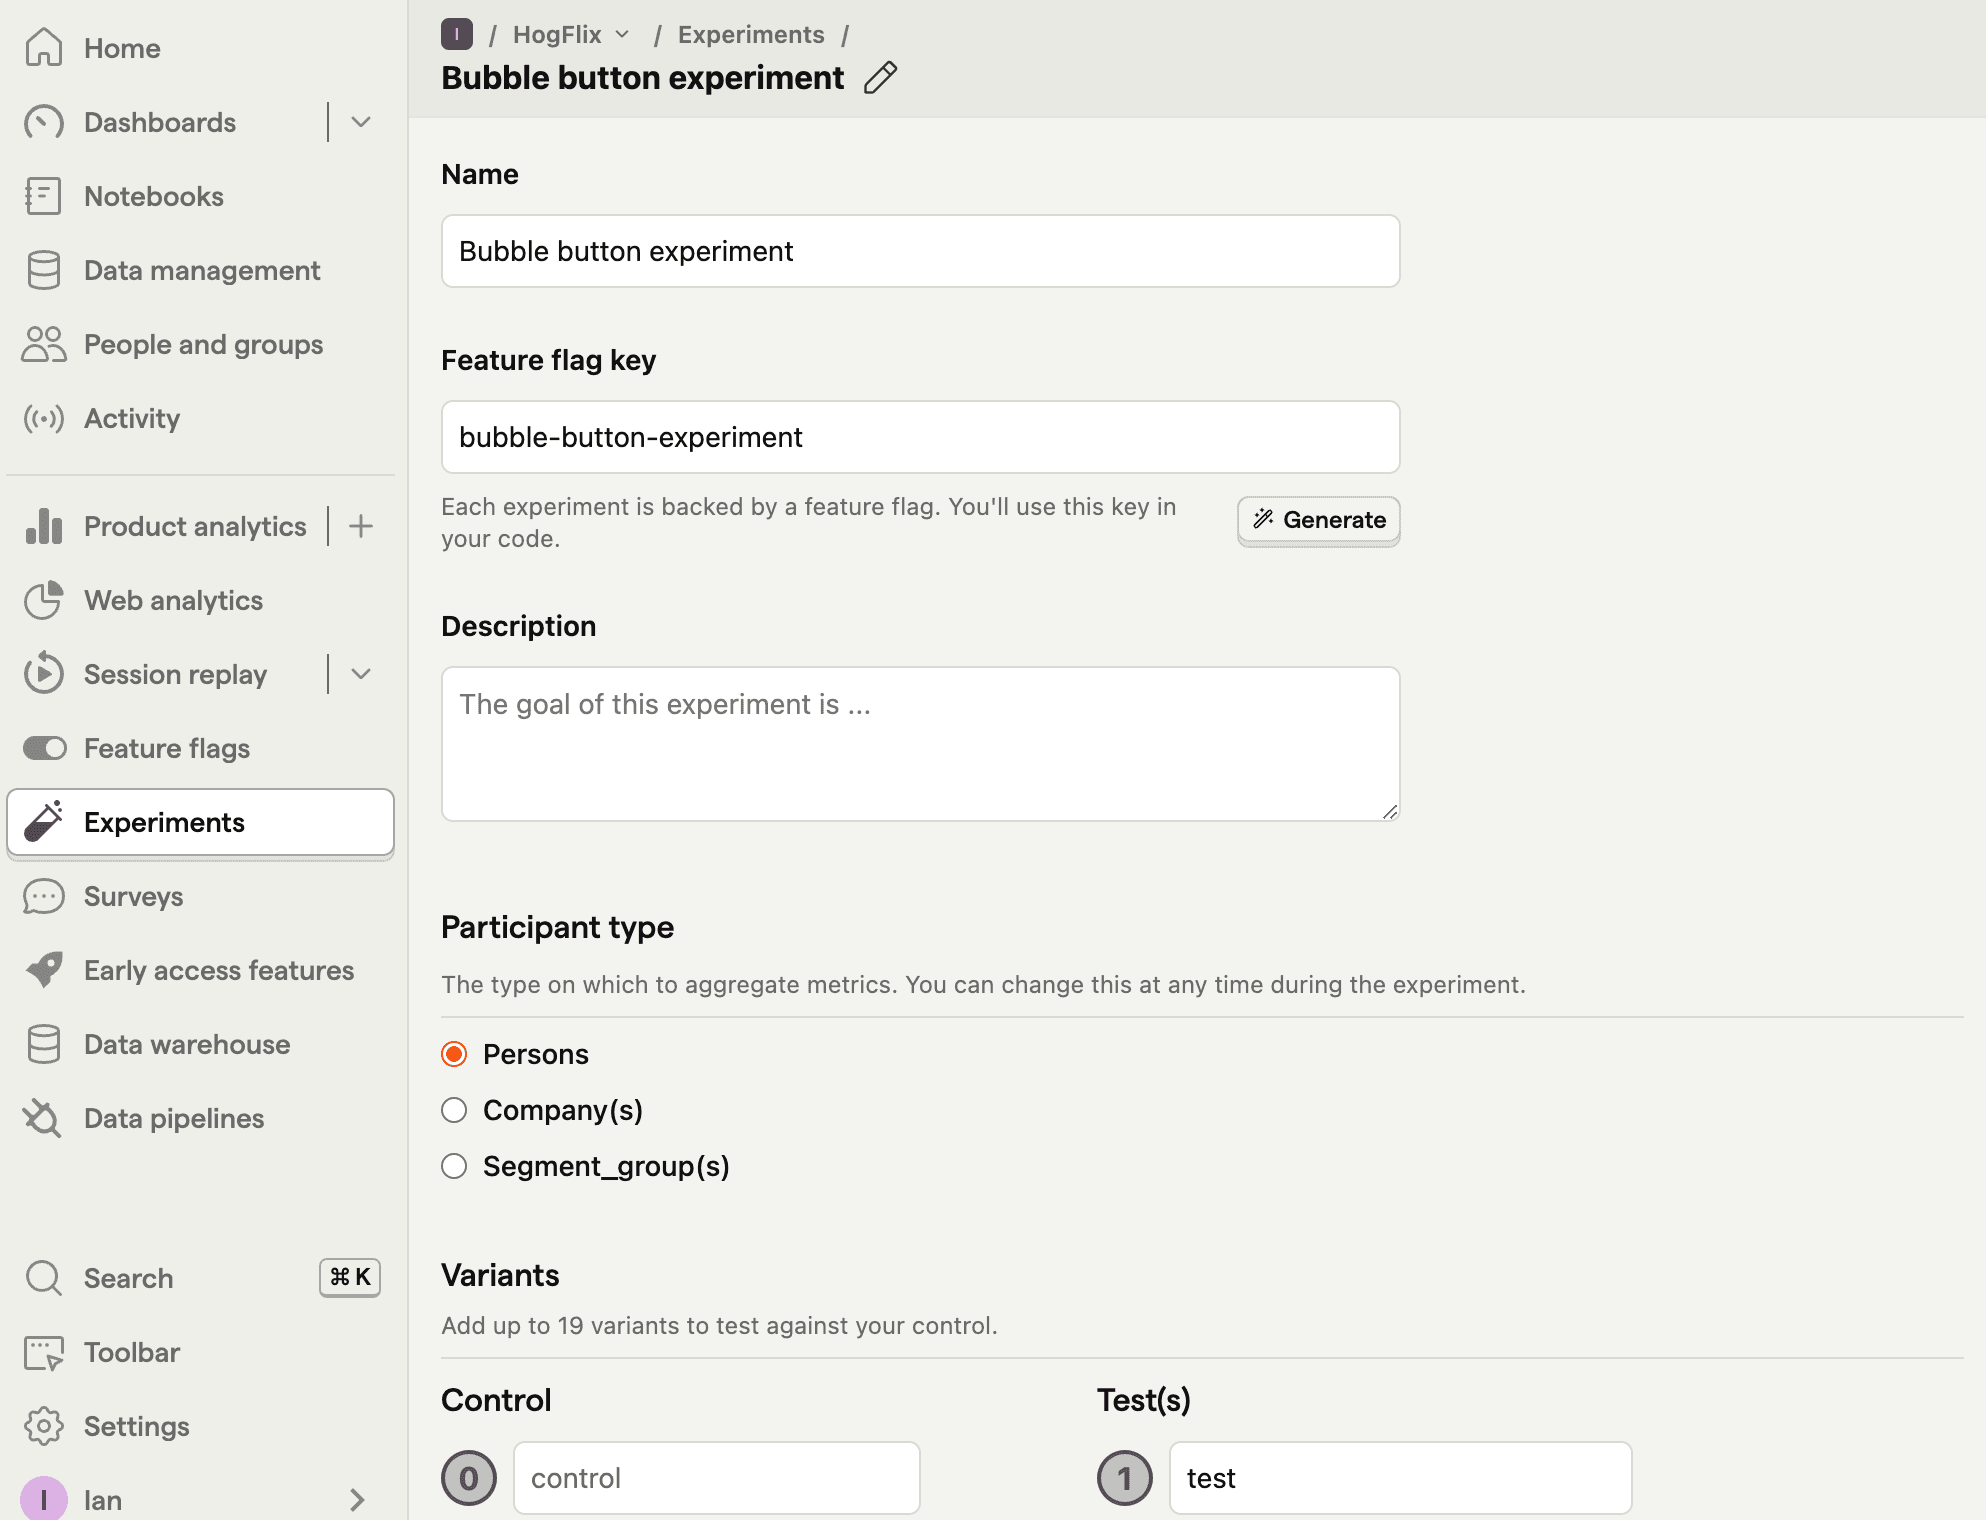
Once created, set the primary metric to a trend of ab_test_button_clicked and then click Launch.
4. Implement the A/B test in Bubble
The final step is to add the experiment code in Bubble. We need to add code that does the following:
- Fetch the
bubble-button-experimentflag. - Change the title of the button based on whether the value of the flag is
controlortest.
To do this, we add another workflow event. Go to the Workflow tab in Bubble. Create a new Page is loaded event with an action to run custom JavaScript code (like we did for capturing our custom event).
Use the following code to change the title of the button based on the value of the feature flag:
Finally, deploy your changes to live.
That's it! Your A/B test is now live. PostHog will split your users so half see the updated button text and tracks whether it has an impact on your click-through rate. You can view your test results on the experiment page in PostHog.
If you want to test each variant of your experiment to make sure it is working correctly, add the line posthog.featureFlags.overrideFeatureFlags({ flags: {'bubble-button-experiment': 'variant_name'}}) to your code:
Further reading
- How to set up Bubble analytics, session replays, and more
- How to create surveys in Bubble
- A software engineer's guide to A/B testing
Subscribe to our newsletter
build mode
Read by 75,000+ founders and builders
We'll share your email with Substack
PostHog is the leading platform for building self-driving products. With a full suite of developer tools – AI observability, product analytics, session replay, feature flags, experiments, error tracking, logs, and more – PostHog captures all the context agents need to diagnose problems, uncover opportunities, and ship fixes. A data warehouse and CDP tie it all together, unifying that context into one source agents can read across. You can steer it all from Slack, the web app, the desktop (PostHog Desktop), or your own editor via the MCP.