Import opt-out lists from Customer.io
In this guide we'll walk through importing your opt-out lists from Customer.io into PostHog and keeping them in sync.
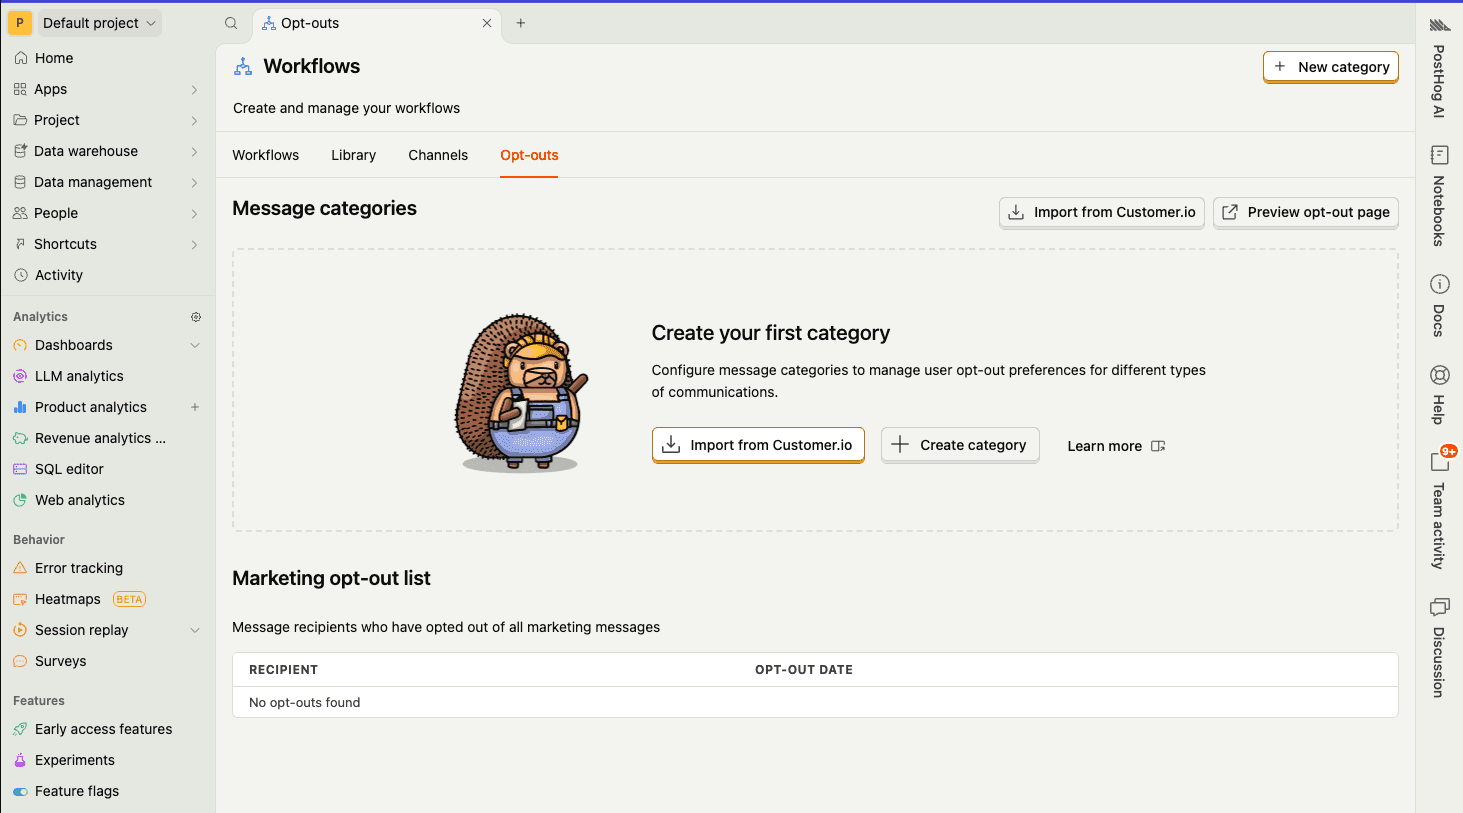
Go to your PostHog app and navigate to Workflows > Opt-out list. Click Import from Customer.io.
- 1
Import categories and global opt-outs
RequiredThis step imports all subscription topics and globally unsubscribed customers from Customer.io using an App API key.
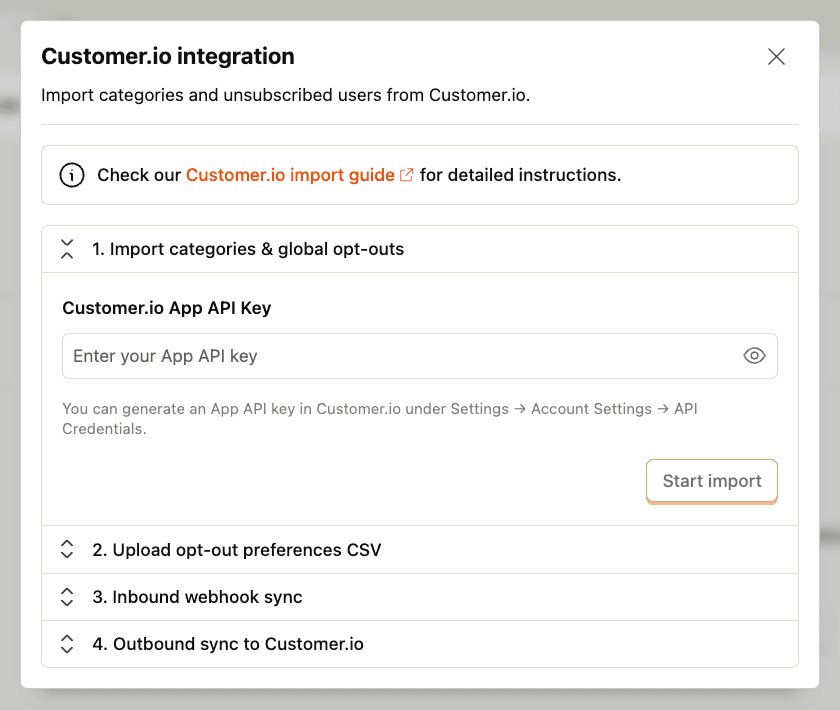
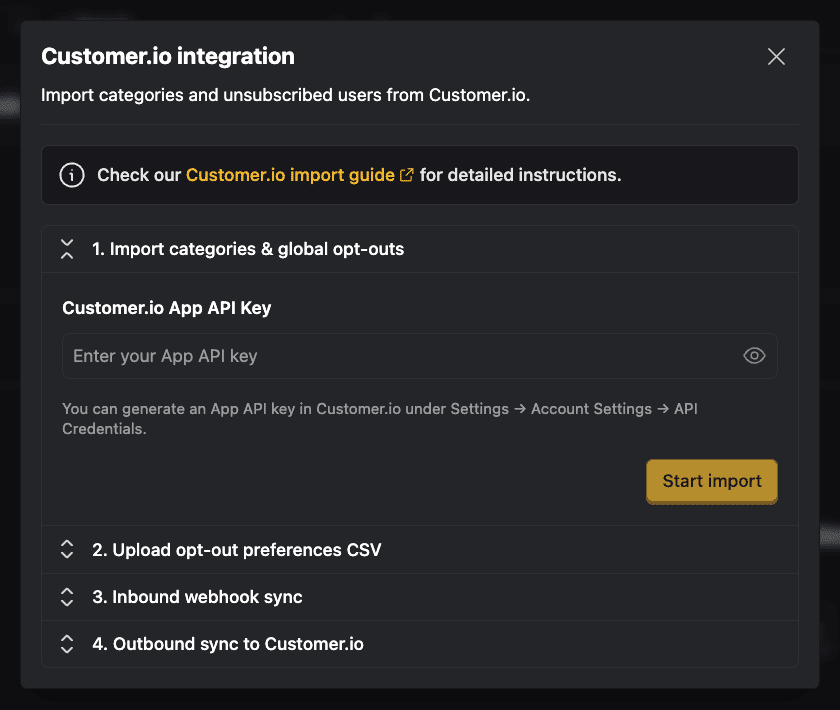
To create an App API key in Customer.io, go to Settings > Account Settings > App API Keys in your Customer.io dashboard.
Click Create New App API Key and give it a descriptive name (e.g. "PostHog Import").
Save your API keySave this API key securely – Customer.io only shows it once.
Go back to PostHog, paste the key into the first step, and click Start import. This will import:
- All available categories from Customer.io
- All customers who are generally unsubscribed (not subscribed to any category)
Customer.io only supports importing globally unsubscribed users via API, so per-category opt-outs need to be imported through a CSV in the next step.
- 2
Upload opt-out preferences CSV
RequiredTo get the CSV of people who have opted out of specific categories, go to the People page in Customer.io. Filter for people with subscription preferences:
- Click conditions at the top of the page
- Select
cio_subscription_preferencesfrom the dropdown - Choose the exists operator
- Confirm your choice

This will update the people list in the table below to show only those with subscription preferences.
Now export this data:
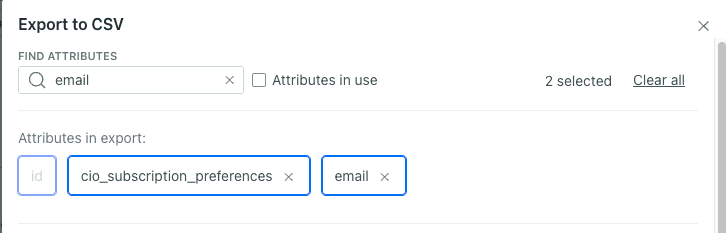
- Click Export to CSV in the top right corner
- Click Choose attributes
- Select only these two attributes:
cio_subscription_preferencesemail(make sure it'semailand not$email)
Customer.io will send you an email with a download link for the CSV file.
Back in PostHog, select the CSV and click Upload & process CSV.
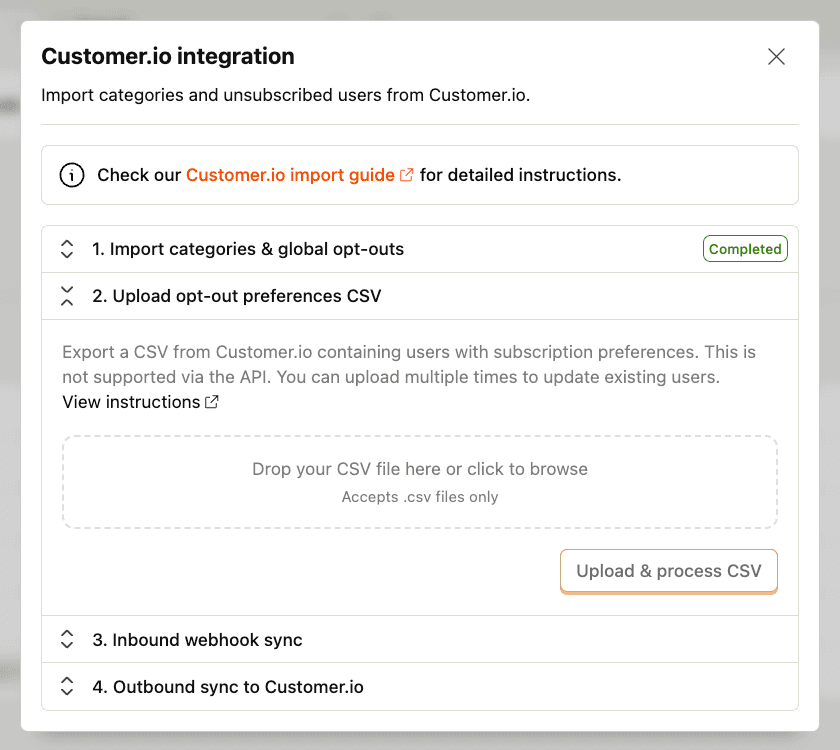

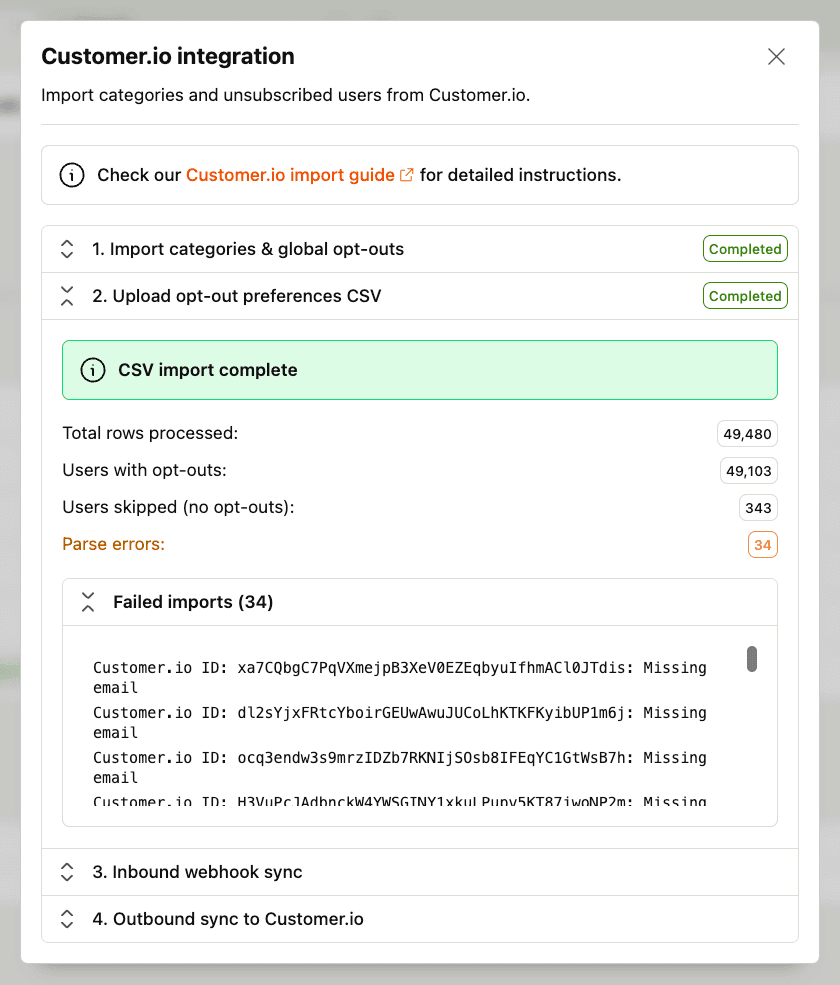
Once complete, you'll see a success message with a summary of imported opt-outs.

- 3
Receive opt-out updates from Customer.io
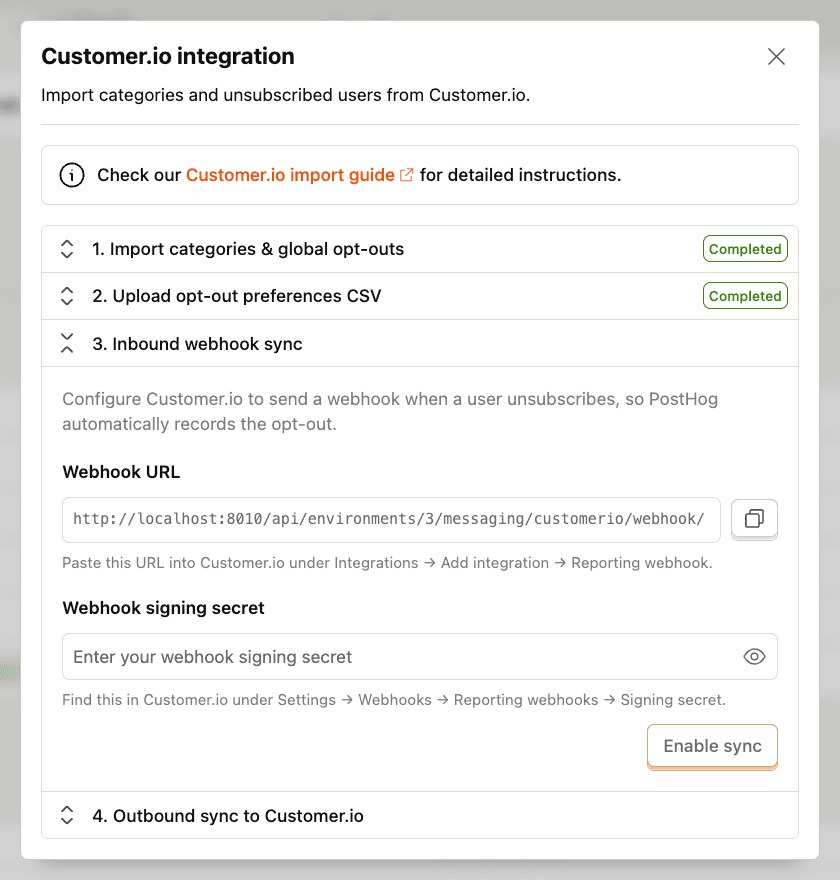
RecommendedTo keep opt-outs in sync, set up a Reporting Webhook so Customer.io notifies PostHog whenever someone unsubscribes or changes their topic preferences.
Go to Customer.io and navigate to Integrations > Add integration > Reporting webhook. Paste the webhook URL from PostHog.
Next, copy the webhook signing secret. It's used to verify that incoming webhooks are from your Customer.io account – unsigned webhooks are rejected.
Back in PostHog, paste the signing secret and click Enable sync.
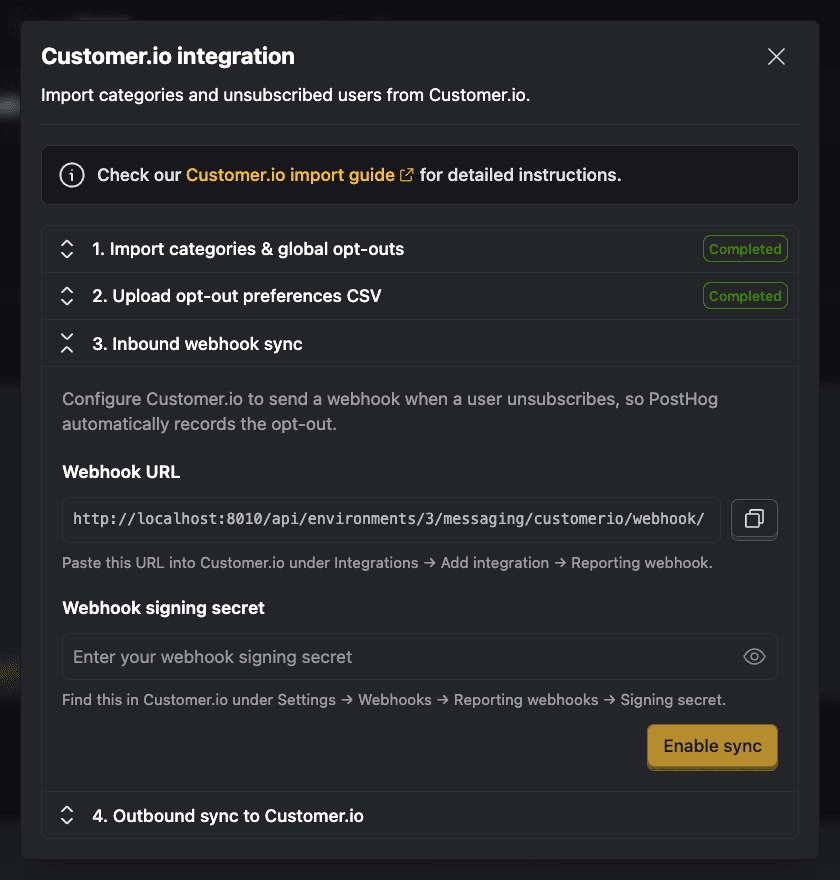
Once enabled, PostHog automatically records opt-outs whenever:
- A user globally unsubscribes or resubscribes in Customer.io
- A user changes their per-topic subscription preferences in Customer.io
- 4
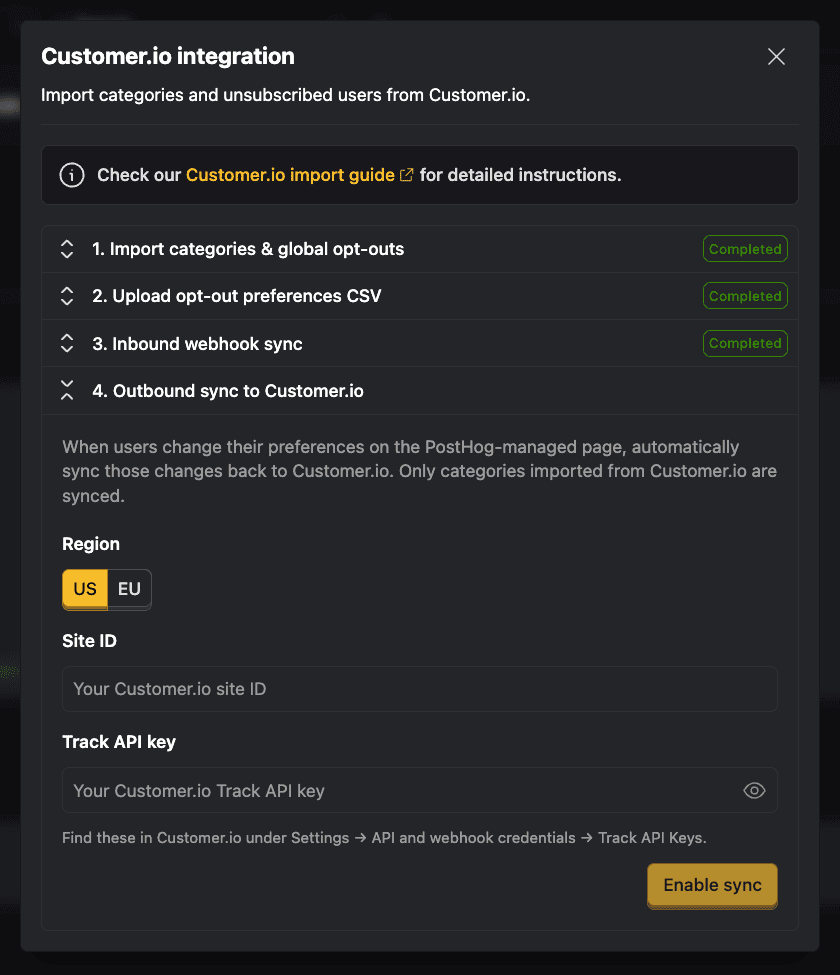
Send PostHog opt-out updates to Customer.io
RecommendedWhen users update their preferences through a PostHog-managed preferences page, you can automatically sync those changes back to Customer.io. This is useful if you haven't fully migrated your email campaigns to PostHog Workflows.
Only categories originally imported from Customer.io are synced back.
To get your Customer.io Track API credentials, go to Settings > API and webhook credentials > Track API Keys and copy the Site ID and Track API key.
Back in PostHog:
- Select your Customer.io region (US or EU) – this determines which Track API endpoint PostHog uses
- Enter your Site ID
- Enter your Track API key
- Click Enable sync