How to set up Next.js A/B tests

A/B tests are a way to make sure the content of your Next.js app performs as well as possible. They compare two or more variations on their impact on a goal.

PostHog's experimentation tool makes it easy to set up A/B tests. This tutorial shows you how to build a basic Next.js app (with the app router), add PostHog to it, bootstrap feature flag data, and set up the A/B test in the app.

1. Create a Next.js app

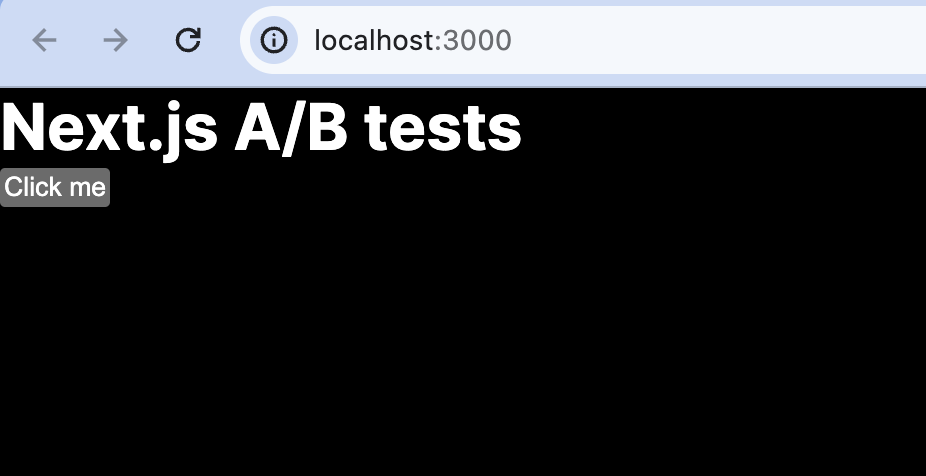
We will create a basic Next.js app with a simple button to run our test on. First, make sure Node is installed (18.17 or newer), then create a Next.js app:

JavaScript
npx create-next-app@latest next-ab

Select No for TypeScript, Yes for use app router, and the defaults for the rest of the options. Once created, go to your app/page.js file and set up a basic page with a heading and a button.

JavaScript
// app/page.js
export default function Home() {
return (
<main>
<h1>Next.js A/B tests</h1>
<button id="main-cta">Click me</button>
</main>
);
}

Once done, run npm run dev and go http://localhost:3000 to see your app.

App

2. Add PostHog

To track our app and set up an A/B test, we install PostHog. If you don't have a PostHog instance already, you can sign up for free.

Start by installing the posthog-js SDK:

Terminal
npm i posthog-js

Next, create a providers.js file in your app folder. In it, initialize PostHog with your project API key and instance address and export a provider component.

JavaScript
// app/providers.js
'use client'
import posthog from 'posthog-js'
import { PostHogProvider } from '@posthog/react'
export function PHProvider({ children }) {
if (typeof window !== 'undefined') {
posthog.init('<ph_project_api_key>', {
api_host: 'https://us.i.posthog.com',
defaults: '2025-05-24',
})
}
return <PostHogProvider client={posthog}>{children}</PostHogProvider>
}

Once created, you can import PHProvider into your layout.js file and wrap your app in it:

JavaScript
import "./globals.css";
import { PHProvider } from './providers'
export default function RootLayout({ children }) {
return (
<html lang="en">
<PHProvider>
<body>{children}</body>
</PHProvider>
</html>
);
}

When you reload your app, you should see events captured in your activity tab in PostHog.

3. Creating an action for our experiment metric

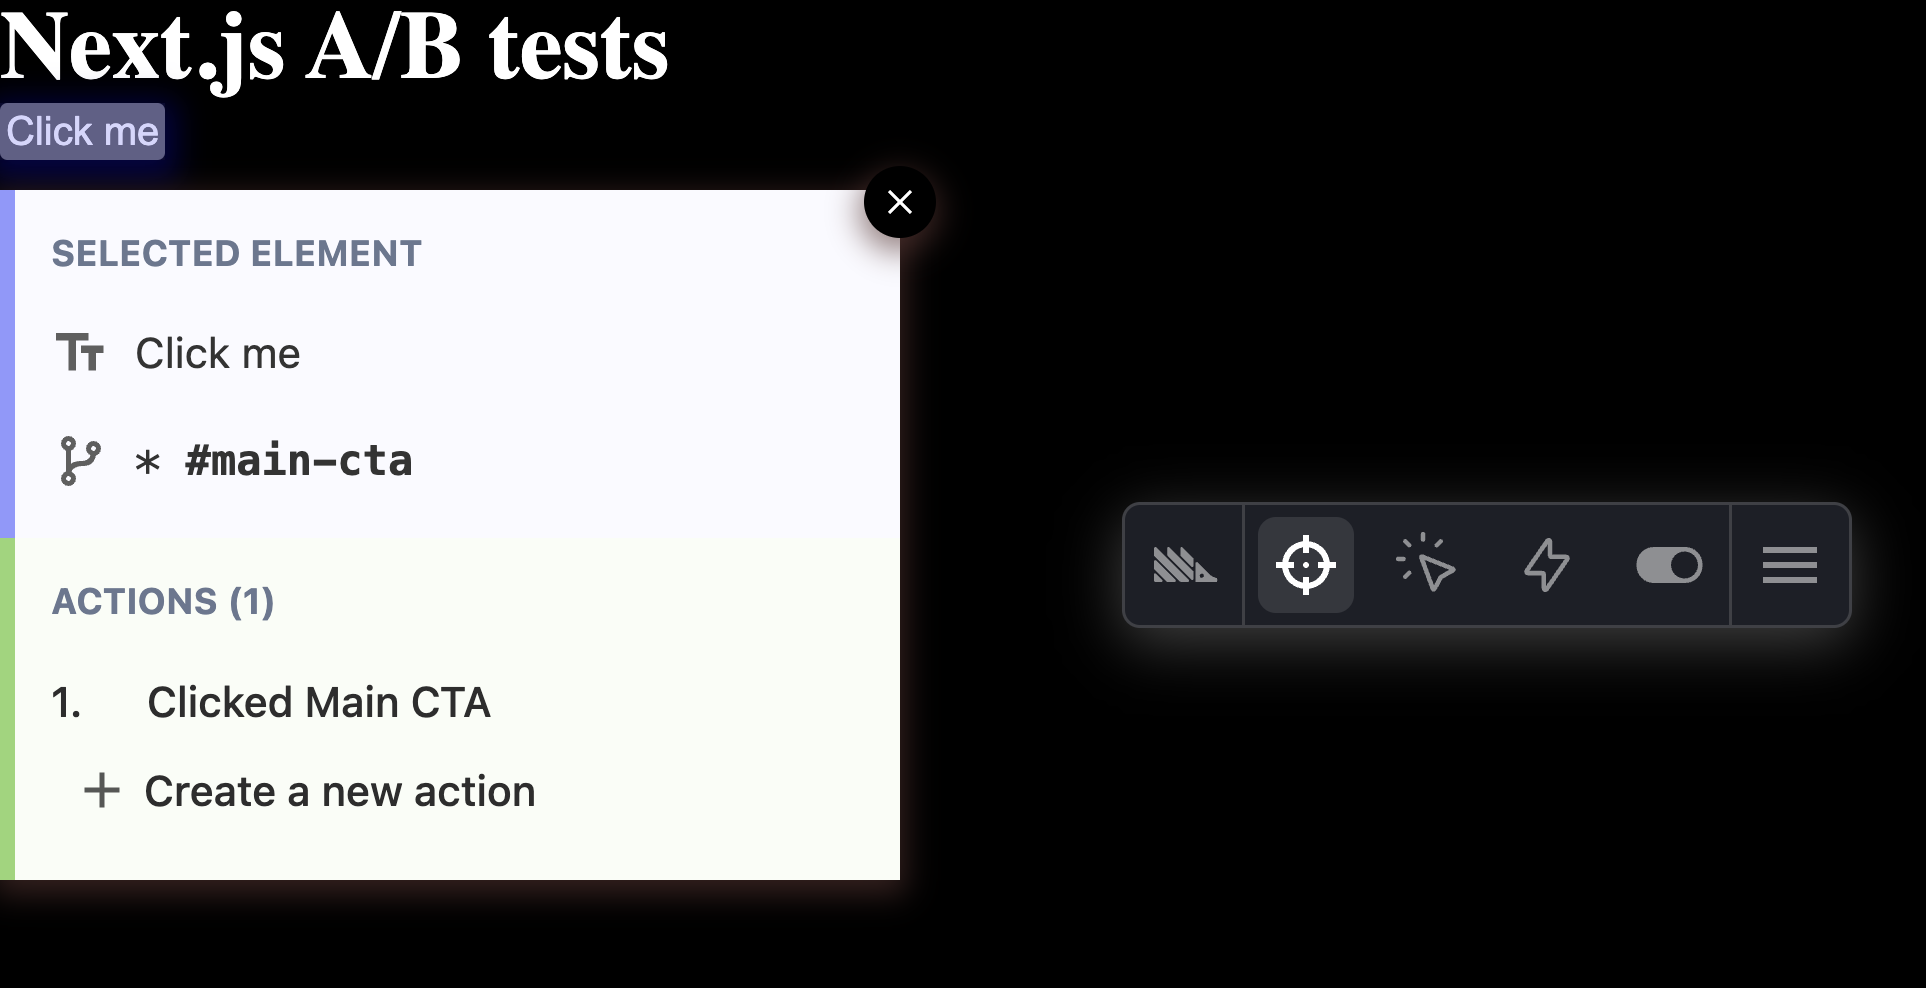
To measure the impact of our change, we need an experiment metric. To set this up, we can create an action from the events PostHog autocaptures using the toolbar.

To enable and launch the toolbar, go to the "Launch toolbar" tab, add http://localhost:3000/ as an authorized URL, then click launch. To create an action with the toolbar, click:

  1. The target icon (inspector) in the toolbar
  2. The "Click me" button
  3. "Create new action" in the modal

Name the action "Clicked Main CTA" and then click "Create action."

Action

Note: You can also use a custom event as a goal metric. See our full Next.js analytics tutorial for how to set up custom event capture.

4. Creating an experiment

With PostHog installed and our action set up, we're ready to create our experiment. To do so, go to the A/B testing tab in PostHog, click "New experiment," and then:

  1. Name your A/B test.
  2. Set your feature flag key to something like main-cta.
  3. Click Save as draft.
  4. Set the primary metric to a trend of clicked_main_cta.
  5. Click Launch.

Once done, you're ready to go back to your app to start implementing it.

5. Bootstrapping feature flags

A/B testing in PostHog relies on feature flag data. To ensure that feature flag data is available as soon as possible, we make a server-side request for it and then pass it to the client-side initialization of PostHog (known as bootstrapping).

Set up a function in layout.js that:

  1. Checks for the user distinct_id in the cookies.
  2. If it doesn't exist, creates one using uuidv7.
  3. Uses the posthog-node library and the distinct_id to getAllFlags.
  4. Passes the flags and distinct_id to the PHProvider.

Start by installing uuidv7 and posthog-node:

Terminal
npm i uuidv7 posthog-node

Next, create a utils folder and create a folder named genId.js. In this file, we use React's cache feature to generate an ID once and return the same value if we call it again.

JavaScript
// app/utils/genId.js
import { cache } from 'react'
import { uuidv7 } from "uuidv7";
export const generateId = cache(() => {
const id = uuidv7()
return id
})

After this, we create another file in utils named getBootstrapData.js. In it, create a getBootstrapData function like this:

JavaScript
// app/utils/getBootstrapData.js
import { PostHog } from 'posthog-node'
import { cookies } from 'next/headers'
import { generateId } from './genId'
export async function getBootstrapData() {
let distinct_id = ''
const phProjectAPIKey = '<ph_project_api_key>'
const phCookieName = `ph_${phProjectAPIKey}_posthog`
const cookieStore = cookies()
const phCookie = cookieStore.get(phCookieName)
if (phCookie) {
const phCookieParsed = JSON.parse(phCookie.value);
distinct_id = phCookieParsed.distinct_id;
}
if (!distinct_id) {
distinct_id = generateId()
}
const client = new PostHog(
phProjectAPIKey,
{ host: "https://us.i.posthog.com" })
const flags = await client.getAllFlags(distinct_id)
const bootstrap = {
distinctID: distinct_id,
featureFlags: flags
}
return bootstrap
}

Next:

  1. Import PostHog (from Node), the Next cookies function, and the generateId utility.
  2. Import and use the getBootstrapData function and logic.
  3. Call it from the RootLayout.
  4. Pass the data to the PHProvider.
JavaScript
// app/layout.js
import './globals.css'
import PHProvider from "./providers";
import { getBootstrapData } from './utils/getBootstrapData'
export default async function RootLayout({ children }) {
const bootstrapData = await getBootstrapData()
return (
<html lang="en">
<PHProvider bootstrapData={bootstrapData}>
<body>{children}</body>
</PHProvider>
</html>
)
}

Finally, in providers.js, we handle the bootstrapData and add it to the PostHog initialization.

JavaScript
// app/providers.js
'use client'
import posthog from 'posthog-js'
import { PostHogProvider } from '@posthog/react'
export default function PHProvider({ children, bootstrapData }) {
if (typeof window !== 'undefined') {
posthog.init("<ph_project_api_key>", {
api_host: "https://us.i.posthog.com",
bootstrap: bootstrapData
})
}
return <PostHogProvider client={posthog}>{children}</PostHogProvider>
}

Now, feature flag data is available as soon as PostHog loads. Bootstrapping flags like this ensures a user's experience is consistent and you track them accurately.

6. Implementing our A/B test

The final part is to implement the A/B test in our component. There are two ways to do this:

  1. A client-side implementation where we wait for PostHog to load and use it to control display logic.
  2. A server-side implementation where we use the bootstrap data directly.

Client-side implementation

To set up our A/B test in app/page.js:

  1. Change it to a client-side rendered component.
  2. Set up PostHog using the usePostHog hook.
  3. Use a useEffect to check the feature flag.
  4. Change the button text based on the flag value.
JavaScript
// app/page.js
'use client'
import { usePostHog } from '@posthog/react'
import { useEffect, useState } from 'react'
export default function Home() {
const posthog = usePostHog()
const [text, setText] = useState('')
useEffect(() => {
const flag = posthog.getFeatureFlag('main-cta')
setText(flag === 'test' ? 'Click this button for free money' : 'Click me');
}, [])
return (
<main>
<h1>Next.js A/B tests</h1>
<button id="main-cta">{text}</button>
</main>
)
}

When you reload the app, you see our app still needs to wait for PostHog to load even though we are loading flags as fast as possible with bootstrapping. This causes the "flicker," but is solvable if we server-render the component.

Server-side implementation

We can use the same getBootstrapData function in a server-rendered page and access the data directly. Next.js caches the response, meaning it is consistent with the bootstrapped data.

To set up the A/B test, we change the app/page.js component to be server-rendered and await the bootstrapData to use it to set the button text.

JavaScript
// app/page.js
import { getBootstrapData } from "./utils/getBootstrapData"
export default async function Home() {
const bootstrapData = await getBootstrapData()
const flag = bootstrapData.featureFlags['main-cta']
const buttonText = flag === "test" ? "Click this button for free money" : "Click me";
return (
<main>
<h1>Next.js A/B tests</h1>
<button id="main-cta">{buttonText}</button>
</main>
);
}

This shows your updated button text immediately on load. This method still uses the client-side for tracking, and this works because we bootstrap the distinct ID from the server-side to the client.

Further reading

Subscribe to our newsletter

Product for Engineers

Read by 100,000+ founders and builders

We'll share your email with Substack

Community questions

  • Johannes
    Edited 6 months ago

    as someone as pointed out below, awaiting getBoostrapData() in the root layout opts the whole Next.JS app into dynamic rendering! Is there any other solution? or are there any update on this issue?

  • NA
    7 months ago

    For the server-side implementation, wouldn't one need to also call the $feature_flag_called event in order to bucket / include users in the experiment? Or am I missing something?

  • Johannes
    a year ago

    I have just updated my posthog setup for NextJS 15 according to this tutorial, but it doesn't include anything on implementing bootstrap data. That's why I am reading the tutorial on this page, but I am a bit confused as to how to integrate bootstrap data with the code in the other tutorial. I would really appreciate some help!

  • User525
    a year ago

    I see in the example that cookieStore.get() is called to get phCookie, but where is the phCookie value being stored?

    • Ian
      a year ago

      PostHog automatically sets that cookie when you initial the JavaScript Web library or snippet in the client.

  • Elie
    a year ago

    This doesn't work if any of your pages use generateStaticParams.

    You'll run into a DynamicServerError error because you can't call cookies() when generating static pages: https://nextjs.org/docs/messages/dynamic-server-error

    So by using cookies() in your RootLayout you're affecting usage of your entire app and causing it to crash in certain cases.

    • Jason
      a year ago

      what is the solution here? getting the same error on build time

  • Pierson
    a year ago

    The $feature_flag_called event doesn't get recorded correctly when using the server-side implementation? Not sure what to do here if I'm looking to ensure no flickering.

    • Ian
      a year ago

      The $feature_flag_called event doesn't get captured at all?

      Bootstrapping will prevent flickering.

  • Kevin
    2 years ago

    I'm getting the following error on Next 14 –

    app/layout.tsx
    Type error: Layout "app/layout.tsx" does not match the required types of a Next.js Layout.
    "getBootstrapData" is not a valid Layout export field.
    • Kevin
      Author
      2 years ago
      Solution

      solved it by moving getBootstrapData to another file, reading the cookies in the layout, and passing them as an argument to getBootstrapData

    • Ian
      2 years ago

      Classic Next.js stuff. Thanks for finding a solution, updating the tutorial to use this solution: https://github.com/PostHog/posthog.com/pull/8380

  • Christoph
    2 years ago

    Is there any way to do an A/B test for the landingpage hero with Posthog that works on the first load?

    • with server side rendering
    • without any flickering

    I read all documentation and tested all options but the best thing I found was to enable server-side rendering on the second load and optimize client fetching speed with middleware bootstrapping.

    But my first load is still flickering because I am using Next.js 14 and my landinpage is server-side rendered. On the first load there are not cookies, so the default hero gets loaded, then the useEffect from the client is loaded and the hero is switched.

    Please tell me there is any other way? The most important thing about a landingpage is the first impression you get with the hero and that is broken with A/B testing for all new users.

    • Ian
      2 years ago
      Solution

      I've got a complete overhaul of this tutorial in review. It covers server-side rendering without flickering.

Questions about this page? or post a community question.

  1. Legally-required cookie banner

    PostHog.com doesn't use third-party cookies, only a single in-house cookie.

    No data is sent to a third party. (Ursula von der Leyen would be so proud.)

    Ursula von der Leyen, President of the European Commission