


How to add session replays to Intercom

Contents
Session replays are a useful support tool for debugging and recreating issues. The errors, console, and network data along with the rest of PostHog's tools make it a powerful support platform.
To get easy access to session replays in Intercom, you can add them as either user data or events. This can be done automatically with the integrations config option or manually passing the session replay and person URLs to Intercom. This tutorial shows you how to set up both.
Automatically sending session replays to Intercom
Since version 1.256.0, our Web SDK can add session replay and person URLs to Intercom automatically by setting the integrations config option to { intercom: true }.
The integration calls update and trackEvent on Intercom whenever the session ID changes, adds latestPosthogReplayURL and latestPosthogPersonURL to your Intercom person record, and sends a posthog:sessionInfo event with the replay and the person URL.
It does require Intercom to be installed on your site as well as a people data attribute for latestPosthogReplayURL and latestPosthogPersonURL in your Intercom account.
Manual setup
If you want complete customization over the format of the data sent to Intercom, you can do this manually. To show you how to set this up, we build a basic Next.js app, add PostHog, add Intercom, and set up the session replay link to show in both places in Intercom.
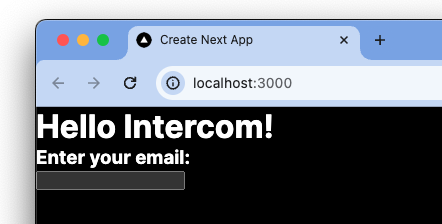
1. Create a basic Next.js app
First, make sure Node is installed (18.17 or newer), and then create a Next.js app:
Select No for TypeScript, Yes for use app router, and the defaults for every other option. Once created, go into your app/page.js file and add a basic page with a spot for users to enter their email.
Once done, run npm run dev and go http://localhost:3000 to see your app.
2. Add PostHog
To set up session replays, we install PostHog in our app. If you don't have a PostHog instance, you can sign up for free.
Important: Make sure to enable Record user sessions in your project settings.
After doing this, install the posthog-js SDK:
Next, create a providers.js file in your app folder. In it, initialize PostHog with your project token and instance address (from your project settings) and export a provider component. If you use a US Cloud instance, also make sure your ui_host config option is set to https://us.posthog.com.
Once created, you can import PHProvider into your layout.js file and wrap your app in it:
3. Add Intercom
Start by going to your installation settings page. Once there, enable "Install Messenger on your site or web app," choose the "Install with code snippet" tab, and then choose "Single-page apps."
To install Intercom in the app/page.js file, we:
- Set
APP_IDas a variable, but you can use the pre-filled URL Intercom provides as well. You can get this value from yourapp.intercom.comURL, it is afterapps/. - Add the first script to a
useEffectto run on load. - Add the
bootcall to thehandleSubmitfunction where the email is available.
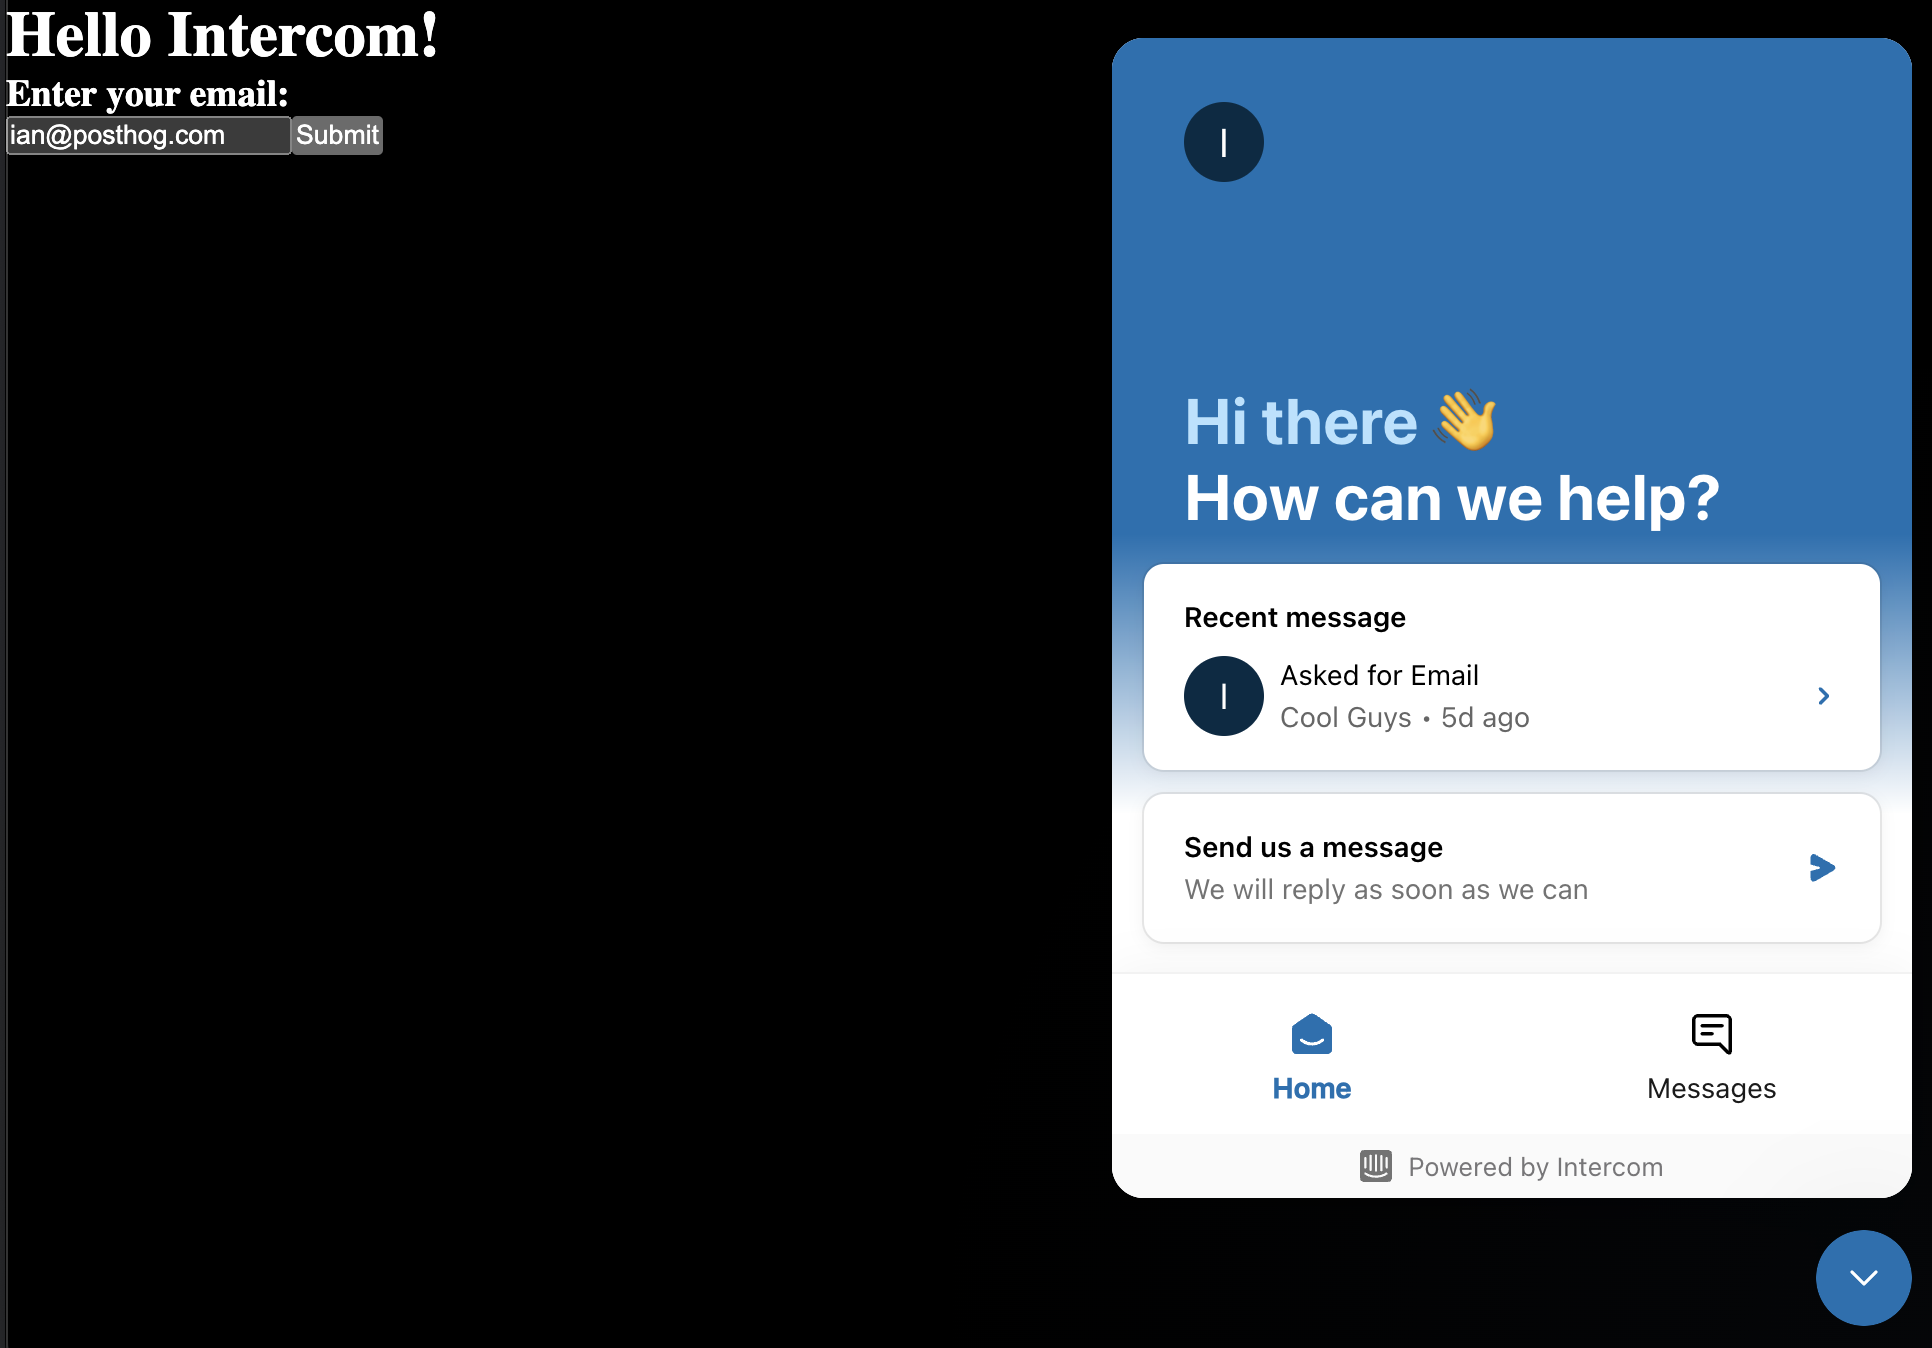
Altogether, this looks like this:
Now when you submit an email, Intercom launches with your email connected.
4. Adding session replays to Intercom
The final piece is adding PostHog's session replays to Intercom. Since PostHog automatically captures session replay, all that is left to do is get the link and add it in Intercom. There are two spots we can add it.
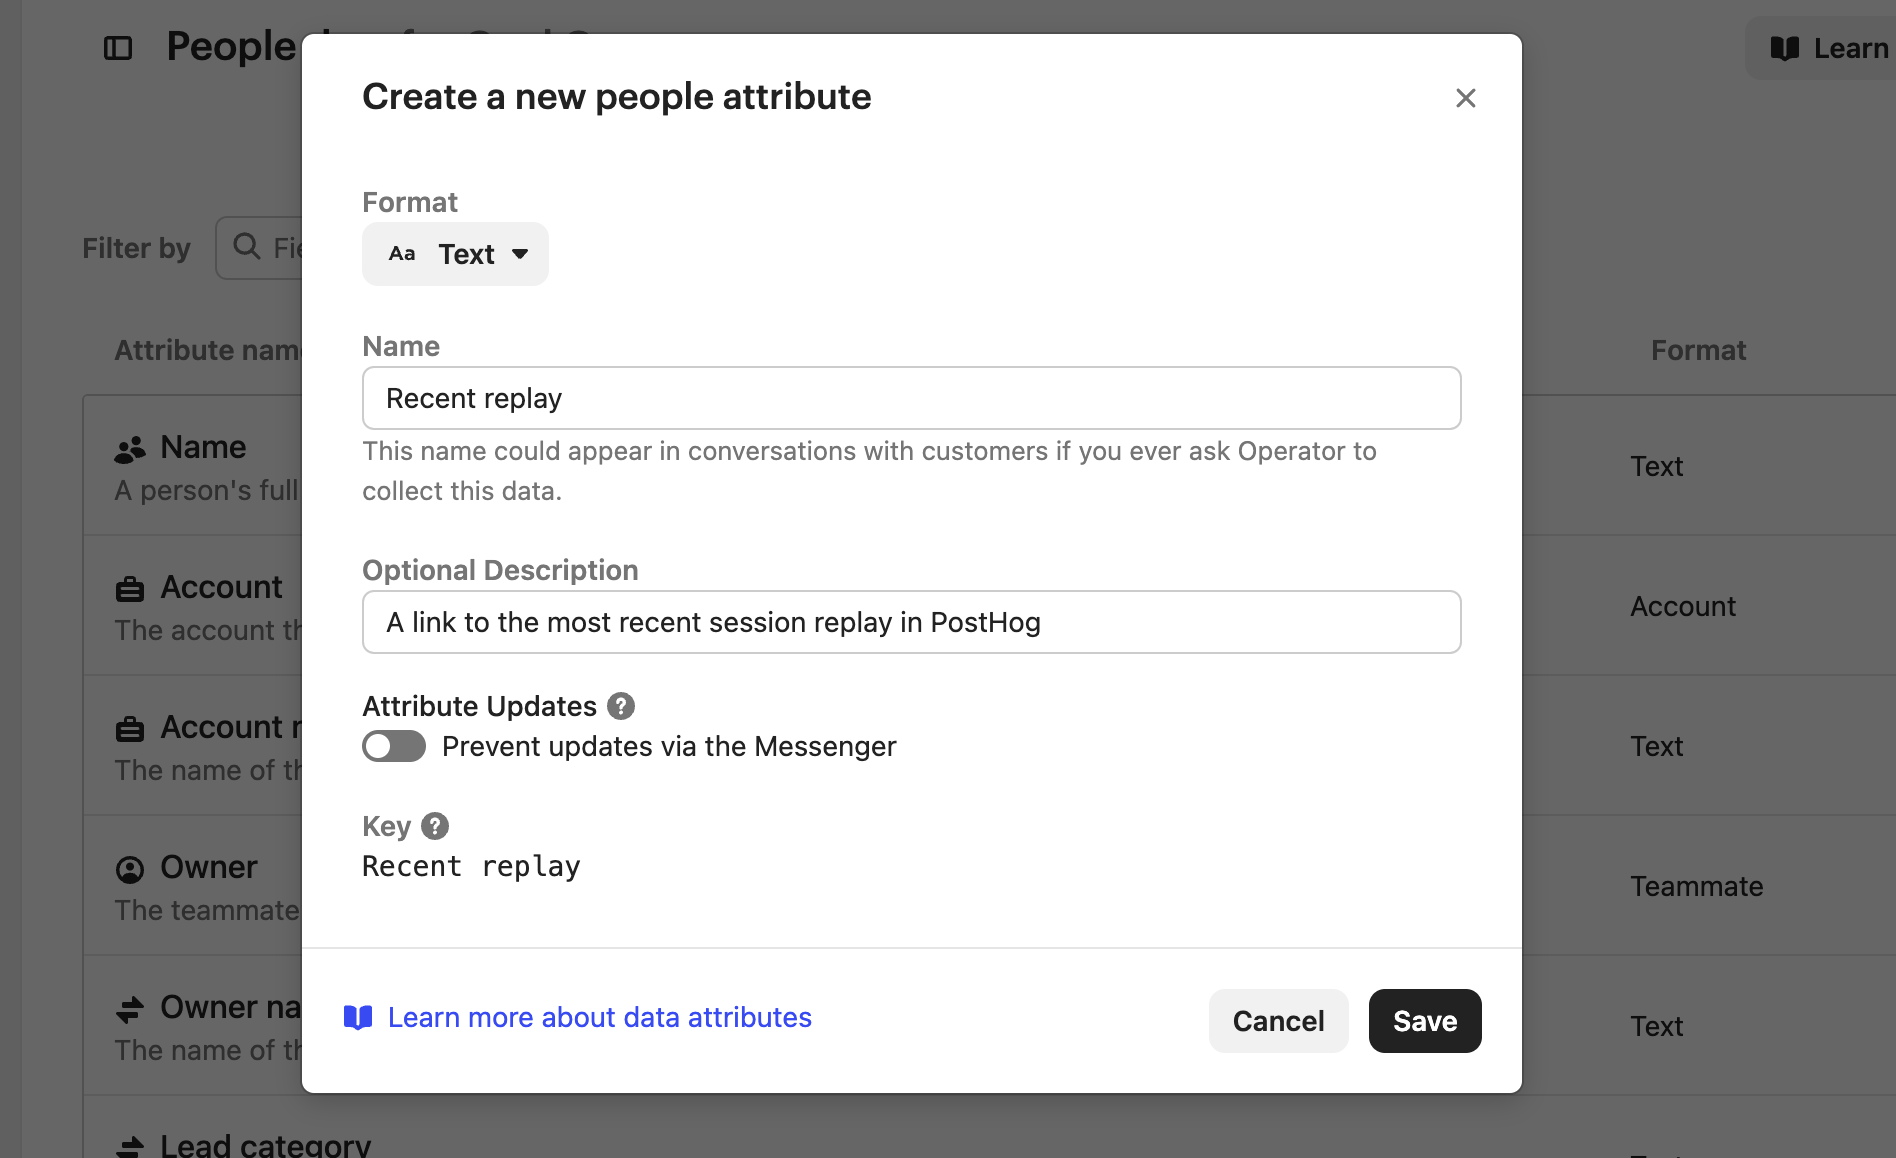
Recent session replay as people data attribute
The first way is to add the session replay link is as a people data attribute. To do this, go to the people data settings and click "Create attribute." Name the attribute "Recent replay," click the toggle to enable updates via the Messenger, and click "Save."
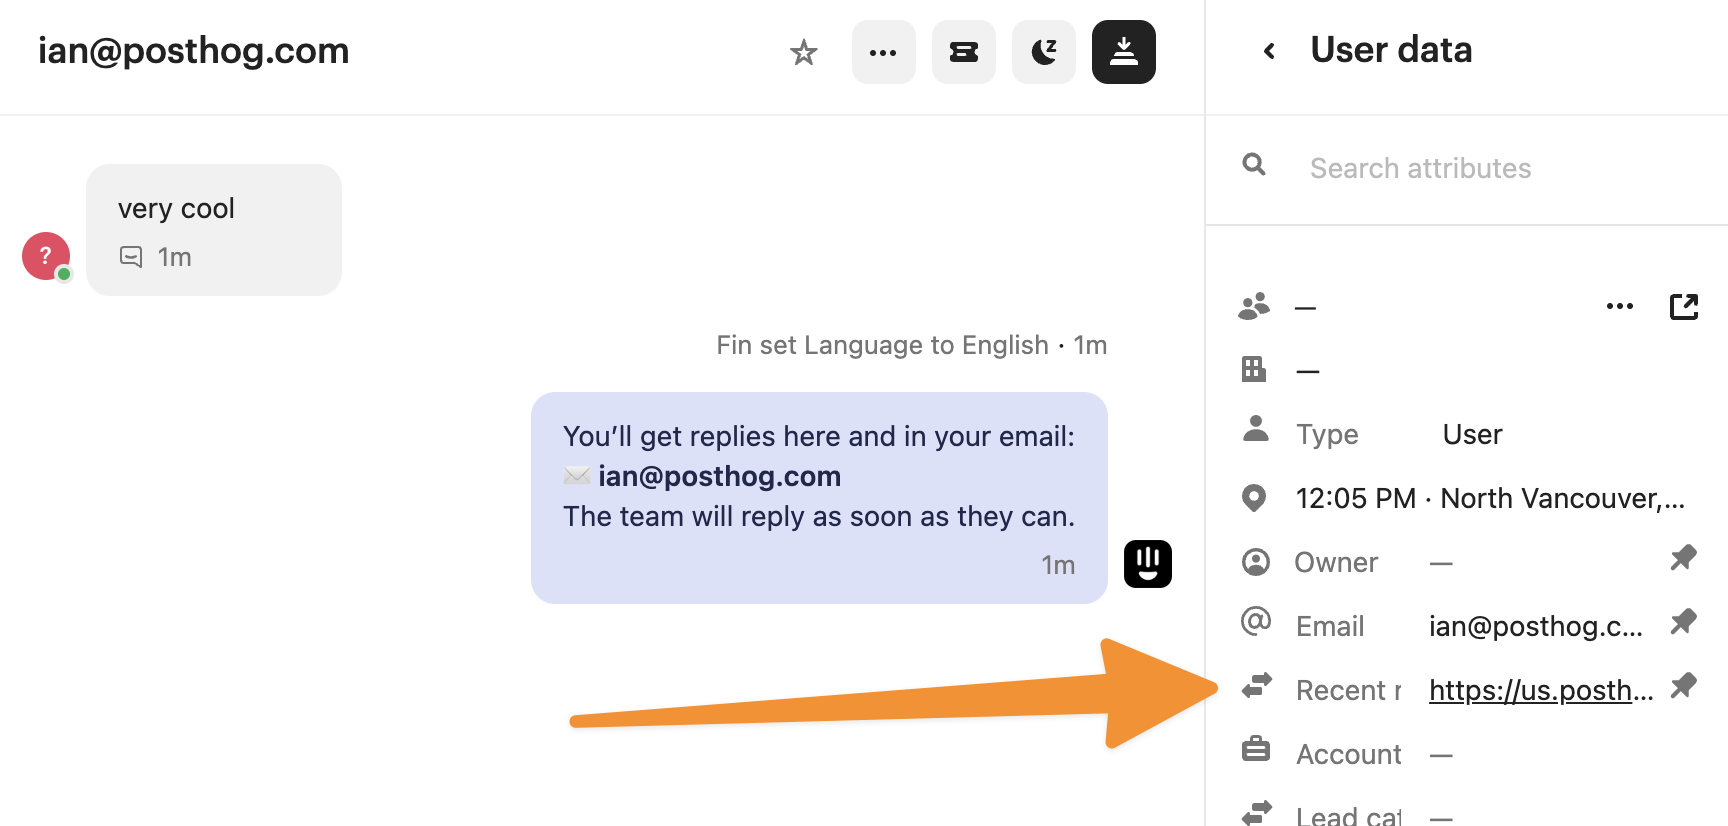
Back in your app, add PostHog to your component in app/page.js, call the get_session_replay_url() method, and add the link as recent_replay in your boot call like this:
Now, when a user sends a message, you can see a link to their most recent replay in PostHog.
The only downside with this method is that it will only show the most recent replay. You lose the history of replays across sessions you might need for solving older issues.
Adding a session replay event
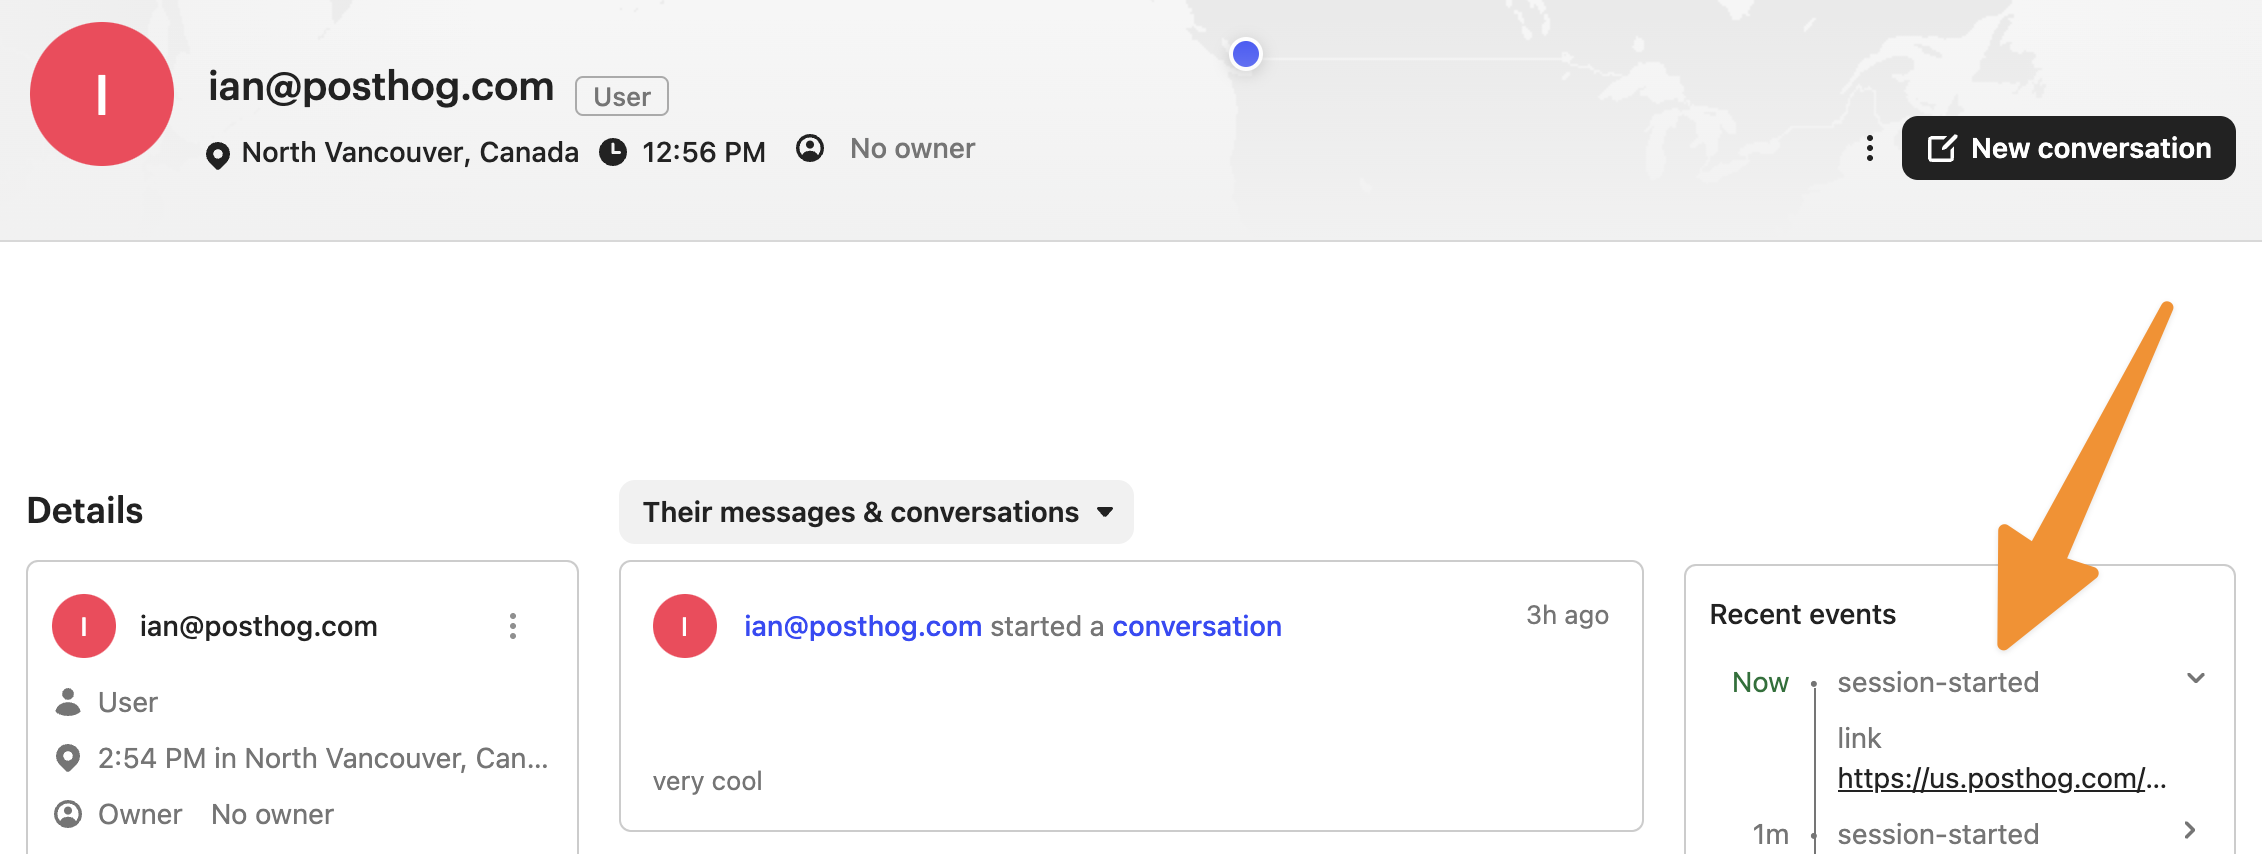
The second way lets us capture a history of session replays in Intercom. We do this by setting up a basic Intercom event with the session replay link. To do this, use the Intercom trackEvent to capture a session-started event like this:
After running this, when you go to the user in Intercom, you see events connected to them with links to different sessions.
Bonus: Beyond a session replay link, you can add information like:
- User ID (with
posthog.get_distinct_id())- Report event ID
- Admin links
- Target area (like onboarding, dashboard, features) As an example, you can see what we add in GitHub.
Further reading
- How to add session replays to Zendesk
- How to use session replays to improve your support experience
- How to use filters + session replays to understand user friction

Subscribe to our newsletter
build mode
Read by 75,000+ founders and builders
We'll share your email with Substack
PostHog is the leading platform for building self-driving products. With a full suite of developer tools – AI observability, product analytics, session replay, feature flags, experiments, error tracking, logs, and more – PostHog captures all the context agents need to diagnose problems, uncover opportunities, and ship fixes. A data warehouse and CDP tie it all together, unifying that context into one source agents can read across. You can steer it all from Slack, the web app, the desktop (PostHog Code), or your own editor via the MCP.