


How to create custom surveys

Contents
Surveys make it easy to collect qualitative feedback fast. PostHog provides everything you need to do this, but you can also customize the implementation of the survey in your app. In this tutorial, we show you how to do this by creating a Next.js app, adding PostHog, setting up a basic survey, and then creating a completely custom survey.
Already have an app and PostHog set up? Skip to survey creation.
Creating a Next.js app and installing PostHog
First, once Node is installed, create a Next.js app. Run the command below, select No for TypeScript, Yes for use app router, and the defaults for every other option.
Once created, go into the folder and install posthog-js.
Next, go into your app folder and create a providers.js file. Create a client-side PostHog initialization using the project token and instance address (from your project settings). Make sure to add the use client directive and a check for the window. Altogether, this looks like this:
We can then import the PHProvider component from the provider.js file in our app/layout.js file, and wrap our app in it.
After setting this up and running npm run dev, your app is ready for surveys.
Creating a basic survey
With our app and PostHog set up, we can go to the surveys tab in PostHog and enable the surveys popup if it isn’t already.
Aftwards click "Create survey." Enter a name, question, and any of the other details you want (like display conditions). Once done, click "Save as draft," make sure everything looks good, then click "Launch."
In your app, you will now see your survey in the bottom right of the page. PostHog automatically tracks surveys shown, dismissed, and submitted along with the responses and user details for each.
Creating a custom survey
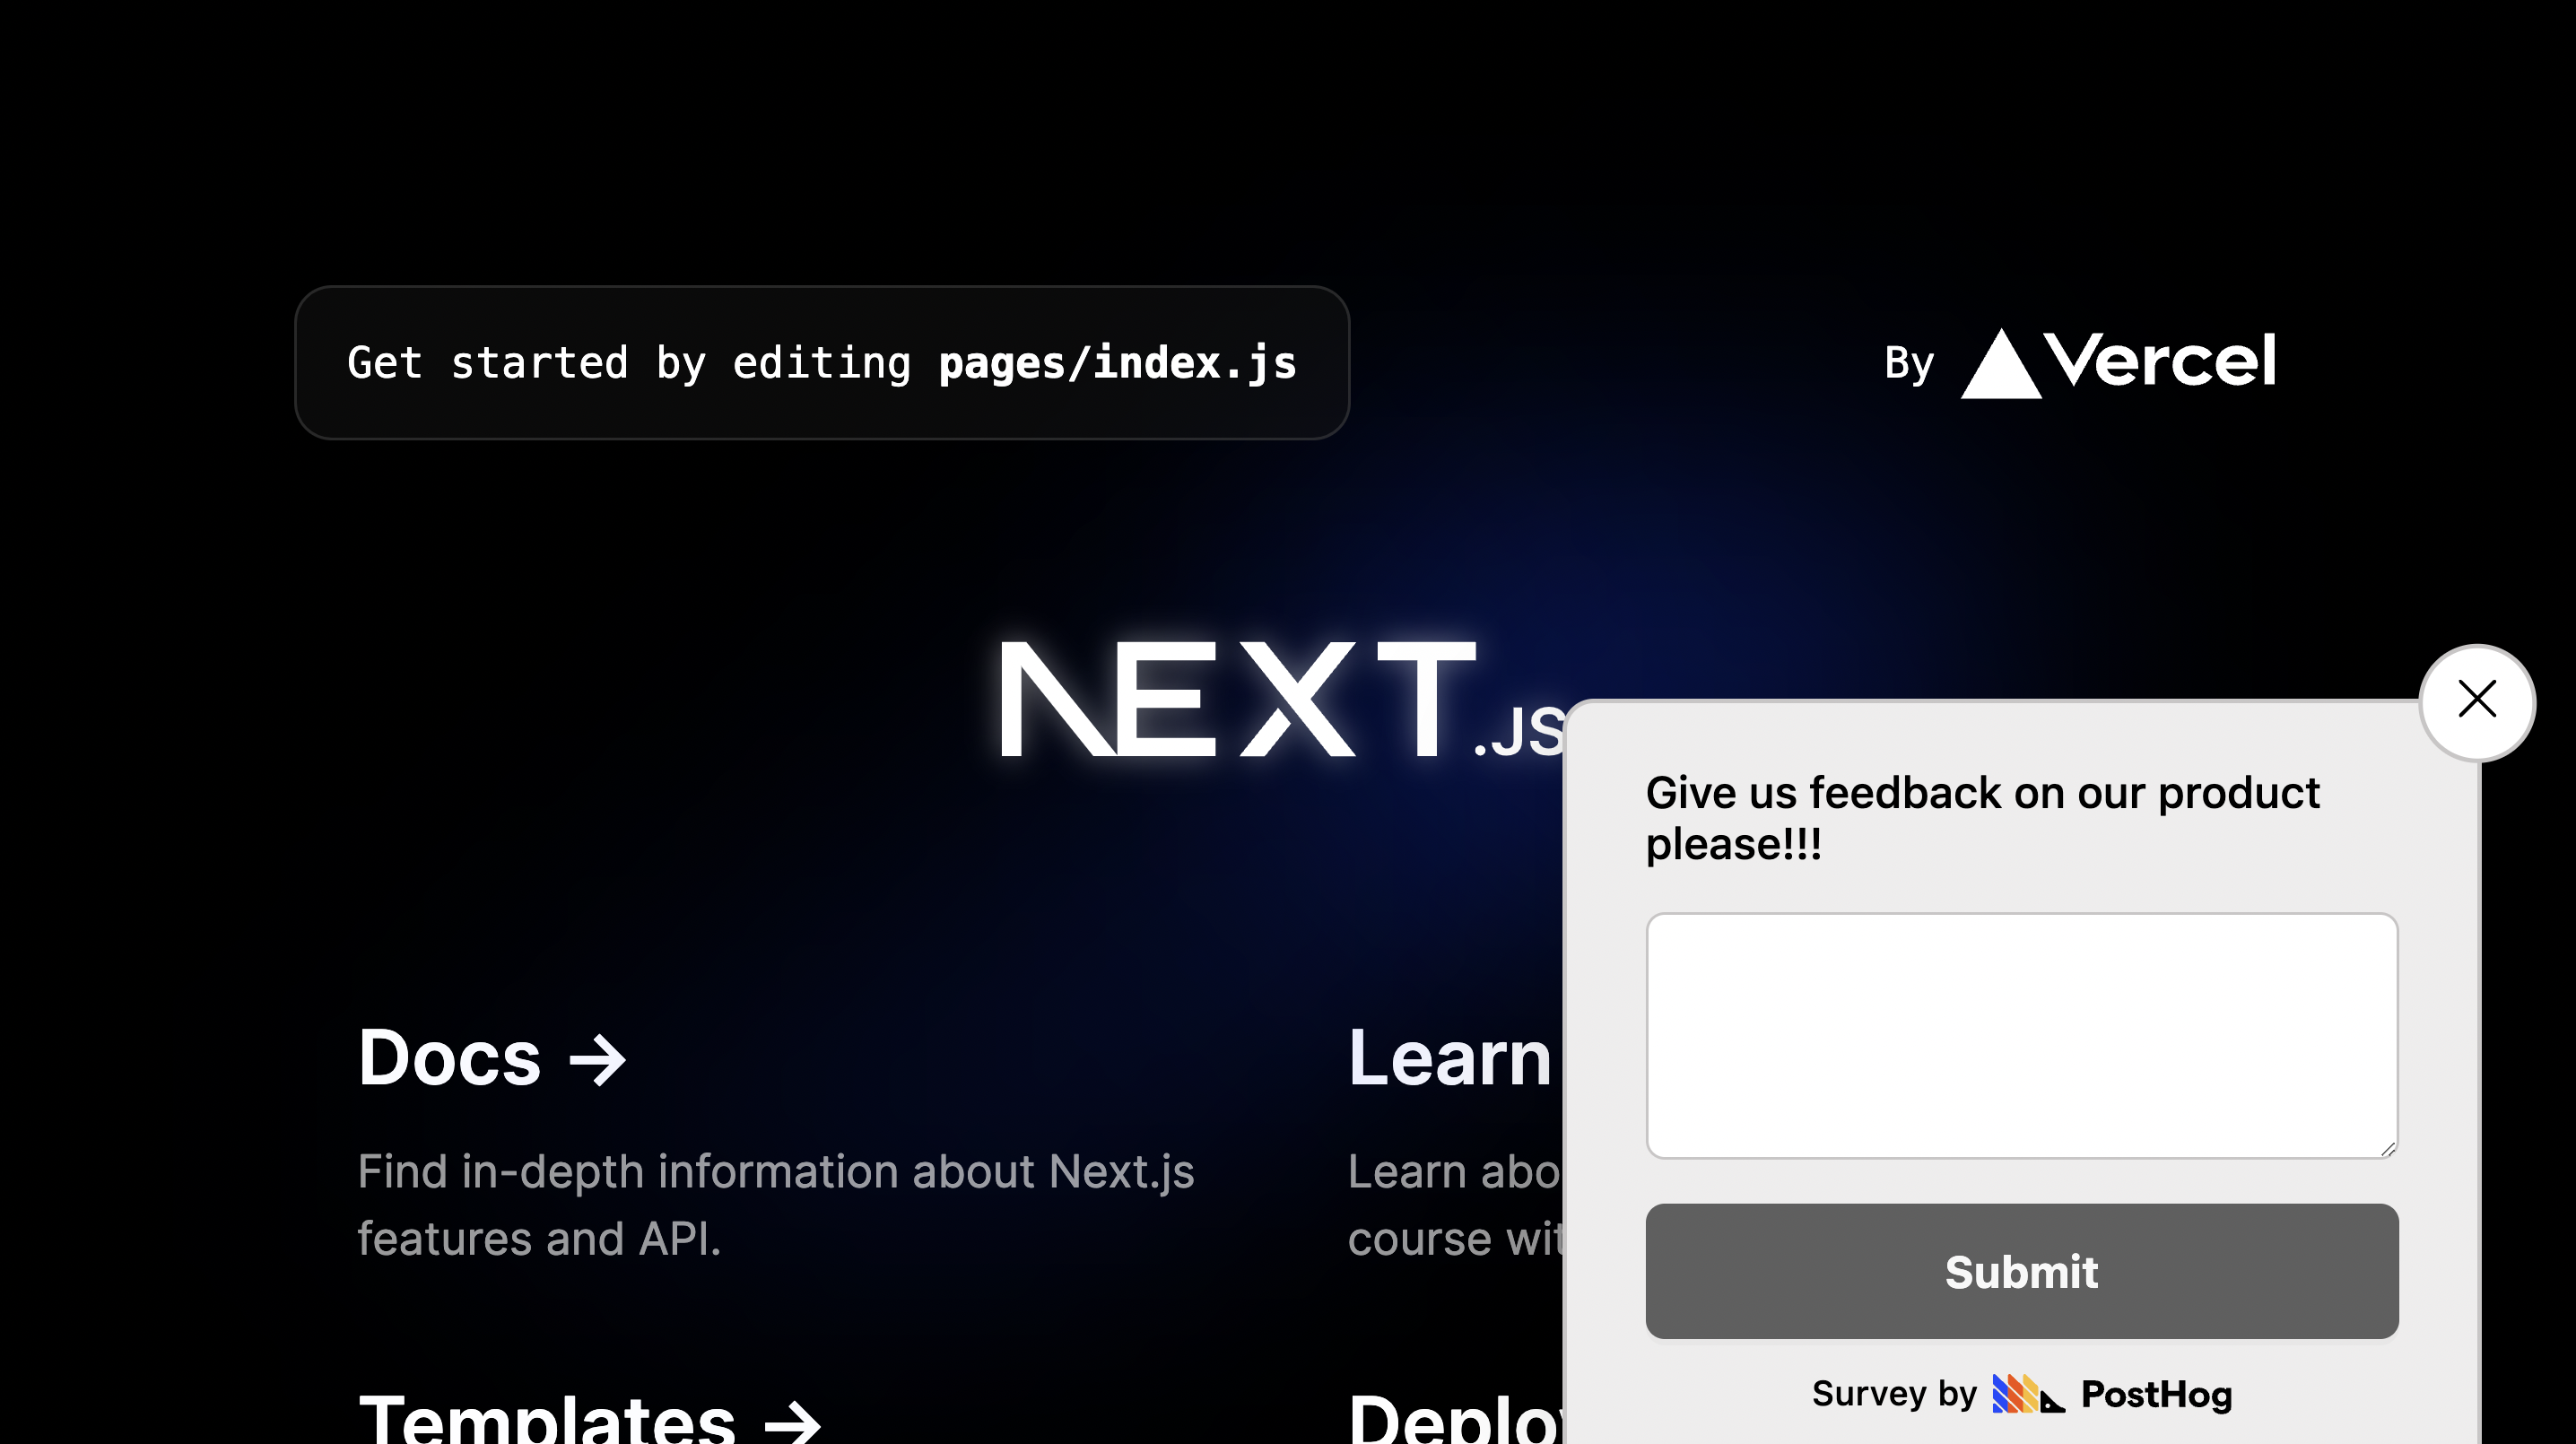
You can customize how and when you show your survey. To start, create another survey, but this time set the "Display mode" as API instead of popover. Customize the details as much as you want, save it as a draft, then launch. It won’t show in your app until we write some code to implement it.

Once done, head back to the app and remove the boilerplate from page.js . We’ll make this the page with our survey. To start, this requires the use client directive, usePostHog context, and a useState hook for the survey data.
We can then get the surveys for a user with PostHog’s getActiveMatchingSurveys method in a useEffect. In the callback, filter for API type surveys, set the first one in our state, and capture a survey shown event:
Next, add our survey data to our page with a <textarea> and submit button.
To capture responses, we need another state for value of our <textarea> and a function to set the state when it changes.
Finally, set up a survey sent event capture when the user clicks the submit button. This needs to include the survey ID, name, and response, and should also reset the textarea.
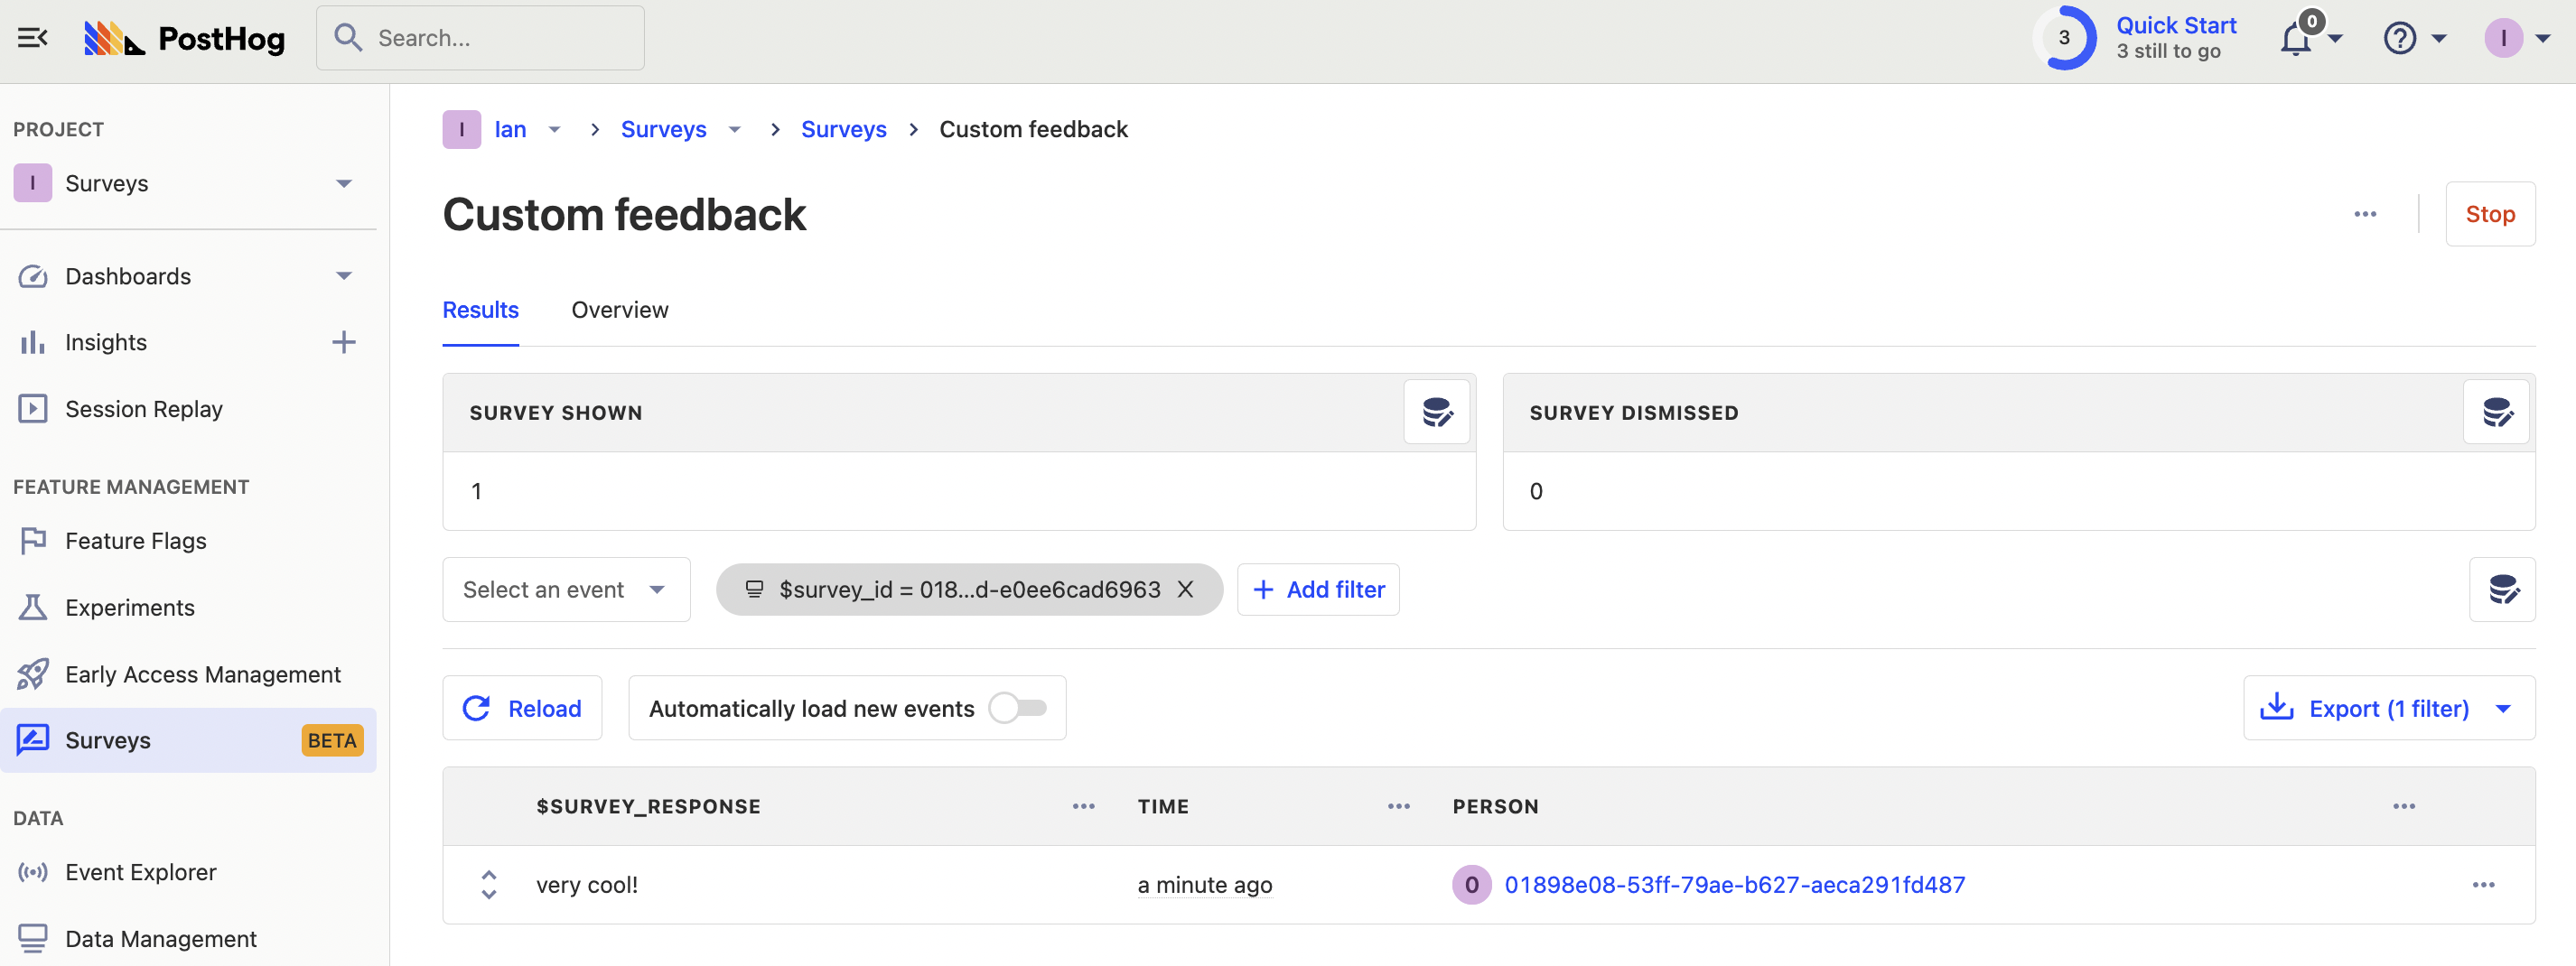
When you submit the survey with a response, it shows up in your results in PostHog.
Dismiss and hide survey
The last thing you might want to do is enable users to dismiss the survey and prevent it from being shown repeatedly. The PostHog survey app handles this with localStorage storing a value that is 'seenSurvey_' + survey.id, so we will use that as well.
First, create a function to close the survey which sets the value in localStorage and the state of the survey to null.
Next, add the closeSurvey function to the submit function and a new dismiss function that captures a survey dismissed event. We also need a dismiss button on our page under our submit button.
This hides the survey when either are clicked, but it shows again when the page is refreshed. To fix this, we check for the seenSurvey_ value in local storage and don’t show the survey if it’s true. We can do this in the useEffect like this:
This completes an introduction to our custom survey functionality, which you can customize further to your needs.
Further reading
- Get feedback and book user interviews with surveys
- The Product-Market Fit Game
- How we made something people want

Subscribe to our newsletter
Product for Engineers
Read by 100,000+ founders and builders
We'll share your email with Substack
PostHog is an all-in-one developer platform for building successful products. We provide product analytics, web analytics, session replay, error tracking, feature flags, experiments, surveys, LLM analytics, logs, workflows, endpoints, data warehouse, CDP, and an AI product assistant to help debug your code, ship features faster, and keep all your usage and customer data in one stack.