


Building a Vue cookie consent banner

Contents
With internet privacy regulations like GDPR coming into effect, managing cookies is becoming increasingly important. Cookies are pieces of information apps set in users’ browsers to help them store information and identity. It’s possible to use PostHog without cookies, but it’s simpler to use them.
To ensure you are compliant with regulations such as GDPR, your app must receive consent to use cookies. One way to do this is with a cookie consent banner, and this tutorial shows you how to build one in Vue, a popular JavaScript framework and combine it with PostHog.
Step 1: Setting up our Vue app
First, if you haven’t used Vue before, install the command line interface (CLI). You also need a package manager such as npm, which you can get by installing Node.
After installing the CLI, you can create the Vue project. We are naming ours vue-cookie-banner. When the CLI prompts you with options, choose Vue 3.
Next, head into the folders it created and run the server. This launches the site.
Now you have the template for a Vue app that is ready for PostHog and a cookie consent banner.
Step 2: Installing PostHog
Using PostHog starts by installing the posthog-js package.
Next, we’ll set up PostHog using the Composition API.
In src, create a composables folder as well as a usePosthog.js file to that folder. In usePosthog.js, initialize PostHog with your project token and host from your project settings like this:
In main.js, import the PostHog composable and call it.
Once you run npm run serve again and head into the cookies for your site, you should see a PostHog cookie added.
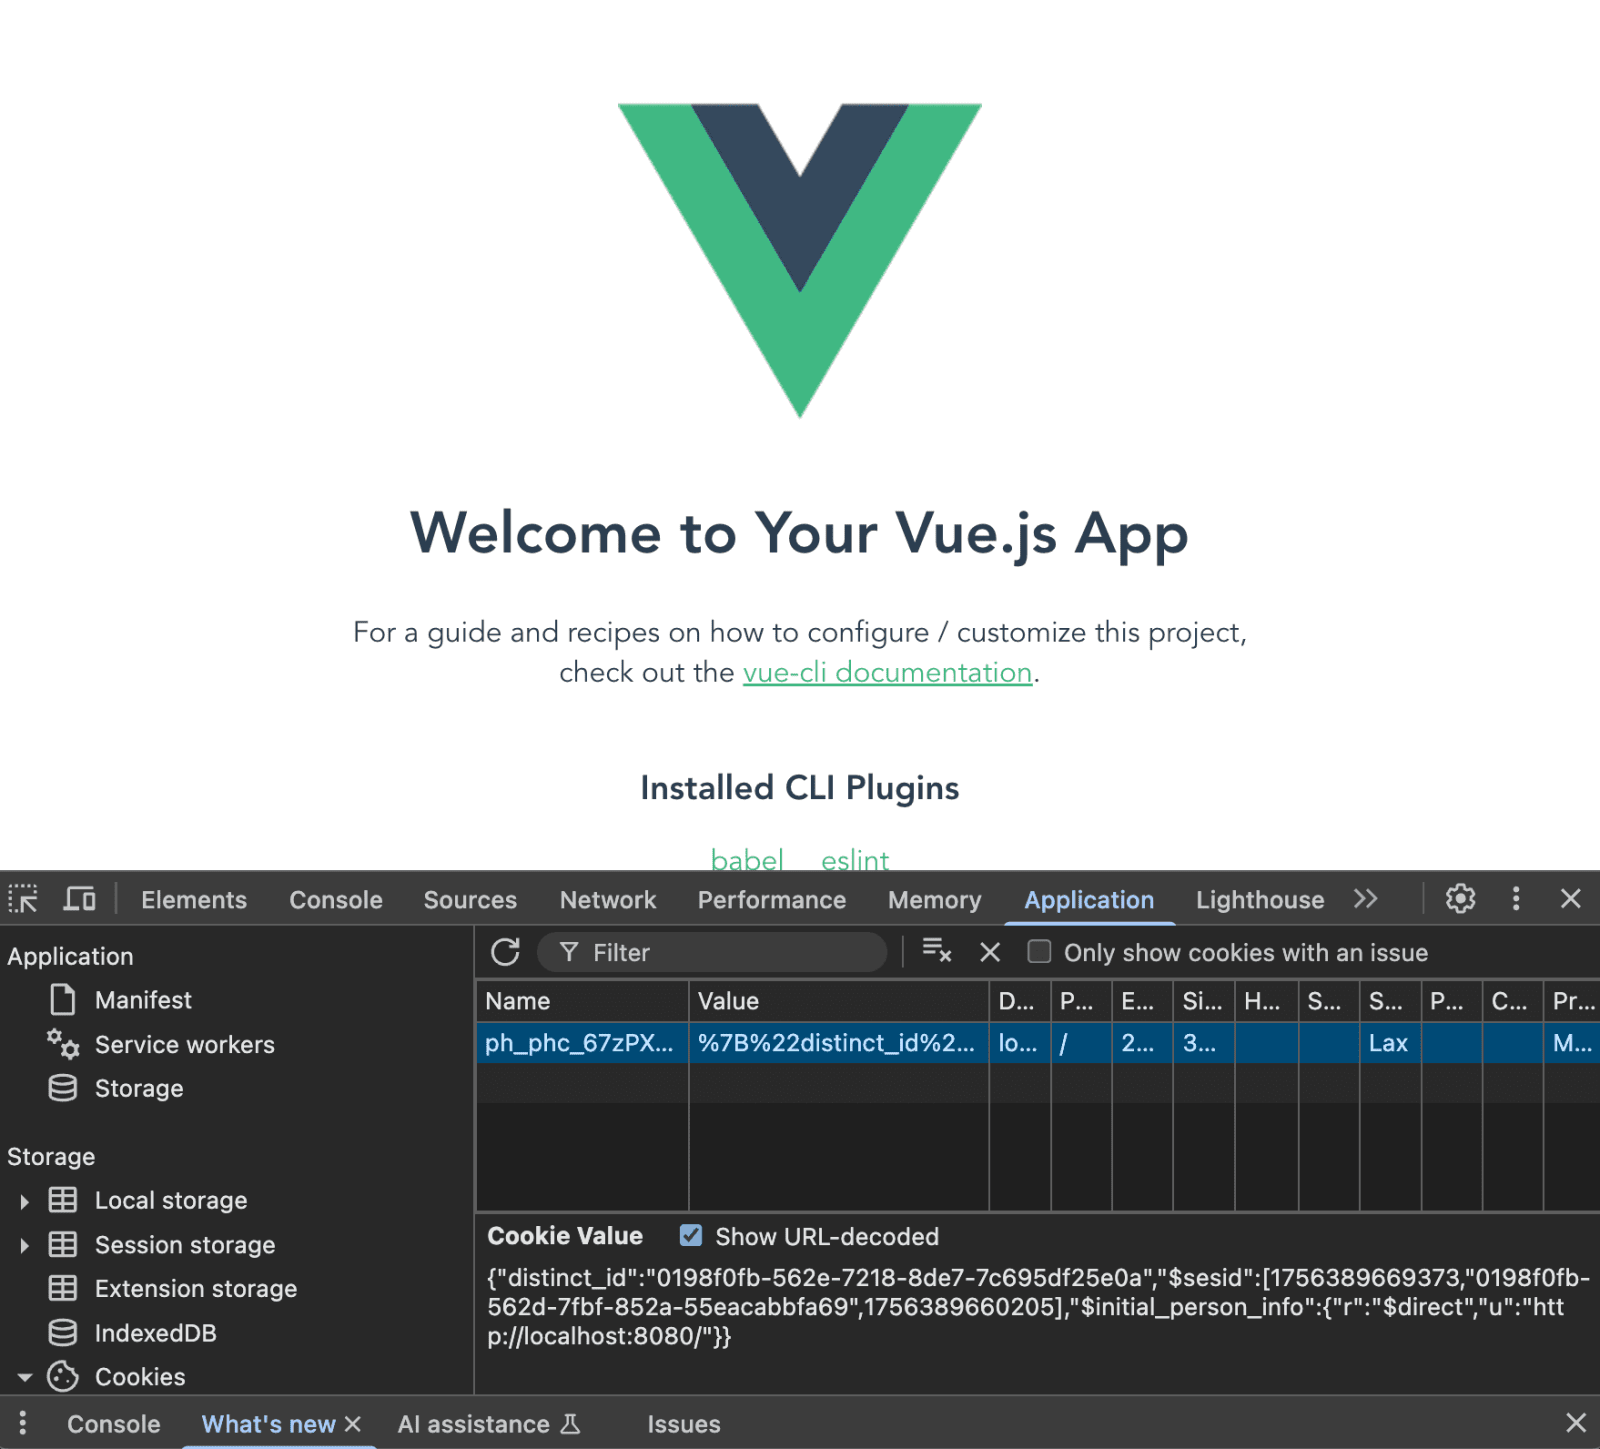
Our app did this without the consent of the user, and now, it’s time to build the cookie consent banner to fix this.
Step 3: Ensuring cookies aren't set on initial load
If you want to make sure you are fully compliant, you may want to ensure cookies aren't set until the user has given consent.
To do this, you can set cookieless_mode to on_reject in your initialization config like this:
This means that PostHog will not set any cookies until the user has given consent, which is what we rely on the cookie banner to do.
Step 4: Creating our cookie banner component
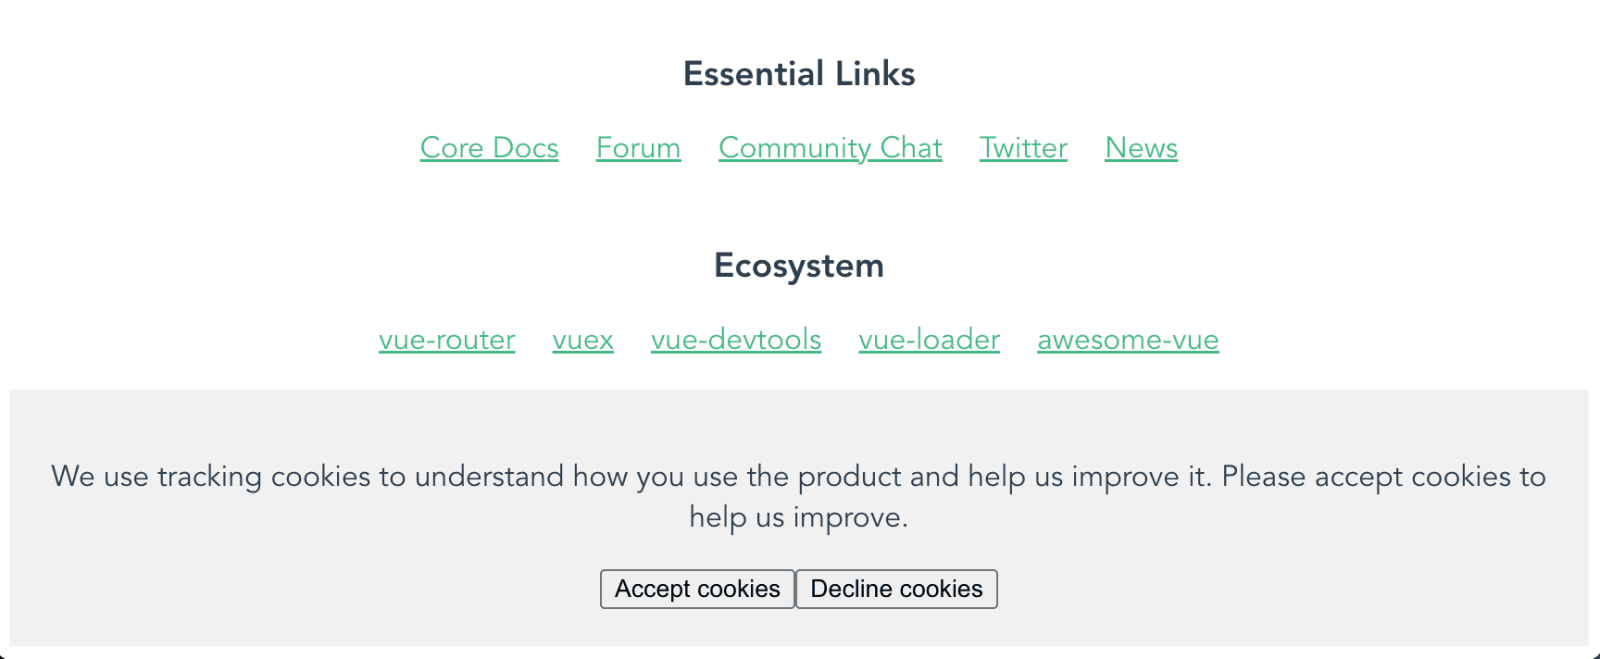
First, create a CookieBanner.vue component in our components folder.
For our cookie banner, create a basic component with some details about cookies, buttons to accept and decline, and some basic styling. You can customize it more if you like (our posthog.com cookie banner can provide some inspiration).
In App.vue, import the CookieBanner component and add below the default HelloWorld component.
That gives us a basic cookie consent banner in our Vue app. It’s not the prettiest, but you can modify it to fit your site.
The problem is that it doesn’t do anything at the moment. We must add the logic to manage consent and opt users in or out of cookies. Luckily, PostHog makes this easy.
Step 5: Adding the opt out (or in) logic
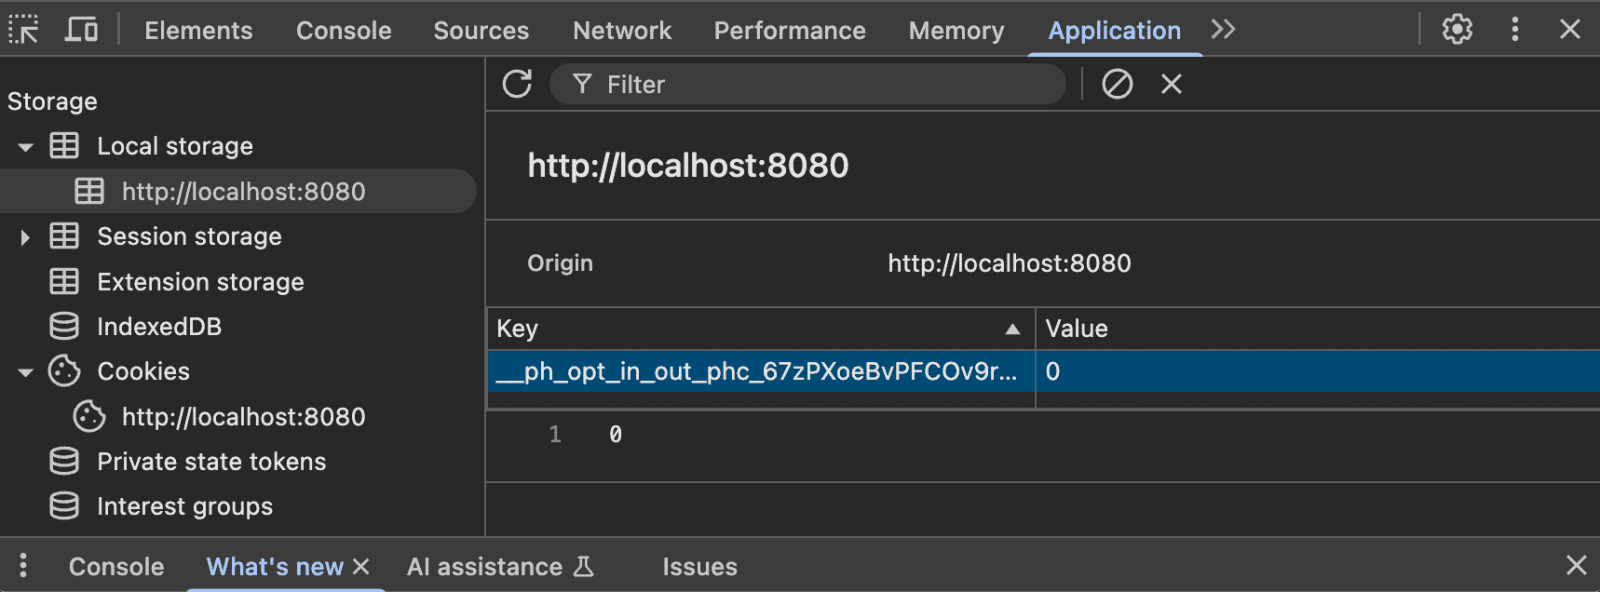
PostHog has methods to help us opt user in or out and deal with cookies. We’ll add click handlers to our buttons and connect them to methods that use PostHog to either opt in or out of tracking cookies.
Now, no cookies are set until the user clicks an option and the decision is saved in local storage.
This is the functionality we want, but the banner doesn't disappear after the user clicks an option (and that’s annoying). We can add some more logic, again using PostHog, to hide the banner once the user chooses an option.
Step 6: Making the banner conditional
To make the banner conditional, we:
- Set up a
showBannerstate to control whether the banner is shown. - Use PostHog's
get_explicit_consent_statusmethod to check if the user has made a choice. - Hide the banner if/when the user has made a choice.
Altogether this looks like this:
Once we’ve done that, our cookie consent banner is fully functional. Try it out by clicking accept and decline, making sure it disappears, and the correct values show up in cookies and local storage. Clear local storage to reset and test again with the other option to confirm everything works. You're now one step closer to being compliant with GDPR and other privacy regulations.
Further reading
Subscribe to our newsletter
build mode
Read by 75,000+ founders and builders
We'll share your email with Substack
PostHog is the leading platform for building self-driving products. With a full suite of developer tools – AI observability, product analytics, session replay, feature flags, experiments, error tracking, logs, and more – PostHog captures all the context agents need to diagnose problems, uncover opportunities, and ship fixes. A data warehouse and CDP tie it all together, unifying that context into one source agents can read across. You can steer it all from Slack, the web app, the desktop (PostHog Desktop), or your own editor via the MCP.