


How to set up React error tracking

Contents
Errors are inevitable when building apps. Setting up error tracking limits their impact by helping you identify, debug, and fix them fast.
To show you how to set this up, we'll create a basic React app, set up PostHog, and then use it to autocapture errors in your app.
1. Creating a React app with Vite
First, ensure Node.js is installed (version 18.0 or newer) and then create a new React app with Vite:
Our app will be a page that can trigger both render errors and manually thrown errors. To do this, set up each of them in App.jsx like this:
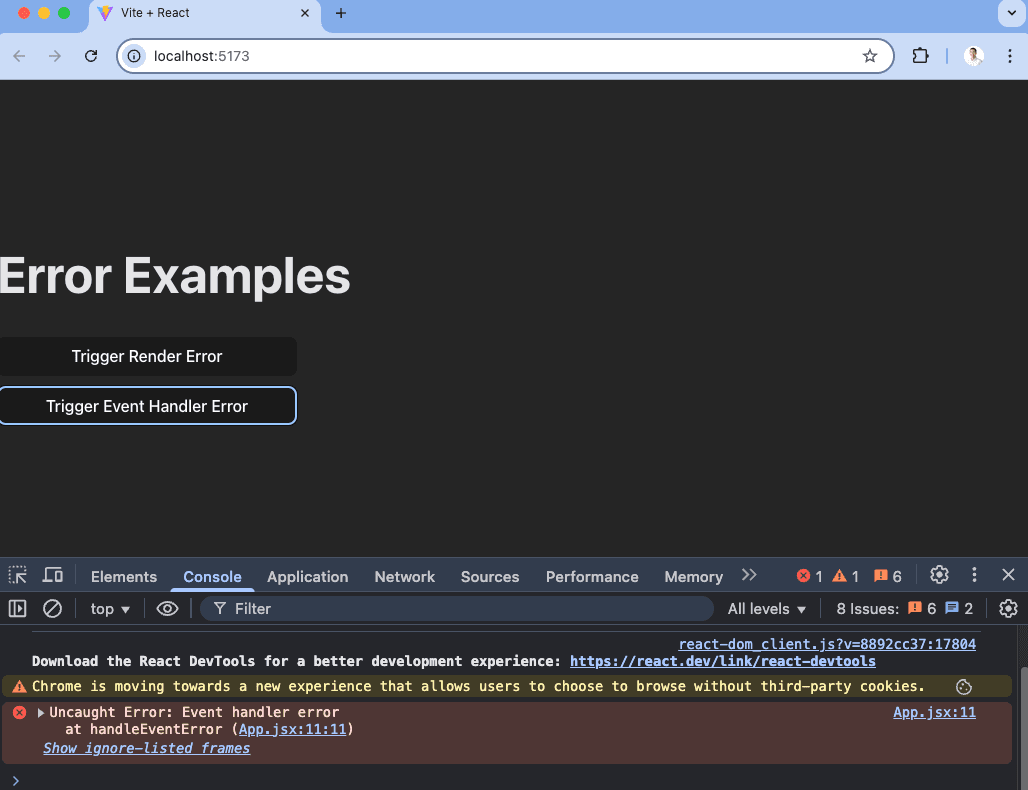
Now, we can run npm run dev and click the buttons to trigger the different types of errors.
2. Setting up PostHog for error tracking
Next, we'll set up PostHog to capture these errors. First, we need to install posthog-js and @posthog/react:
Next, create a PostHogProvider.jsx file in your src directory, and in it, initialize PostHog using your project token and host from your project settings. While you are there, make sure that exception autocapture is enabled.
Once done, import it into main.jsx and wrap your app with it like this:
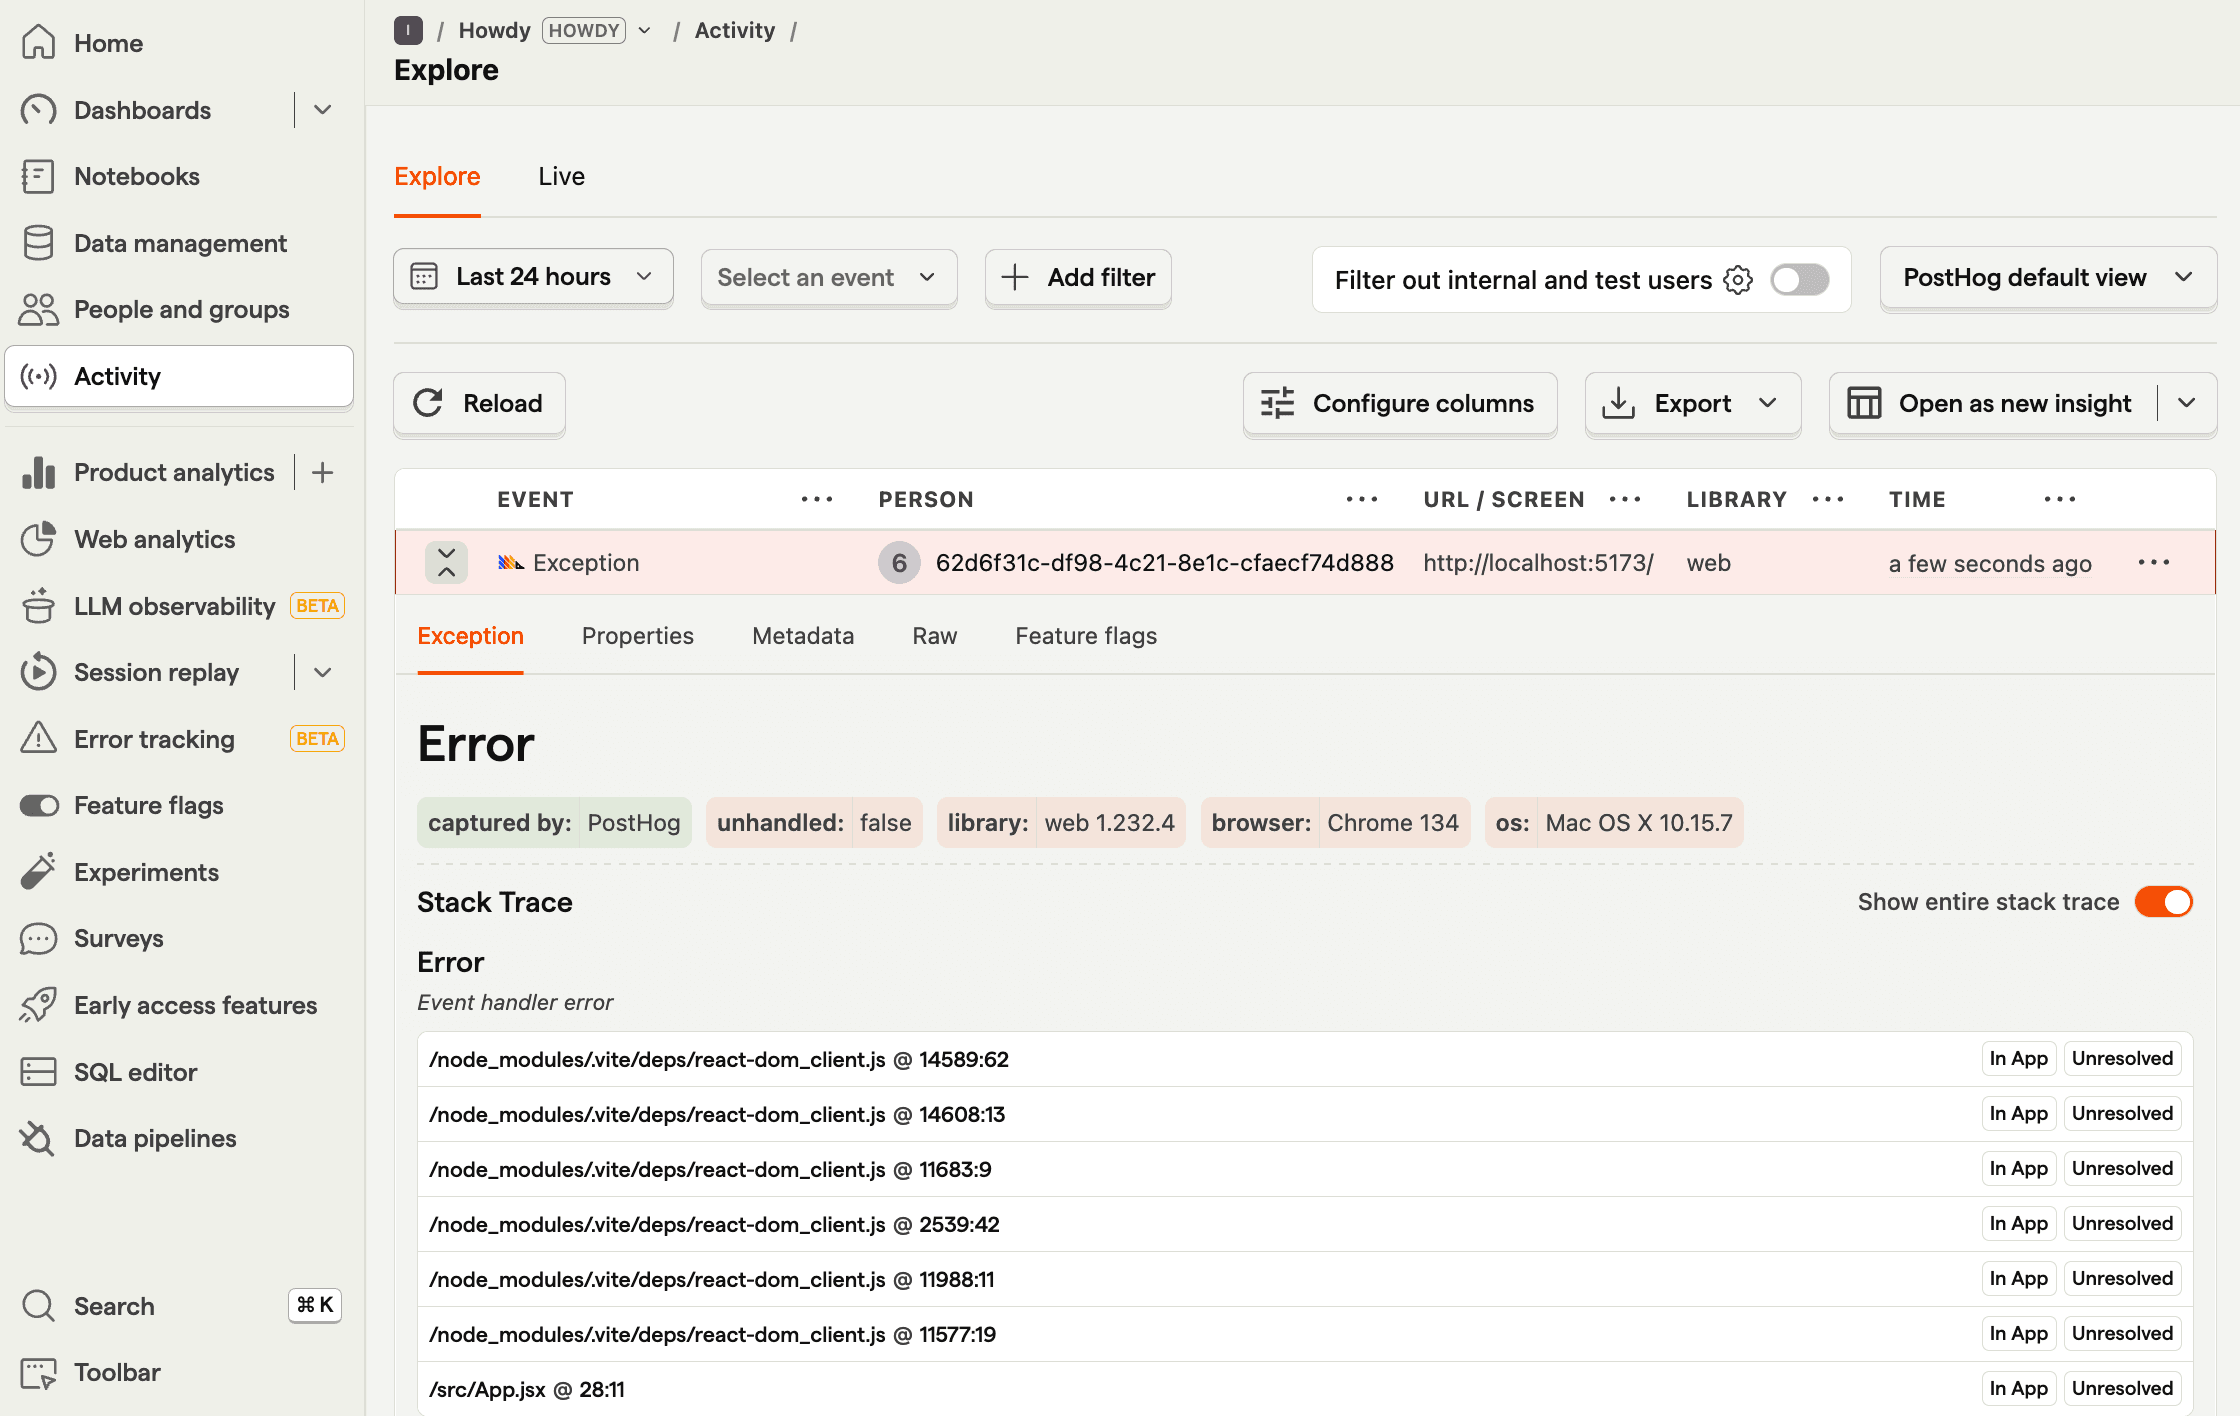
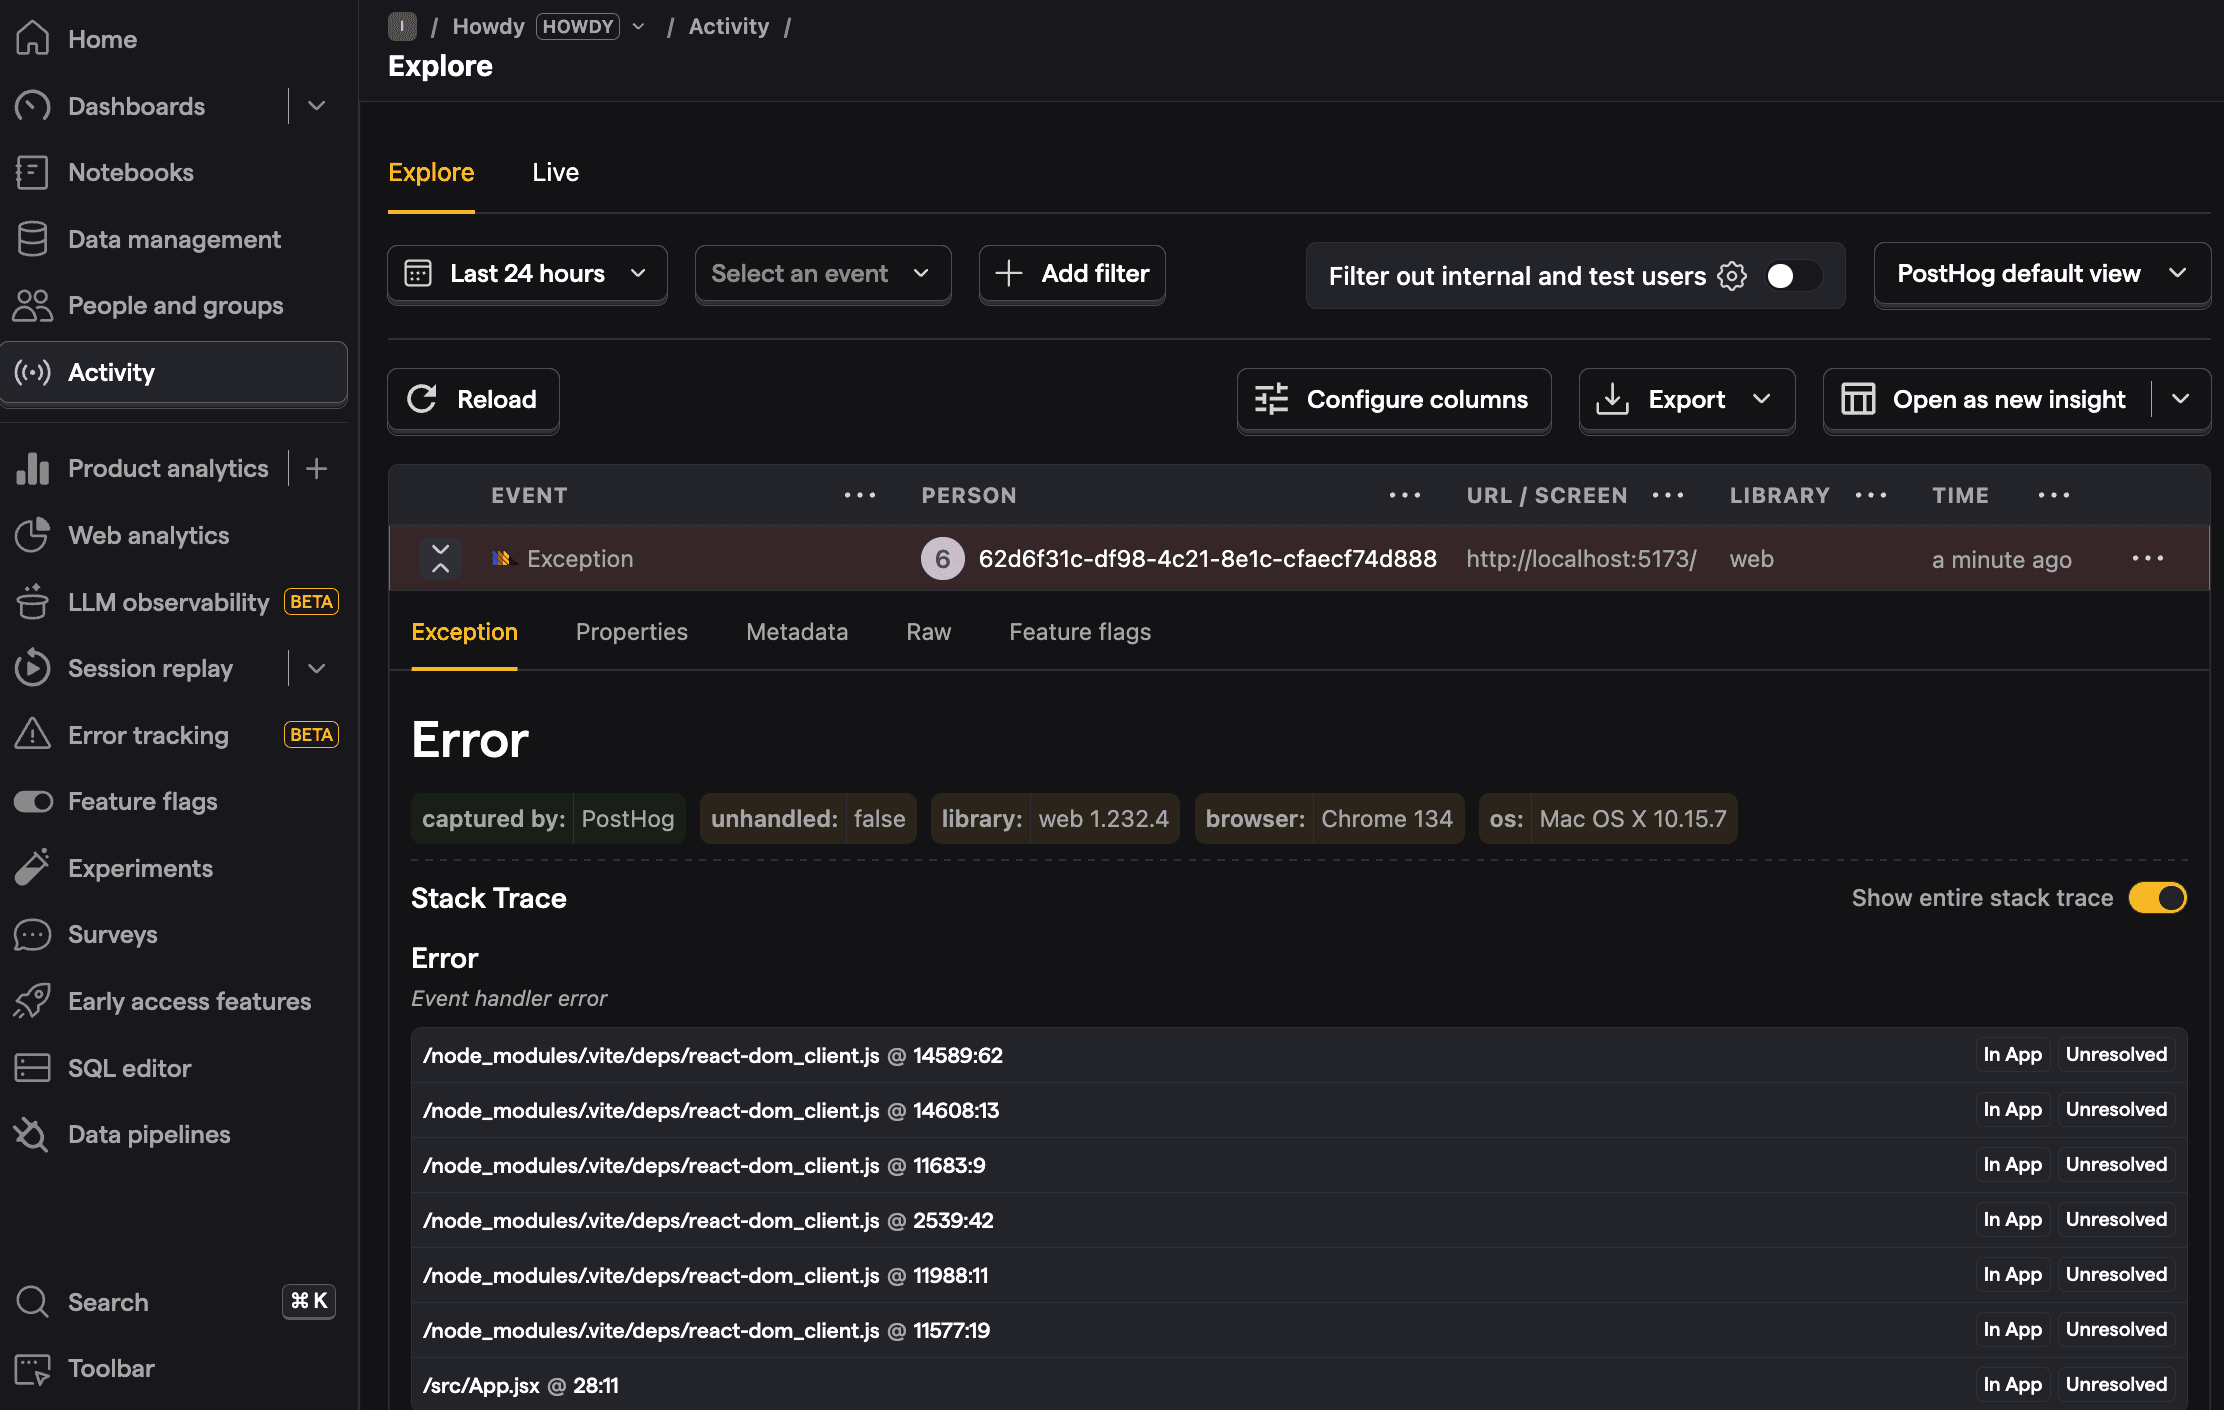
Once done, re-run your app with npm run dev and PostHog will autocapture errors along with their details.
You can also capture errors manually with PostHog’s captureException method like this:
This is helpful if you have existing error handling logic you want to integrate PostHog into.
3. Monitoring errors in PostHog
Once you’ve set up error capture in your app, you can head to the error tracking tab in PostHog to review the issues popping up along with their frequency.
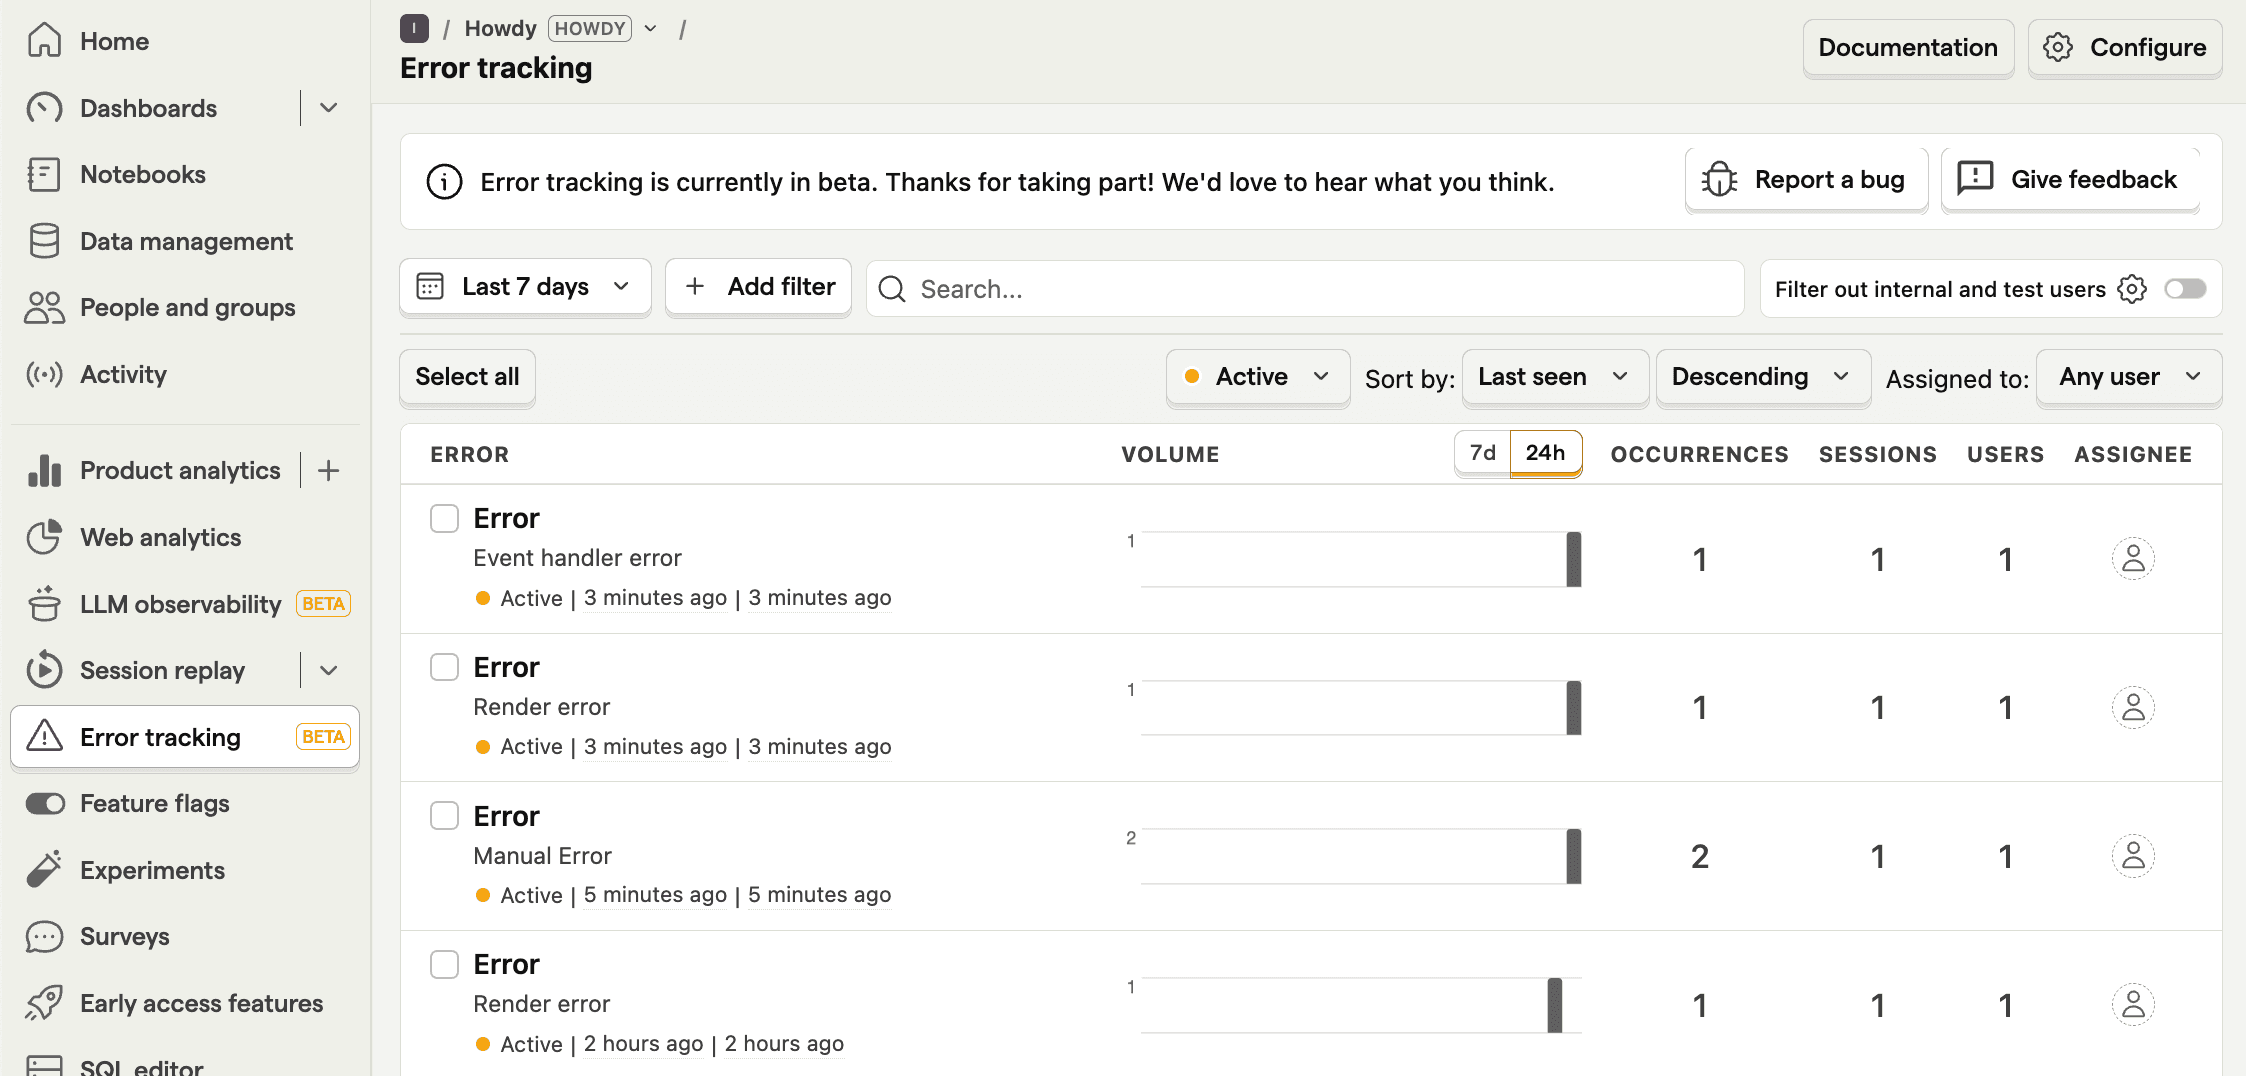
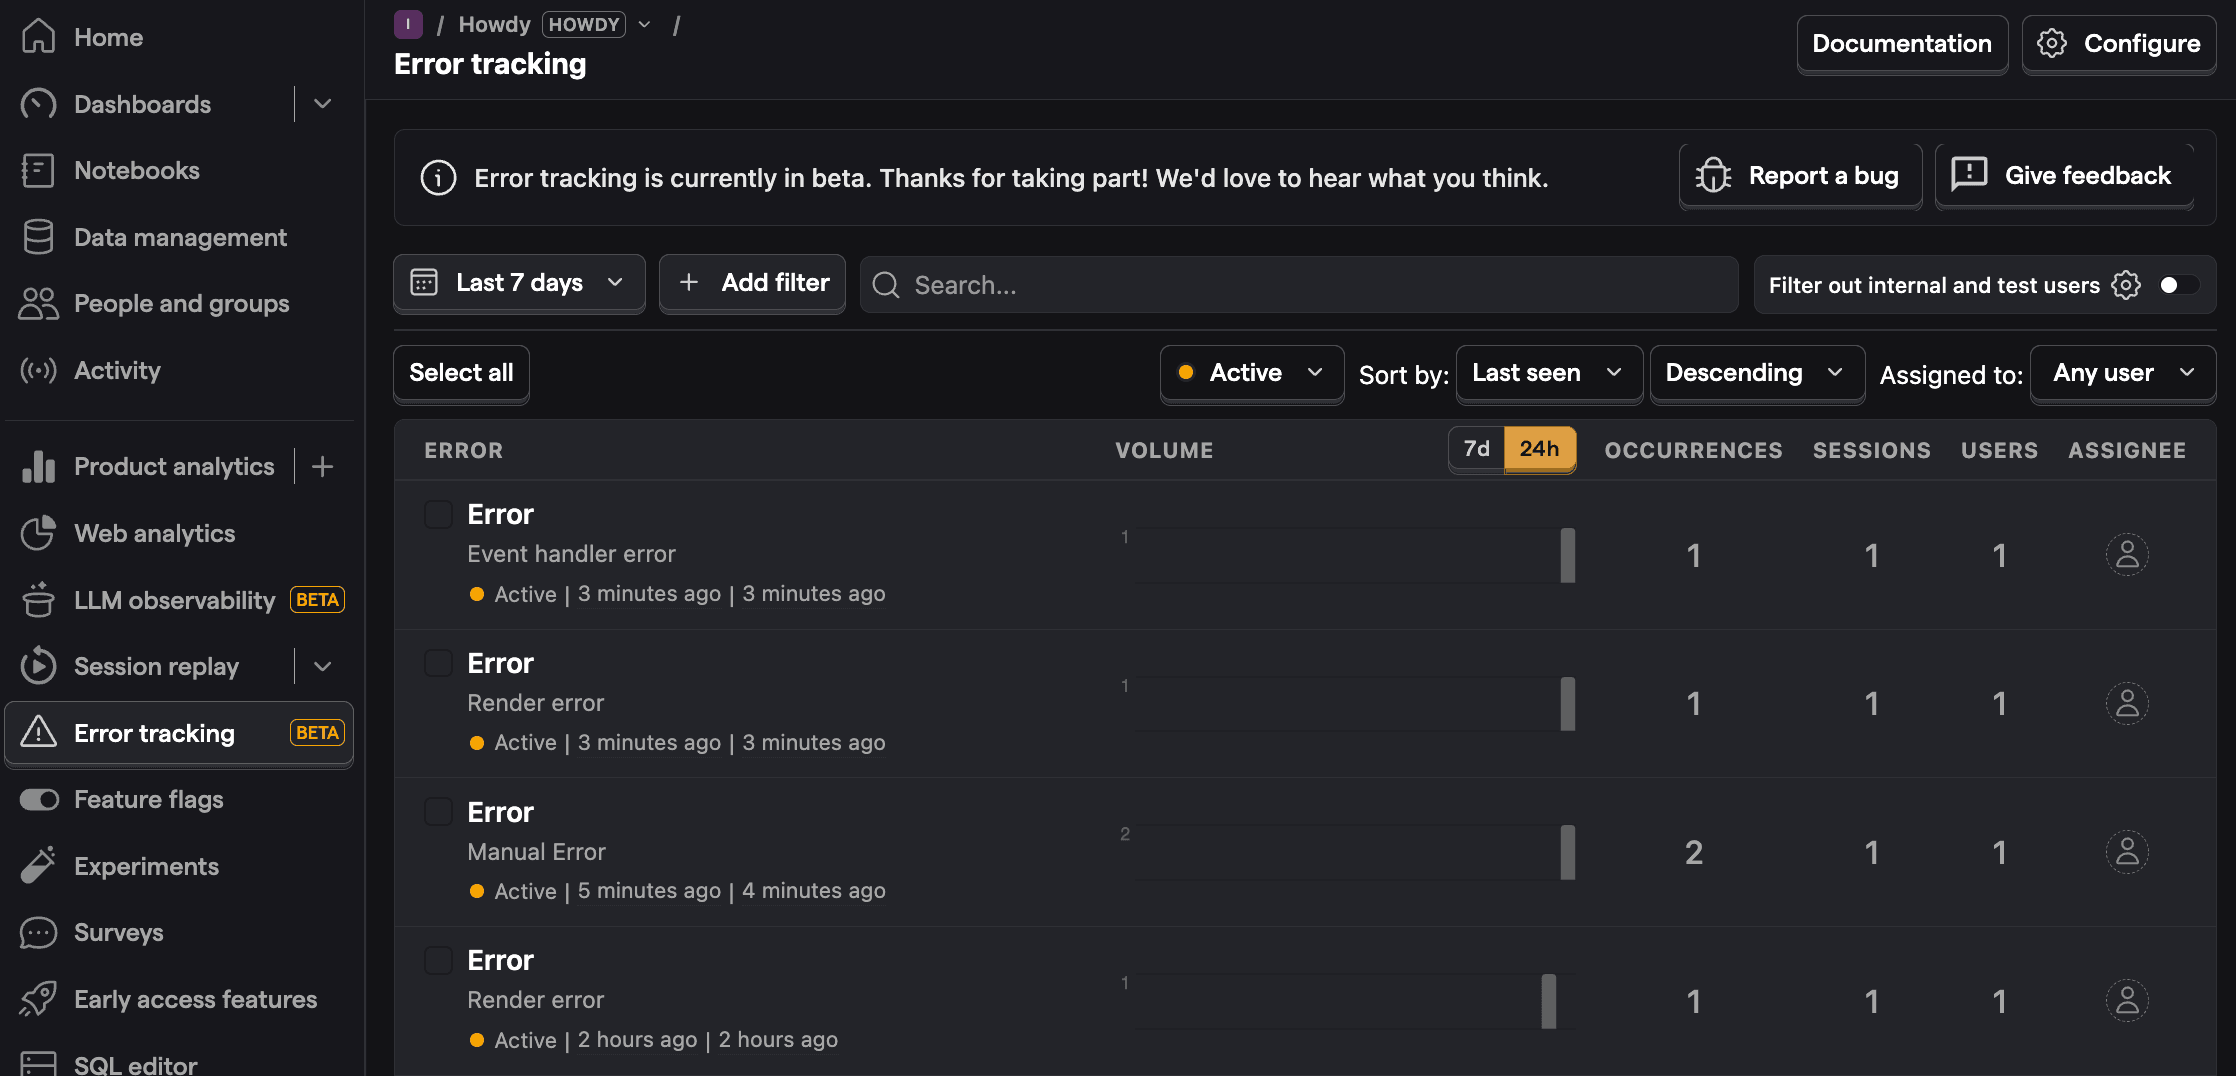
You can click into any of these errors to get more details on them, including a stack trace as well as archive, resolve, or suppress them. On top of this, you can analyze $exception events like you would any event in PostHog, including setting up trends for them and querying them with SQL.
PostHog is the leading platform for building self-driving products. With a full suite of developer tools – AI observability, product analytics, session replay, feature flags, experiments, error tracking, logs, and more – PostHog captures all the context agents need to diagnose problems, uncover opportunities, and ship fixes. A data warehouse and CDP tie it all together, unifying that context into one source agents can read across. You can steer it all from Slack, the web app, the desktop (PostHog Code), or your own editor via the MCP.