


How to run A/B tests in iOS

Contents
A/B tests help you make your iOS app better by comparing the impact of changes on key metrics.
PostHog makes A/B testing on iOS simple. To show you how, this tutorial will guide you on how to add PostHog to your iOS app and run an A/B test. We'll create a basic A/B test to see how the background color of a screen affects the click-through rate of a button.
Creating a new iOS app
Our app will have two screens. The first screen will have a button which will take you to a second screen. The second screen will either have a red or green background color depending on if the user is in the control or test group. The second screen will also have a button which captures an event when it's pressed. We'll use this event as our goal metric for our test.
The first step is to create a new app. Open XCode and click "Create new project". Select iOS as your platform, then "App" and press next. Give your app a name, select SwiftUI as the interface, and the defaults for everything else. Click next and then "Create".
Then, replace your code in ContentView with the following:
Then, create a new SwiftUI View called FeatureScreenView. Replace the default code in the new file with the following:
Our basic set up is now complete. Build and run your app to test that it's working.
Adding PostHog to your iOS app
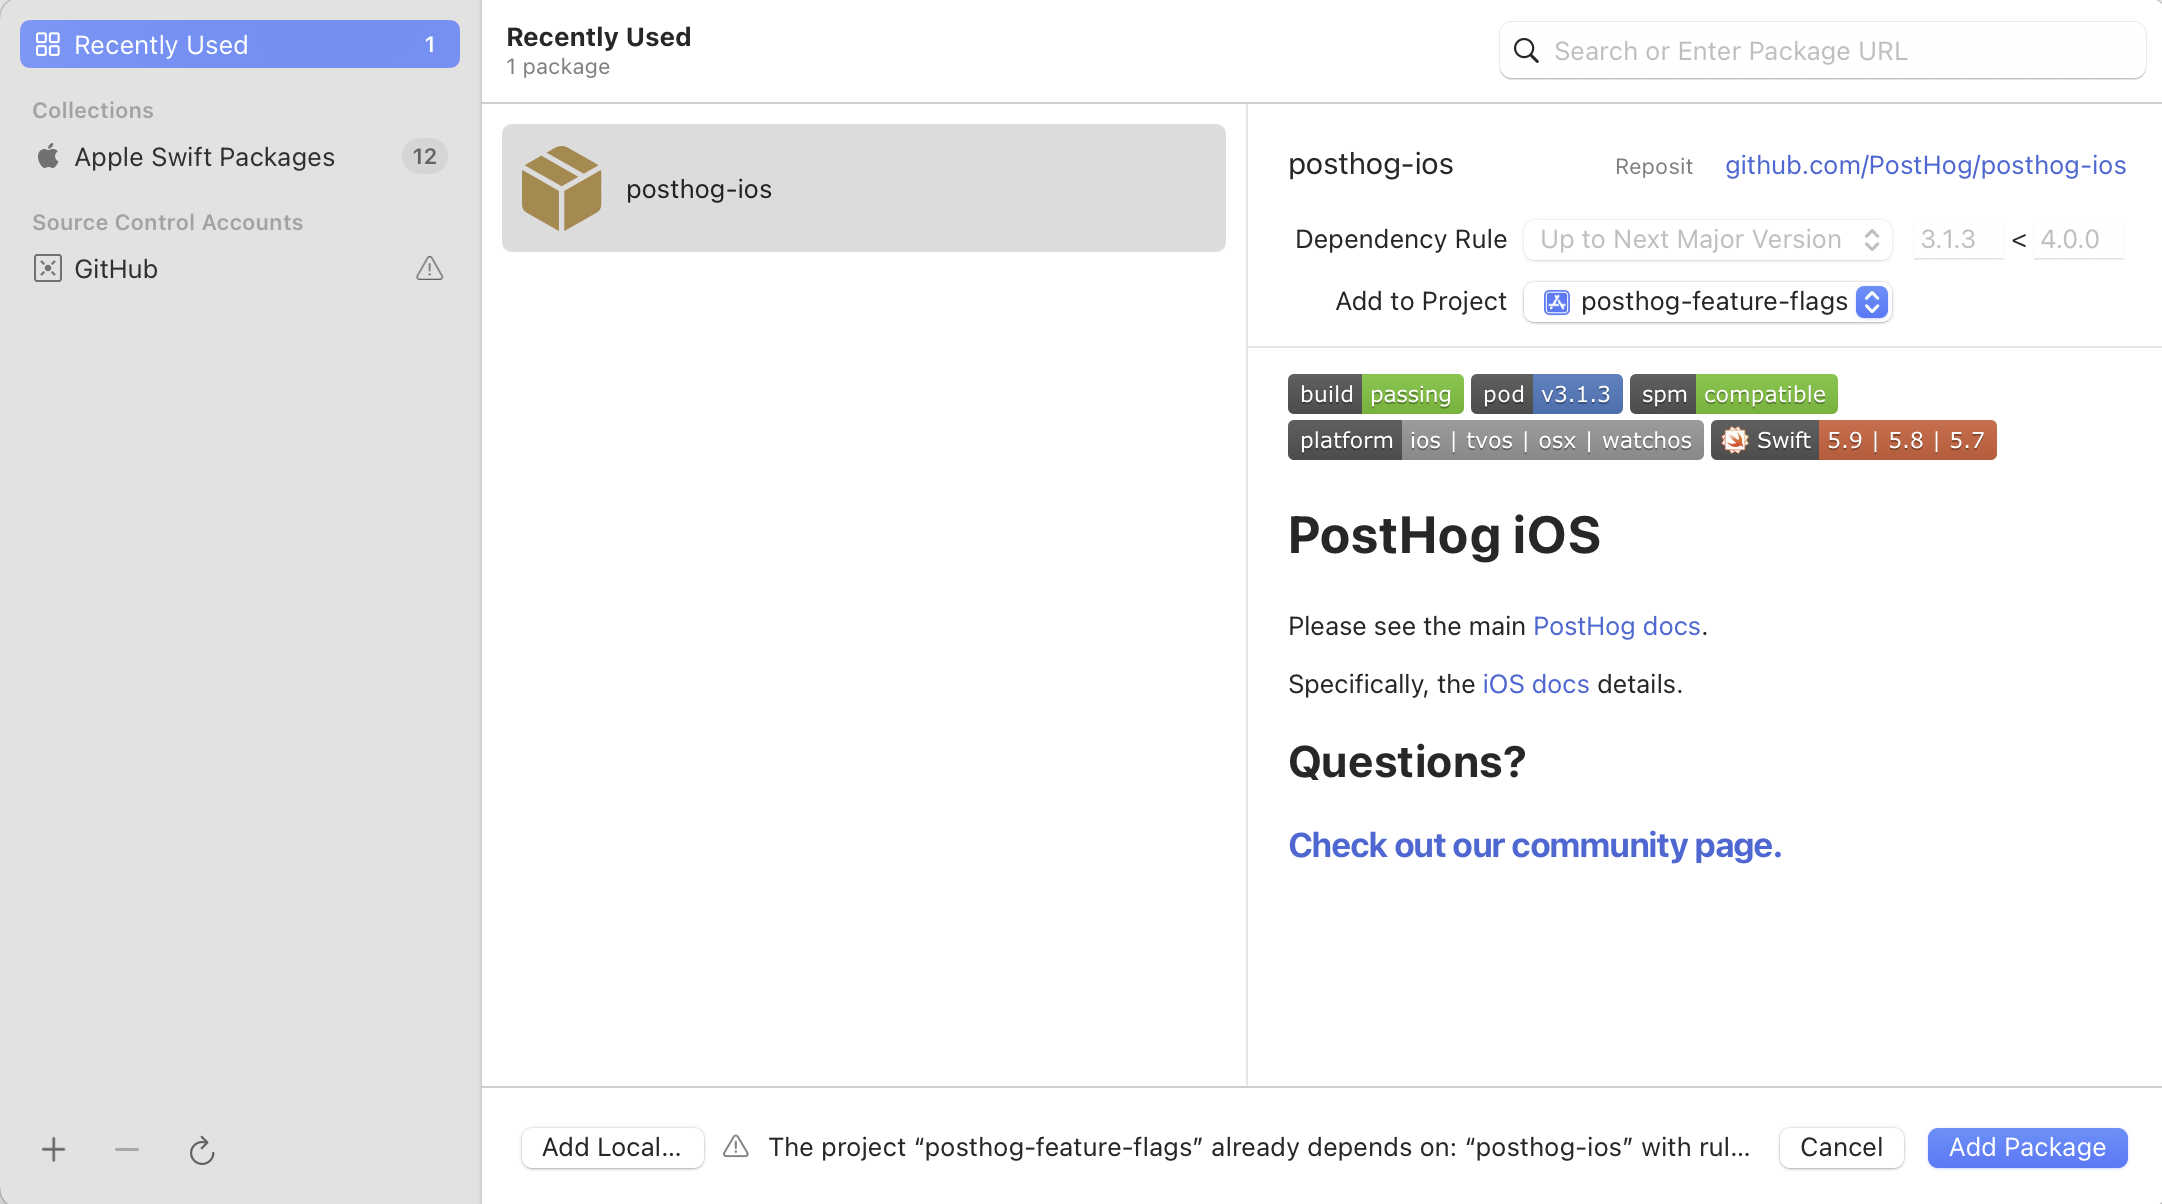
First, add posthog-ios as a dependency to your app using Swift Package Manager (or if you prefer, you can use CocoaPods or Carthage). To add the package dependency to your Xcode project, select File > Add Package Dependency and enter the URL https://github.com/PostHog/posthog-ios.git. Select posthog-ios and click Add Package.
Note that for this tutorial we use version 3.1.0 of the SDK.
Next, configure your PostHog instance in your App.swift struct initializer:
To get your PostHog API key and host, sign up to PostHog. Then, you can find your API key and host in your project settings. Replace the strings <ph_project_token> and <ph_client_api_host> with your API key and host.
Finally, capture a custom event when the button on FeatureScreenView is clicked. We'll use this event as our goal metric in our A/B test.
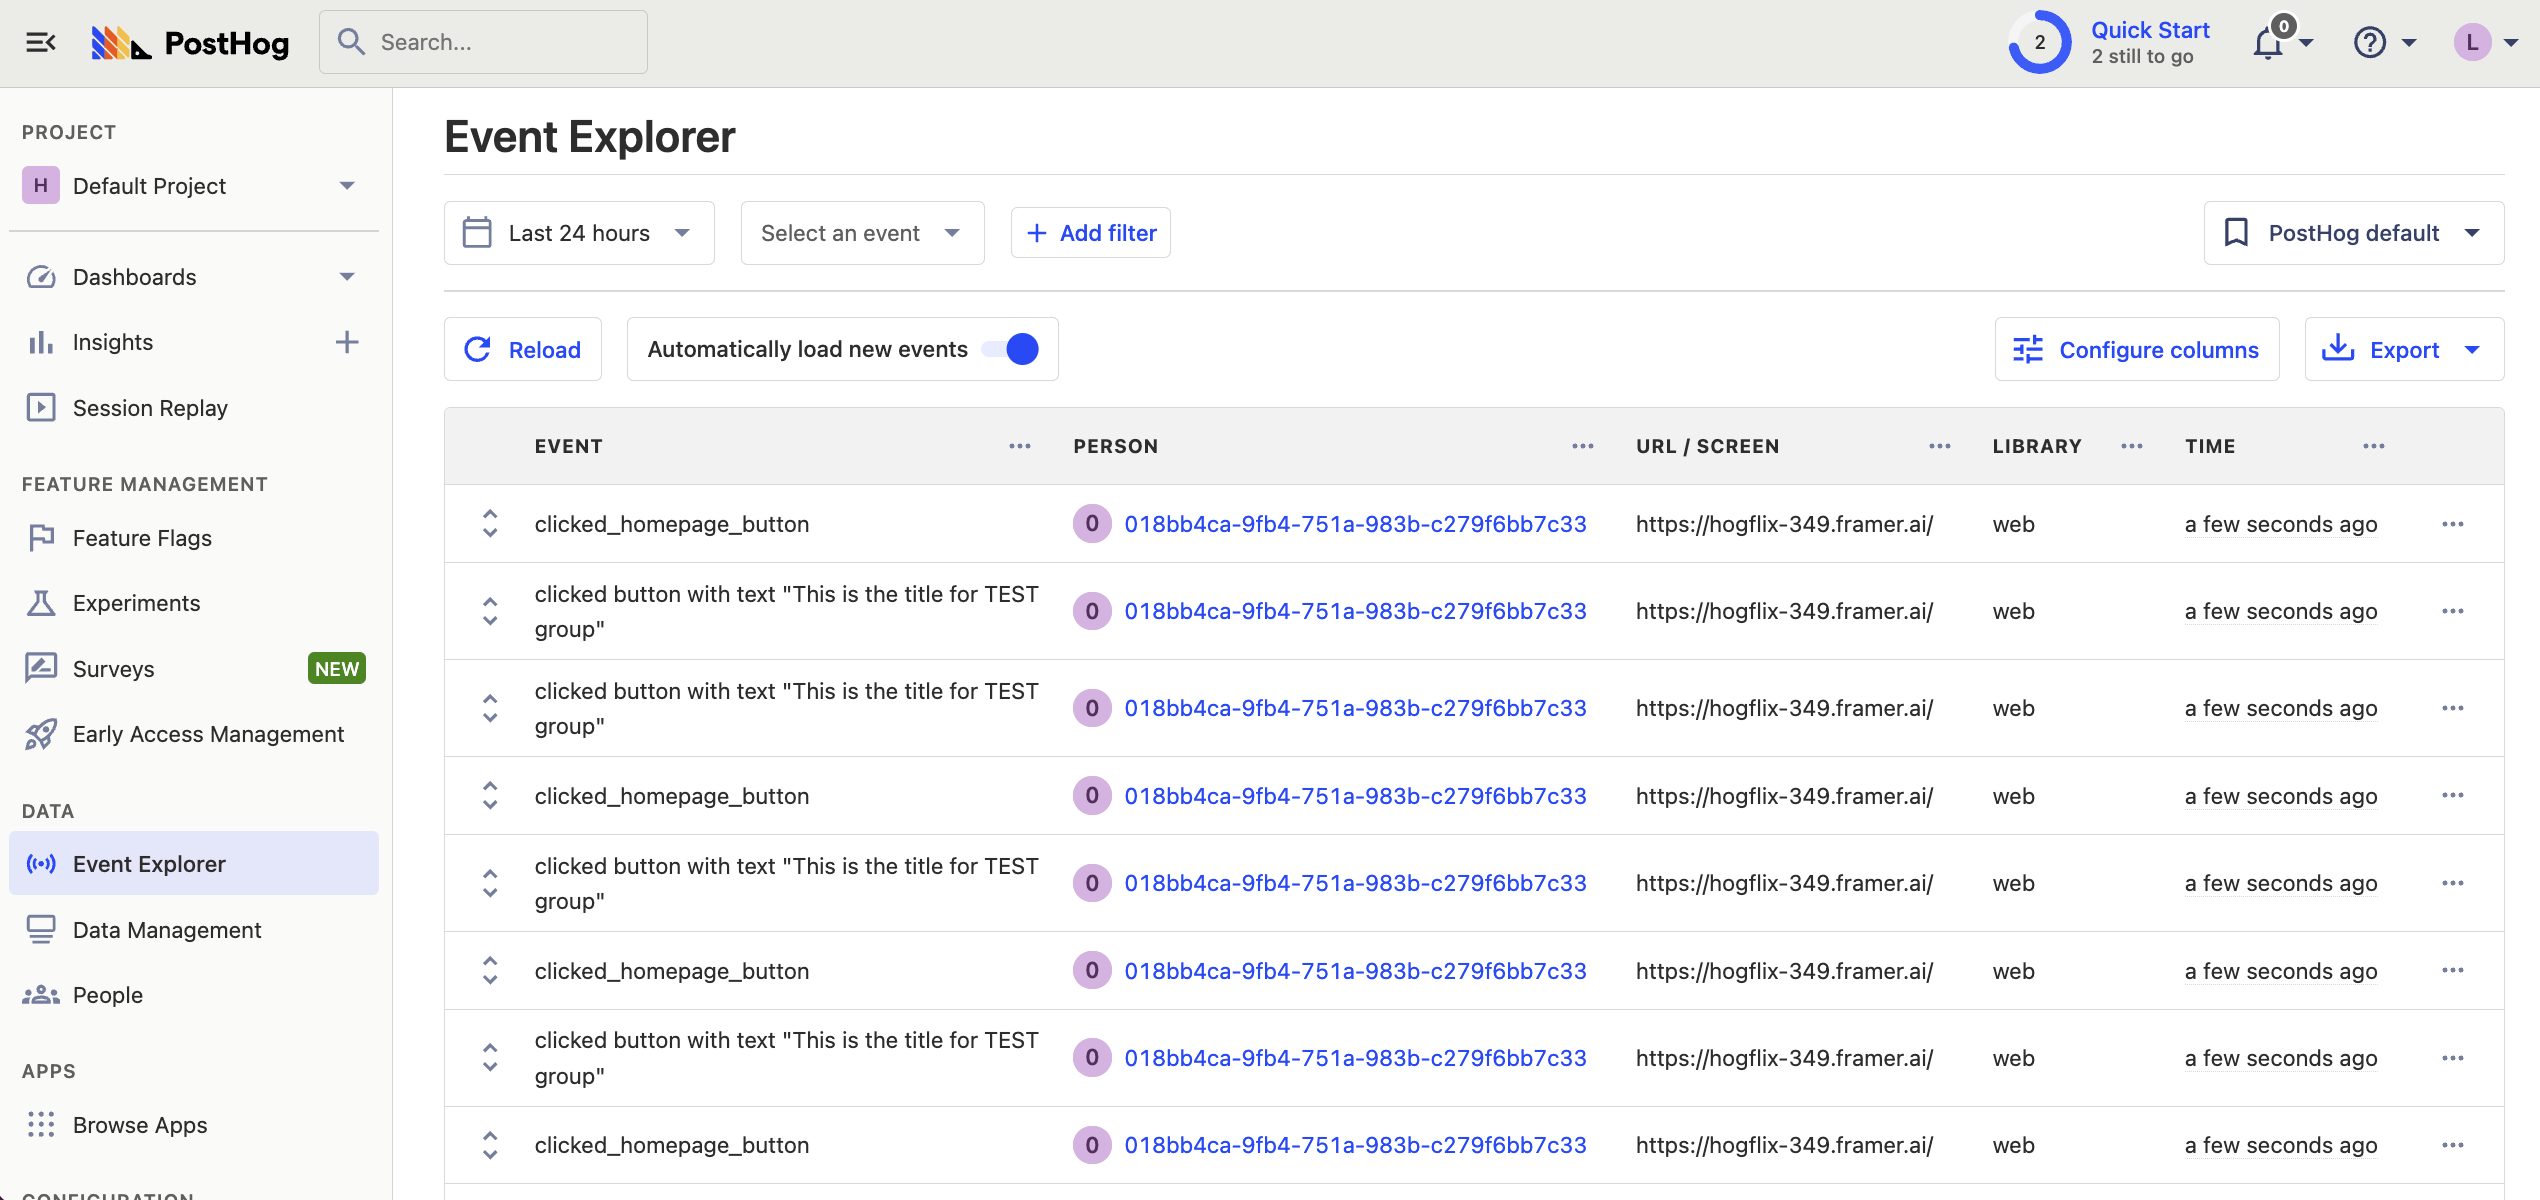
To check your setup, build and run your app. Click your button a few times. You should start seeing events in the activity tab.
Create an A/B test in PostHog
The next step is to set up an A/B test (we call them experiments in PostHog).
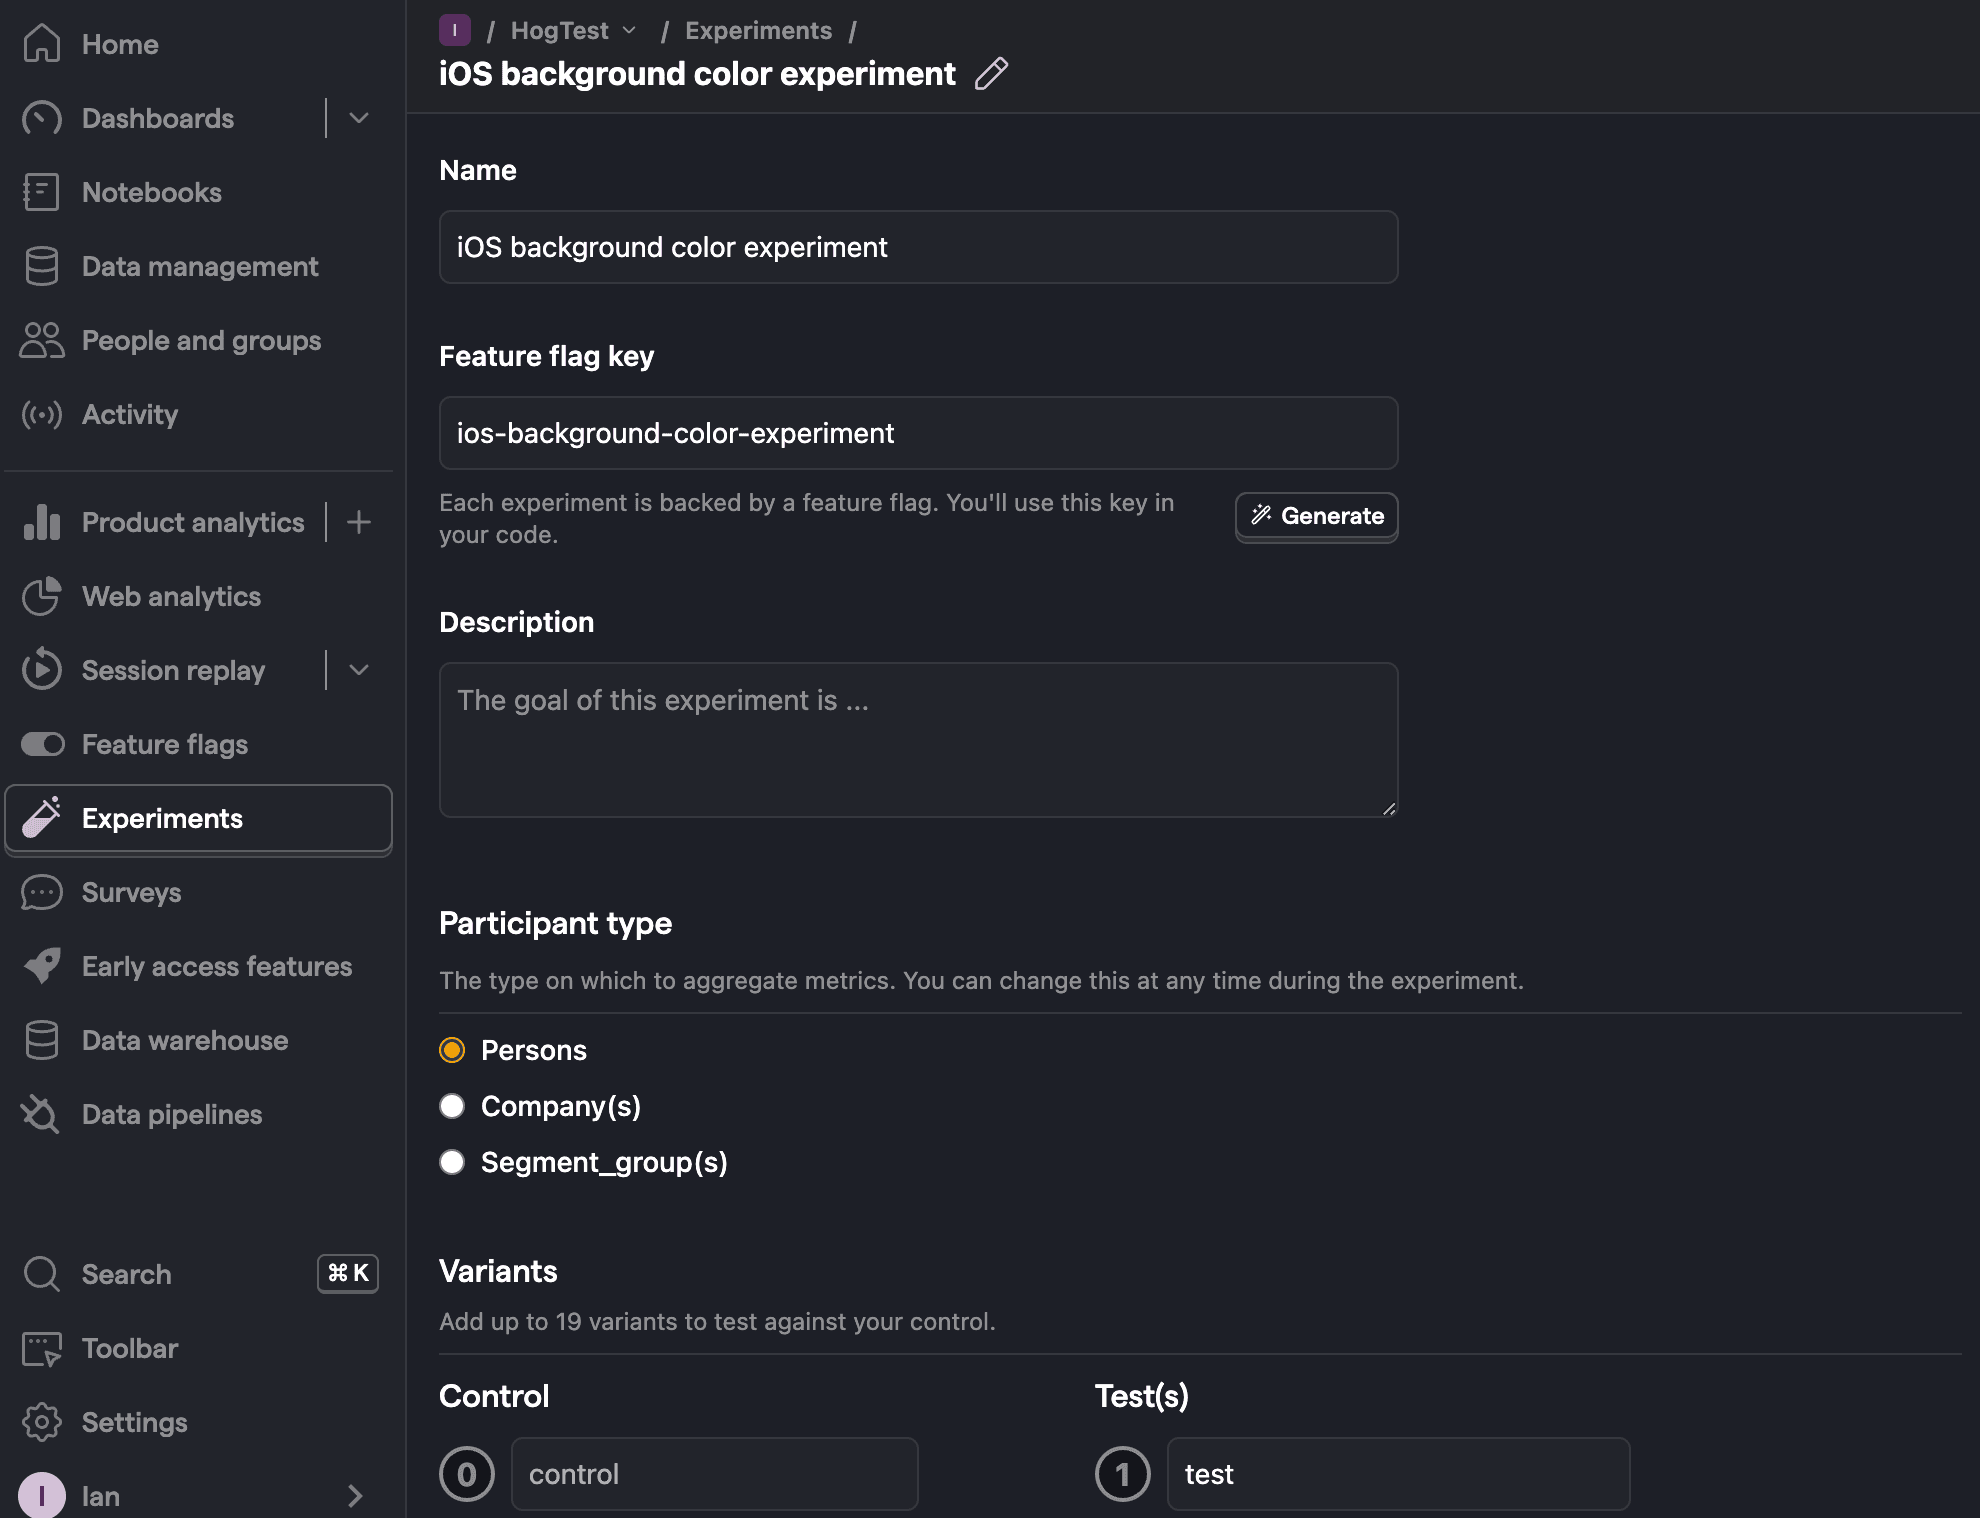
Go to the Experiments tab in PostHog and click "New experiment". Add the following details to your experiment:
- Name it "iOS background color experiment".
- Set "Feature flag key" to
ios-background-color-experiment. - Use the default values for all other fields.
- Click Save as draft.

Once created, set the primary metric to a trend of feature_button_clicked and then click Launch.
Implement the A/B test in Xcode
The final step is to add the experiment code. We'll add code that does the following:
- Fetch the
ios-background-color-experimentflag. - Change the background color of
FeatureScreenViewbased on the value of the flag (controlortest).
To do this, update the code in ContentView.swift with the following:
That's it! Your A/B test is now ready. When you run your app, you see either green or red as the background color of FeatureScreenView and PostHog will capture button clicks for each variant to calculate if changing the color has a statistically significant impact.
If you want to test both variants of your experiment to make sure they are working correctly, you can add an optional override to your feature flag.
Lastly, you can view your test results on the experiment page.
Further reading

Subscribe to our newsletter
Product for Engineers
Read by 100,000+ founders and builders
We'll share your email with Substack
PostHog is the leading platform for building self-driving products. With a full suite of developer tools – AI observability, product analytics, session replay, feature flags, experiments, error tracking, logs, and more – PostHog captures all the context agents need to diagnose problems, uncover opportunities, and ship fixes. A data warehouse and CDP tie it all together, unifying that context into one source agents can read across. You can steer it all from Slack, the web app, the desktop (PostHog Code), or your own editor via the MCP.