


SDK releases
Contents
This guide documents our semi-automated release process for PostHog SDKs. Each SDK repository uses a GitHub App with restricted permissions to handle releases securely, requiring team approval before any release is published. SDK repositories also require all commits to be signed by their author.
If you're creating a new SDK/repo that must be published you MUST implement this approach.
How it works
Our SDK release process uses a dedicated GitHub App per repository that can push directly to the main branch (bypassing branch protections) while still requiring human approval through GitHub Environments. This gives us:
- Security: The app only has access to the specific repository it needs
- Auditability: All releases require approval from the Client Libraries team
- Automation: Changelog generation, version bumping, and publishing are handled automatically
Setting up releases for a new SDK
When creating a new SDK, or migrating an existing one to the new workflow, follow these steps to set up the release infrastructure.
Most of these steps require super administrator privileges on GitHub. Organization-level access is temporarily required to complete the setup — request it before you start, and it can be revoked once the release infrastructure is in place.
1. Create a GitHub App
Create a new GitHub App:
Name:
Releaser (<sdk_name>)(e.g.,Releaser (posthog-go))Description: Should be "Used to release new versions of
posthog-<sdk_name>(e.g. "Used to release new versions ofposthog-go.")Homepage URL: Point to the SDK's docs page on posthog.com (e.g.,
https://posthog.com/docs/libraries/go)Webhook: Disable (uncheck "Active")
Permissions: Under "Repository permissions", set only:
Contents: Read and write
Note: If your app needs to open PRs in other repositories and assign teams or members as reviewers (e.g., the posthog-js upgrader opens PRs from
posthog-jstoposthogand assigns theclient-librariesandclient-libraries-approversteams), you also need to add under "Organization permissions":Members: Read-only
Where can this GitHub App be installed? Keep it restricted to "Only on this account"
Click Create GitHub App
After creating the app:
- Download this image and upload it as the app icon

- Set the background color to
#D97148 - Click the big "Generate a private key" button to generate a private key and save it locally — you'll need it later
- Also save the "App ID" number - you'll need it later
- Go to Install App in the sidebar
- Install the app in the PostHog organization, restricting it to only the SDK repository
2. Expose proper access to client libraries teams
In your SDK repository settings:
- Verify that both
@PostHog/client-libraries-approversand@PostHog/team-client-librariesteams have at least read access to the repository. This is required for them to be able to approve release workflows. - Access "Collaborators and teams"
- Make sure both teams are added as collaborators with at least write access
- For new repositories, make sure Enable release immutability is enabled in the repository settings — you'll find it under Settings → General
3. Create a release environment
In your SDK repository settings:
- Go to Environments and create a new environment named
Release - Configure protection rules:
- Required reviewers: Add
PostHog/client-libraries-approversandPostHog/team-client-librariesas the only teams allowed to approve this release - Prevent self-review: Check this box
- Allow administrators to bypass: Uncheck this box
- Required reviewers: Add
- Click Save protection rules to enforce them before configuring deployment branches — the deployment branches and tags settings below save on their own, and clicking "Save protection rules" afterwards resets them
- Configure deployment branches and tags:
- Deployment branches and tags: Select Selected branches and tags and add
mainas the only selected branch or tag- If the package manager requires publishing from tags, such as pub.dev, also add
[0-9]*.[0-9]*.[0-9]*as an allowed deployment branch or tag pattern
- If the package manager requires publishing from tags, such as pub.dev, also add
- Deployment branches and tags: Select Selected branches and tags and add
)
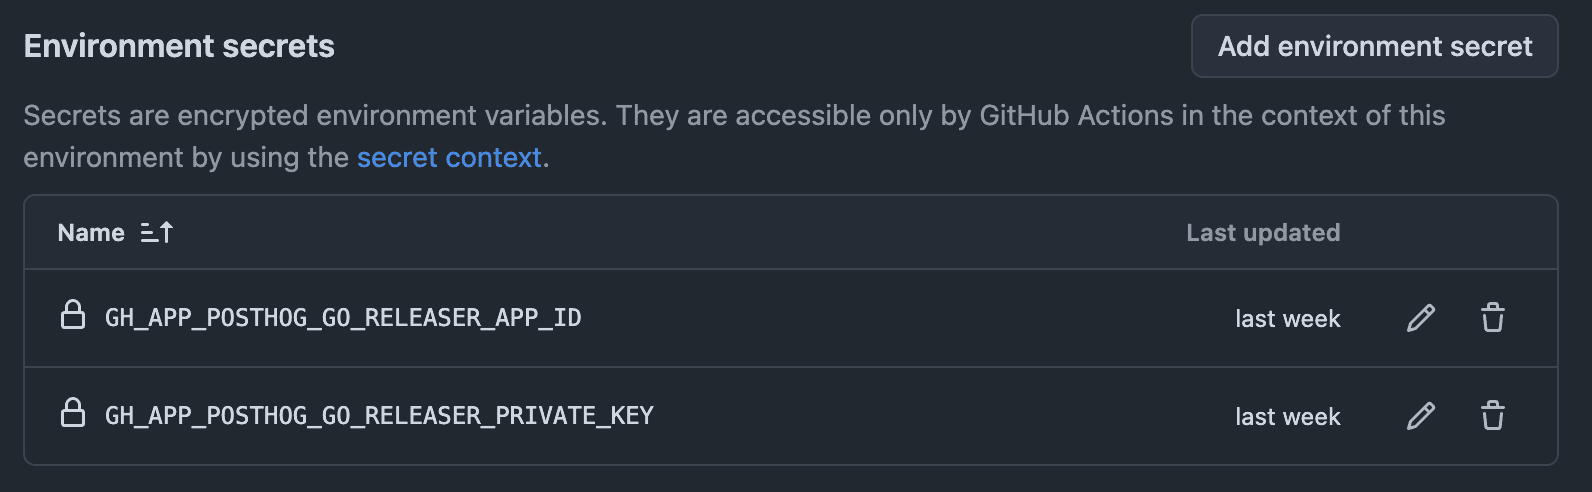
Add environment secrets:
GH_APP_POSTHOG_<SDK_NAME>_RELEASER_APP_ID— Copy the App ID from your GitHub App settingsGH_APP_POSTHOG_<SDK_NAME>_RELEASER_PRIVATE_KEY— Paste the private key you downloaded, include the trailing newline- Easiest way to get the private key value with the correct formatting is via
cat ~/Downloads/release-posthog-<sdk_name>-private-key.pem | pbcopyon Mac ortype release-posthog-<sdk_name>-private-key.pem | pbcopy
- Easiest way to get the private key value with the correct formatting is via
Replace
<SDK_NAME>with your SDK name in uppercase with underscores (e.g.,GH_APP_POSTHOG_GO_RELEASER_APP_ID,GH_APP_POSTHOG_GO_RELEASER_PRIVATE_KEY)
4. Add app to bypass lists
The GitHub App needs to bypass certain protections to push release commits directly.
CodeQL bypass
- Access the CodeQL ruleset
- Under Bypass list, click Add bypass
- Select your newly created GitHub App (
Releaser (<sdk_name>)) - Click the three-dot menu and choose Exempt
- Save the ruleset

Repository PR bypass
- Go back to your SDK repository settings
- Navigate to Rules → Rulesets
- Open the ruleset that requires PRs (may have various names)
- If this ruleset doesn't exist, create one requiring PRs and reviews from codeowners which should be
@PostHog/client-libraries-approversfor all files - Under Rules, make sure Require signed commits is enabled
- If this ruleset doesn't exist, create one requiring PRs and reviews from codeowners which should be
- Under Bypass list, click Add bypass
- Select your GitHub App (
Releaser (<sdk_name>)) - Click the three-dot menu and choose Exempt
- Save the ruleset

Check for classic branch protection too. The steps above exempt the app in a ruleset, but a repository can also have classic branch protection under Settings → Branches → Branch protection rules, which GitHub enforces alongside rulesets and which has its own separate bypass list. If a classic rule requires pull requests, the release still fails with
protected branch 'main' check failed: Changes must be made through a pull requesteven after the ruleset exemption. Remove the classic rule, since the ruleset already covers it, or add the app to its bypass settings as well. Older repos are most likely to have this; newer ones tend to be rulesets-only.
5. Grant access to organization secrets
The release workflow needs access to shared organization secrets. Grant your SDK repository access to the below organization secrets in the organization settings:
Secrets:
SLACK_CLIENT_LIBRARIES_BOT_TOKENPOSTHOG_PROJECT_API_KEY
Variables:
GROUP_CLIENT_LIBRARIES_SLACK_GROUP_IDSLACK_APPROVALS_CLIENT_LIBRARIES_CHANNEL_ID
6. Add the release workflow
Important: Our release workflows use GitHub Actions OIDC tokens for secure authentication with package registries. Make sure your workflow uses a version that supports OIDC for your registry:
- npm: Node.js v22+
Copy the release workflow from an existing SDK (e.g., posthog-rs) and adapt it:
- Update the environment variable prefix to match your SDK name
- Modify the changelog generation logic if needed for your language's conventions
- Update the version bumping logic for your package manager (npm, pip, etc.)
- Update the publishing steps for your package registry
npm packages: set up trusted publishing before enabling the workflow
This applies only to npm publishing (not other package registries).
If your SDK publishes to npm using OIDC trusted publishing, set it up before allowing your GitHub Actions workflow to publish.
New package (never published before)
OIDC trusted publishing can only be configured for a package that already exists on npm. For a brand-new package there's nothing to attach the trusted publisher to yet, so the workflow's very first publish can't use OIDC and will fail with a 404.
To avoid this, bootstrap the package and configure its trusted publisher before enabling the workflow:
Log in to npm (
npm login) as a member of the npm org.Run
setup-npm-trusted-publishto publish a placeholder so the package exists on the registry. This is a manual, authenticated publish (not OIDC). The command is self-contained and publishes from its own temp directory using your global npm auth, so the working directory doesn't matter.TerminalFollow the CLI prompts to configure the Trusted Publisher for the placeholder:
- Choose GitHub Actions as the publisher.
- Fill in the repo details (
PostHog/<repo>) and the release workflow filename (e.g.release.yml). - Only set the environment name (e.g.
NPM Release) if the publish job itself runs inside that GitHub environment (see the callout below). - Under Allowed actions, check Allow npm publish.
This bootstraps npm trusted publishing for the package so future automated releases can publish successfully.
Existing package
If the package has already been published, you can configure trusted publishing directly in npm package settings instead.
Casing matters when configuring the trusted publisher. npm validates the GitHub organization, repository, and workflow filename against the values GitHub puts in the OIDC token, and those values are case-sensitive. The PostHog GitHub organization is
PostHog(capitalPandH) — enteringposthogcauses the publish to fail with a misleading404 Not Foundfrom npm, even though the package and the workflow exist. UsePostHogexactly when setting up or editing the trusted publisher, both viasetup-npm-trusted-publishand in the npm package settings UI.
Only set an environment if the publish job runs in it. npm also validates the environment claim in the OIDC token against the trusted publisher settings. Fill in an environment name only if the job that runs
npm publishhasenvironment: <name>set in the workflow. If a GitHub environment is only used to gate approval in an earlier job, leave the environment field blank, otherwise the publish fails with a misleading404 Not Founderror.
7. Update the README
Add a section to your SDK's README explaining that releases are semi-automatic and link to the #approvals-client-libraries Slack channel where approval requests are posted.
8. Create required labels
Make sure the repository includes the release label, it's used to trigger new releases.
If you're not using something like changesets or sampo that automatically generates version bump labels, create the following labels as well to indicate the type of release:
bump-patchbump-minorbump-major
9. Open a PR
Create a PR with the new release.yml workflow and request a review from @PostHog/client-libraries-approvers. There is now a small, dedicated SDK team at PostHog (@PostHog/team-client-libraries) that helps drive direction and coordination. However, SDK development and maintenance remains a collaborative effort across the engineering organization.
Triggering a release
Once set up, releases are triggered by having a release label added to the PR alongside a changesets(or matching bump-* tag). Once a PR is merged, the environment workflow will kick up and someone from the @PostHog/client-libraries-approvers team will have to approve it on #approvals-client-libraries.
We're slowly migrating all SDKs to use sampo. This is a language-agnostic version of the famous changesets library.
If you're feeling inspired, I highly recommend you build an adapter for Sampo for the language you're working on. We'll all thank you for that.
Troubleshooting
Access token expired or revoked when running npm publish
If you see the error "Access token expired or revoked. Please try logging in again" when publishing with npm publish — even though your credentials and tokens are correctly configured — the issue may be with npm's token handling itself.
Solution: Migrate your project to use a pnpm workspace and publish with pnpm publish instead. pnpm handles authentication differently and isn't affected by this issue.