Python error tracking installation

Last updated:

|Edit this page|
  1. Install PostHog Python SDK

    Required
    Terminal
    pip install posthog

    In your app, import the posthog library and set your project API key and host before making any calls. You can find these in the project settings page in PostHog.

    Python
    from posthog import Posthog
    posthog = Posthog('<ph_project_api_key>', host='https://us.i.posthog.com')

    Note: As a rule of thumb, we do not recommend having API keys in plaintext. Setting it as an environment variable is best.

    To debug, you can toggle debug mode:

    Python
    posthog.debug = True

    To make sure no calls happen during tests, you can disable PostHog, like so:

    Python
    if settings.TEST:
    posthog.disabled = True
  2. Verify PostHog is initialized

    Checkpoint
    Confirm you can capture events with PostHog

    Before proceeding, enable debug and call posthog.capture('test_event') to make sure you can capture events.

  3. Setting up exception autocapture

    Required
    Your goal in this step: Enable automatic exception tracking for your Python application.

    Note: A minimum SDK version of v3.7.0 is required, but we recommend keeping up to date with the latest version to ensure you have all of error tracking's features.

    Exception autocapture can be enabled during initialization of the PostHog client to automatically capture any unhandled exceptions thrown by your Python application. It works by setting Python's built-in exception hooks, such as sys.excepthook and threading.excepthook.

    Python
    from posthog import Posthog
    posthog = Posthog("<ph_project_api_key>", enable_exception_autocapture=True, ...)

    We recommend setting up and using contexts so that exceptions automatically include distinct IDs, session IDs, and other properties you can set up with tags.

  4. Manually capturing exceptions

    Optional
    Your goal in this step: Manually capture exceptions in your Python application.

    For exceptions handled by your application that you would still like sent to PostHog, you can manually call the capture method:

    Python
    posthog.capture_exception(e, distinct_id="user_distinct_id", properties=additional_properties)

    You can find a full example of all of this in our Python (and Flask) error tracking tutorial.

  5. Verify error tracking

    Checkpoint
    Confirm events are being sent to PostHog

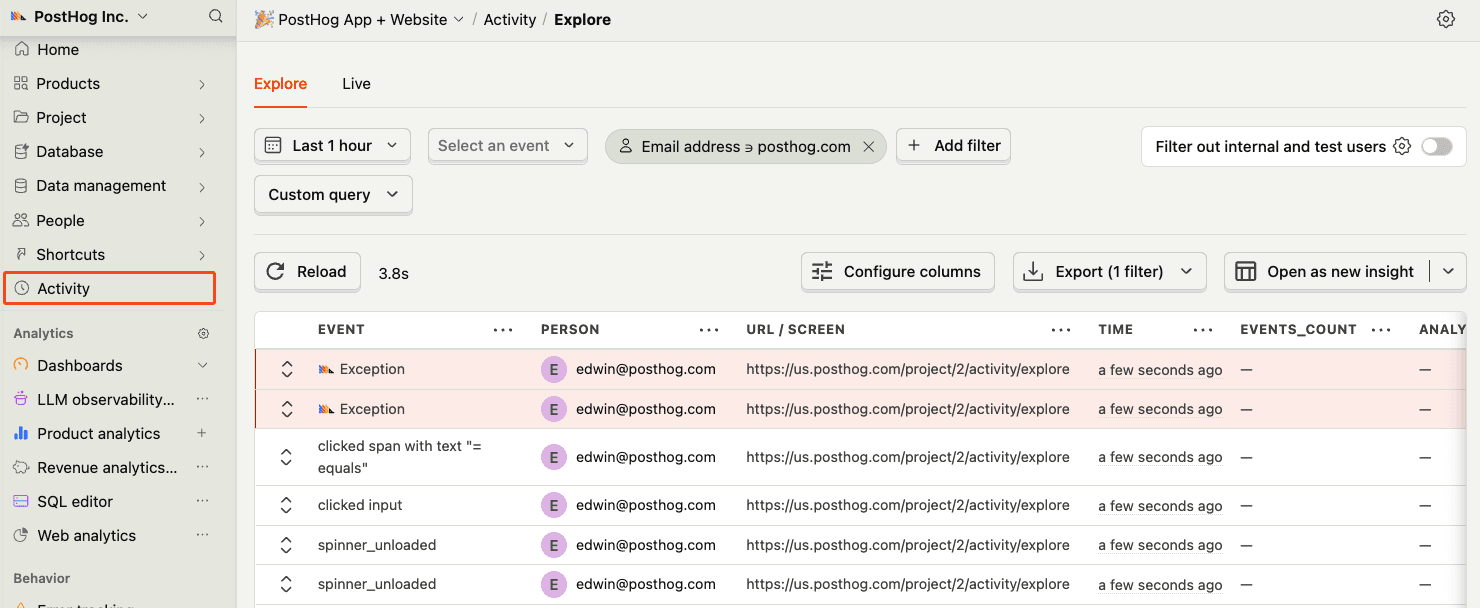
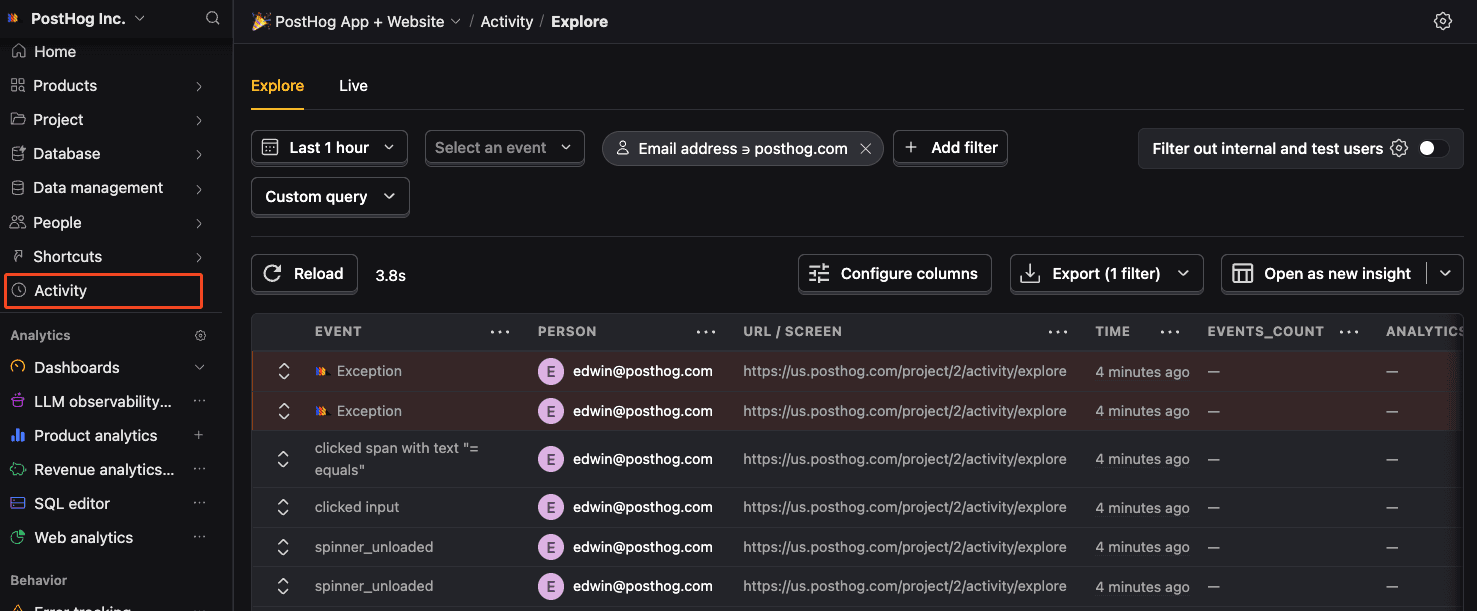
    Before proceeding, let's make sure exception events are being captured and sent to PostHog. You should see events appear in the activity feed.


    Activity feed with events
    Check for exceptions in PostHog
  6. Framework-specific exception capture

    Optional
    Your goal in this step: Configure framework-specific exception capture.

    Python frameworks often have built-in error handlers. This means PostHog's default exception autocapture won't work and we need to manually capture errors instead. The exact process for doing this depends on the framework:

    The Python SDK provides a Django middleware that automatically wraps all requests with a context. This middleware extracts session and user information from request headers and tags all events captured during the request with relevant metadata.

    Basic setup

    Add the middleware to your Django settings:

    Python
    MIDDLEWARE = [
    # ... other middleware
    'posthog.integrations.django.PosthogContextMiddleware',
    # ... other middleware
    ]

    The middleware automatically extracts and uses:

    • Session ID from the X-POSTHOG-SESSION-ID header, if present
    • Distinct ID from the X-POSTHOG-DISTINCT-ID header, if present
    • Current URL as $current_url
    • Request method as $request_method

    All events captured during the request (including exceptions) will include these properties and be associated with the extracted session and distinct ID.

    If you are using PostHog on your frontend, the JavaScript Web SDK will add the session and distinct ID headers automatically if you enable tracing headers.

    JavaScript
    __add_tracing_headers: true

    Exception capture

    By default, the middleware captures exceptions and sends them to PostHog's error tracking. Disable this by setting:

    Python
    # settings.py
    POSTHOG_MW_CAPTURE_EXCEPTIONS = False

    Adding custom tags

    Use POSTHOG_MW_EXTRA_TAGS to add custom properties to all requests:

    Python
    # settings.py
    def add_user_tags(request):
    # type: (HttpRequest) -> Dict[str, Any]
    tags = {}
    if hasattr(request, 'user') and request.user.is_authenticated:
    tags['user_id'] = request.user.id
    tags['email'] = request.user.email
    return tags
    POSTHOG_MW_EXTRA_TAGS = add_user_tags

    Filtering requests

    Skip tracking for certain requests using POSTHOG_MW_REQUEST_FILTER:

    Python
    # settings.py
    def should_track_request(request):
    # type: (HttpRequest) -> bool
    # Don't track health checks or admin requests
    if request.path.startswith('/health') or request.path.startswith('/admin'):
    return False
    return True
    POSTHOG_MW_REQUEST_FILTER = should_track_request

    Modifying default tags

    Use POSTHOG_MW_TAG_MAP to modify or remove default tags:

    Python
    # settings.py
    def customize_tags(tags):
    # type: (Dict[str, Any]) -> Dict[str, Any]
    # Remove URL for privacy
    tags.pop('$current_url', None)
    # Add custom prefix to method
    if '$request_method' in tags:
    tags['http_method'] = tags.pop('$request_method')
    return tags
    POSTHOG_MW_TAG_MAP = customize_tags

    Complete configuration example

    Python
    # settings.py
    def add_request_context(request):
    # type: (HttpRequest) -> Dict[str, Any]
    tags = {}
    if hasattr(request, 'user') and request.user.is_authenticated:
    tags['user_type'] = 'authenticated'
    tags['user_id'] = str(request.user.id)
    else:
    tags['user_type'] = 'anonymous'
    # Add request info
    tags['user_agent'] = request.META.get('HTTP_USER_AGENT', '')
    return tags
    def filter_tracking(request):
    # type: (HttpRequest) -> bool
    # Skip internal endpoints
    return not request.path.startswith(('/health', '/metrics', '/admin'))
    def clean_tags(tags):
    # type: (Dict[str, Any]) -> Dict[str, Any]
    # Remove sensitive data
    tags.pop('user_agent', None)
    return tags
    POSTHOG_MW_EXTRA_TAGS = add_request_context
    POSTHOG_MW_REQUEST_FILTER = filter_tracking
    POSTHOG_MW_TAG_MAP = clean_tags
    POSTHOG_MW_CAPTURE_EXCEPTIONS = True

    All events captured within the request context automatically include the configured tags and are associated with the session and user identified from the request headers.

  7. Upload source maps

    Optional

    Great, you're capturing exceptions! If you serve minified bundles, the next step is to upload source maps to generate accurate stack traces.

    Let's continue to the next section.

    Upload source maps

Questions? Ask Max AI.

It's easier than reading through 698 pages of documentation

Community questions

Was this page useful?

Next article

Node.js error tracking installation

Install the PostHog Node SDK using the package manager of your choice: In your app, set your project API key before making any calls. You can find your project API key and instance address in the project settings page in PostHog. Note: As a rule of thumb, we do not recommend hardcoding API keys. Setting it as an environment variable is preferred. Before proceeding, confirm that you can capture events with PostHog using client.capture('test_event') . Note: A minimum SDK version of v4.5.…

Read next article