This tutorial explains the development workflow and best practices, using an example 'Hello World' transformation. We go from zero to publishing it in the official PostHog repository.
Prerequisites
- A self-hosted PostHog instance (or a local development environment)
- Some knowledge of JavaScript (or TypeScript)
The transformation
Every transformation begins with either the PostHog transformation source editor, or a new GitHub repository. In both cases, our transformation source code will look like this:
And our config would look like:
For information on what code to write and what special functions to use, check out the overview and the developer reference.
Using the source code editor
Add "pipeline-ui" feature flag and enable it. For destinations, you'll need data pipelines add-on to be enabled in your billing settings.
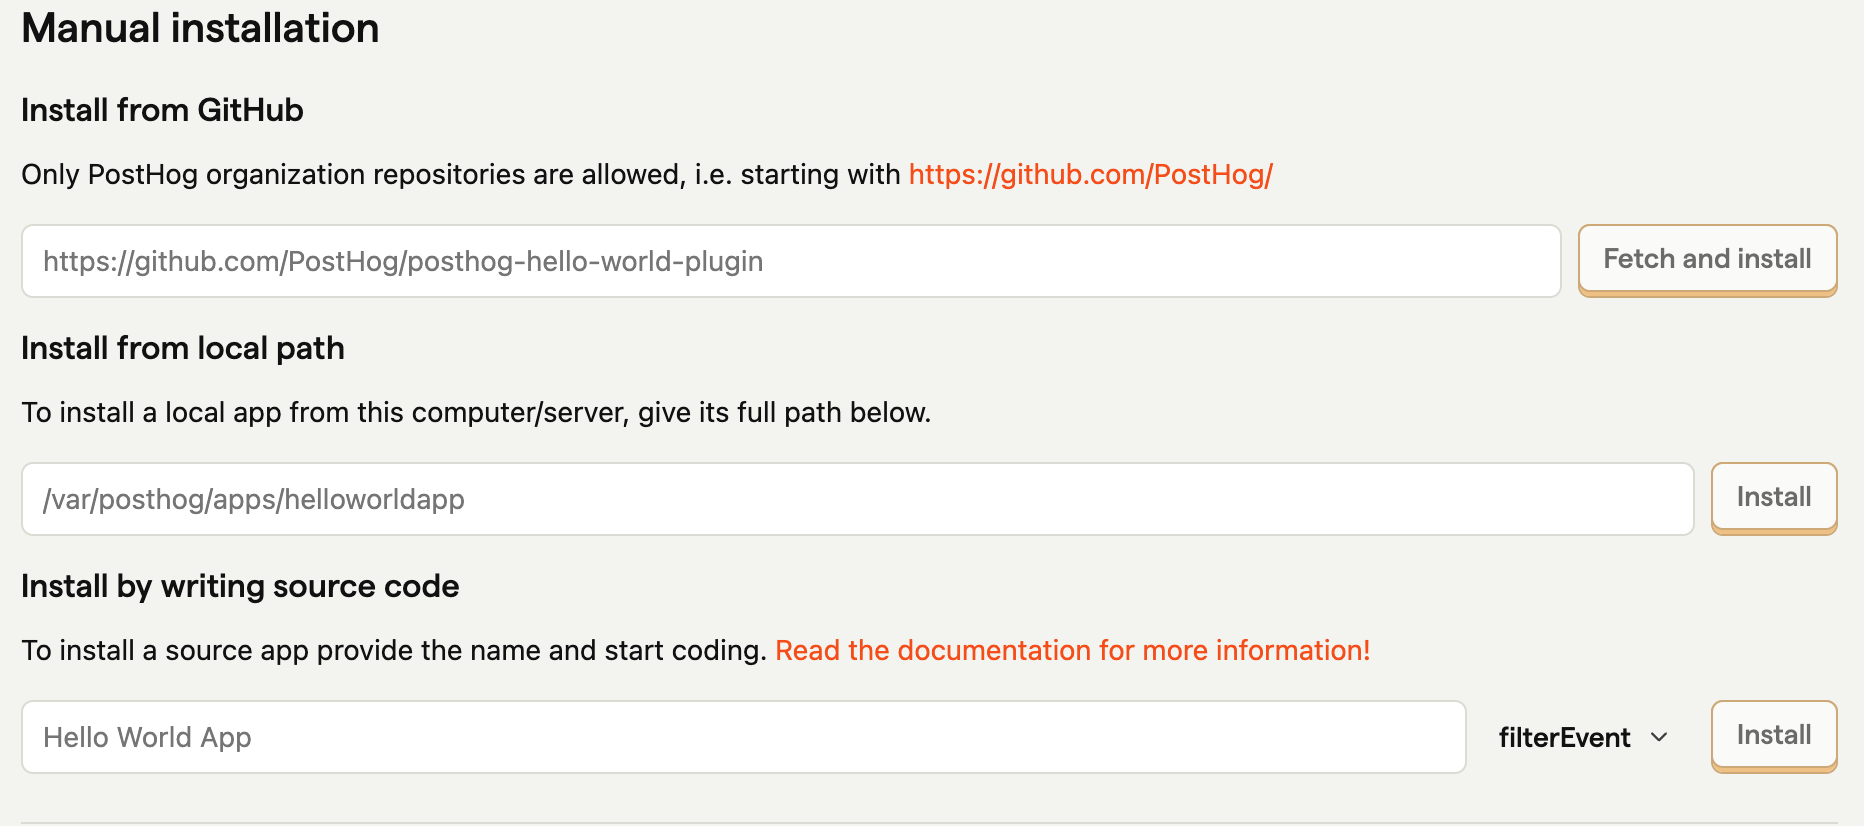
Go to Data pipeline 3000 section and click the Apps management tab. Under "Install by writing source code," enter a name and pick the app type.

This creates transformation or destination for you, which you can then find in the table on the same page. Click to expand the row on the left, and then on the pencil icon to edit the code.
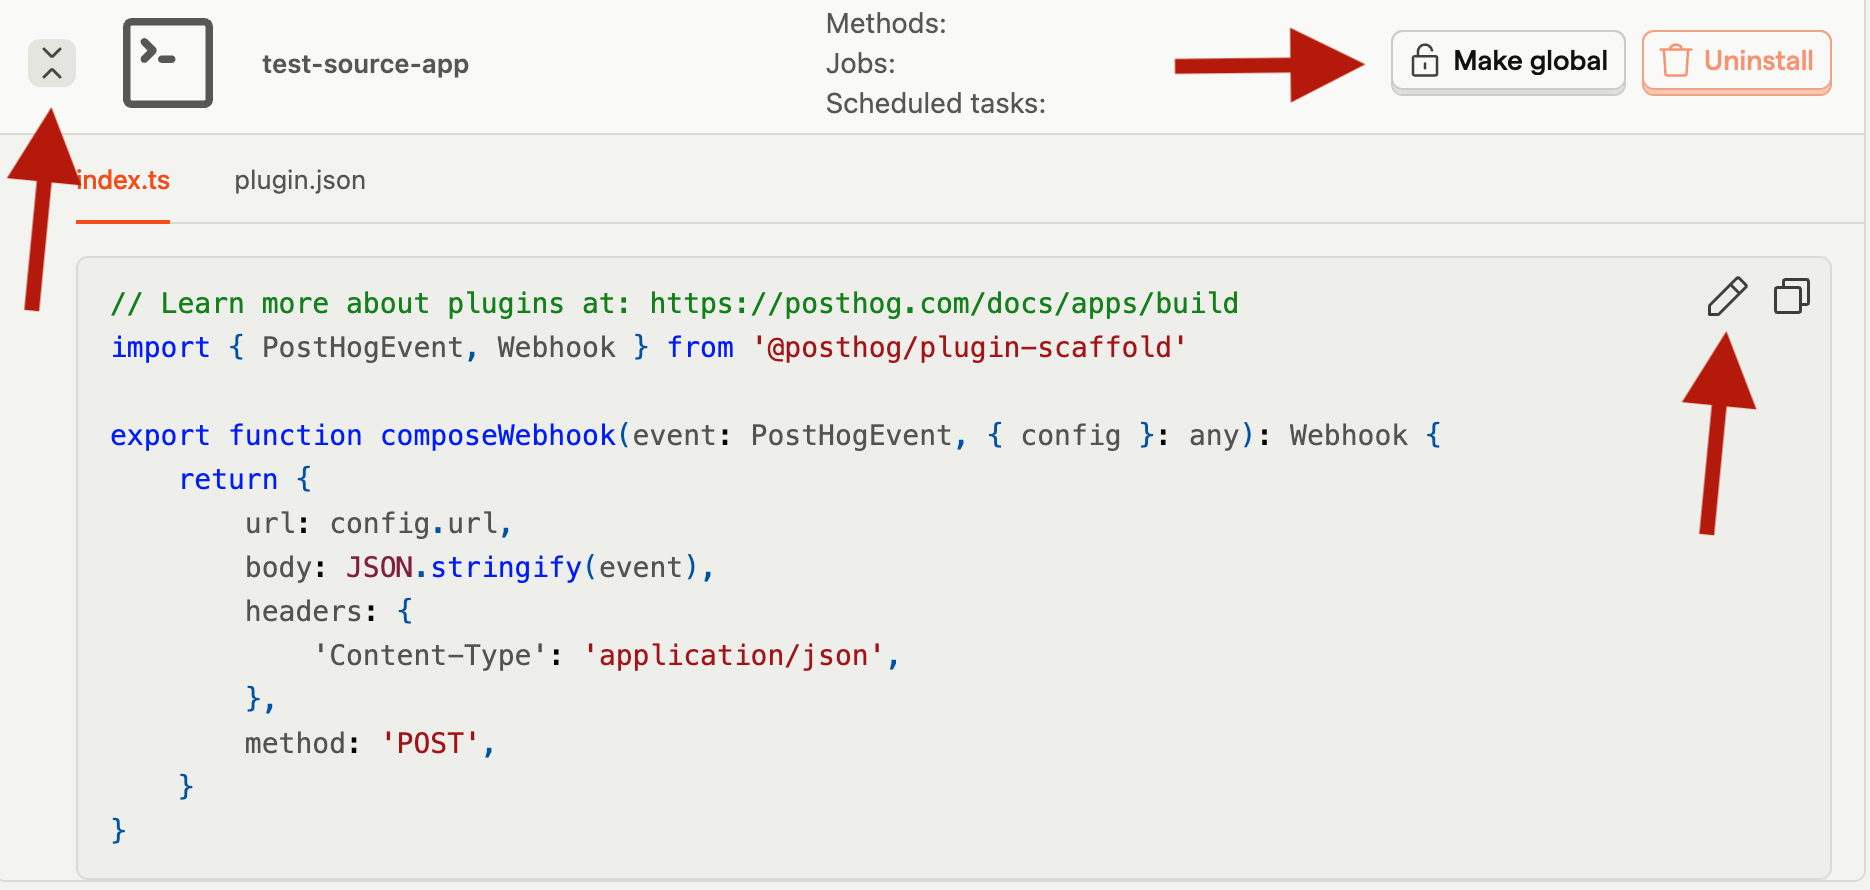
Edit the plugin.json and index.ts files to build your transformation or destination. Once finished make it global, so you can find and enable it and you're ready to test the transformation or destination.
Using a GitHub repository
We have a GitHub template (GH login required) which helps you create a new repository with all the right files. There are only two files which make up the entire transformation: the index.js and plugin.json. Your code goes into index.js, and your configuration goes into plugin.json.
Other than this, there's the index.test.js file for tests, and package.json for package dependencies and metadata.
Remember to update package.json with the appropriate metadata, like name, description, and maintainer.
Once you've written the code in this new repository, you can run it by installing it locally in PostHog. See testing for more information.
Transformation naming conventions
When creating your repository, follow the naming convention of posthog-<plugin-name>-plugin. For example, the hello world repository would be called posthog-hello-world-plugin.
Converting a source transformation or destination to a GitHub repository
If you wish to submit your transformation or destination to the official repository (so it is listed on PostHog Cloud), you need to convert it into a GitHub repository. The easiest way to do this is to start with the template and copy your source code into index.js and your config into the config field of plugin.json. Then update package.json with the appropriate metadata, like name, description, and maintainer.
See submission instructions for how to submit the it to the PostHog Repository.
Testing
For now, the best way to test transformations or destinations is to install them locally.
- If you're writing one in the source editor, see using the source code editor.
- If you're writing one in a GitHub repository, install it locally using the "Install from local path" option in the Apps Management tab (remember to make it global).
This allows you to tweak it and see that everything works fine.
Debugging
Transformations or destinations can make use of the JavaScript console for logging and debugging.
These logs can be seen on the 'Logs' page, which can be accessed on the Data Pipelines tab of the PostHog UI.
Submitting your transformation or destination
You can submit your transformation or destination to the official library. If accepted, it becomes available to all PostHog Cloud users.
Note: We are only reviewing new apps relying on stateless (no cache or external calls, non-async)
processEventorcomposeWebhookfunctions.
If you built one inside the PostHog editor, convert it to a GitHub repository
To submit, send your GitHub repository URL in an in-app support ticket (topic: Data pipelines) or email your GitHub URL to hey@posthog.com
Once we get your email, we review it to ensure it's secure, performant, and adheres to best practices. Then, we add it to our official repository and make it available for everyone to use.